

Adding basic entities to your AL application is easy. We're going to take a look at two of them in this recipe: tables and pages. We'll create a new table to track television shows (come on, we need to have some fun with this, right!?) and an associated card and list page.
Creating basic entities
Getting ready
You're going to need an AL project to work in that's connected to a development sandbox. We will continue to build on the project that we started in this chapter. You can download it from the GitHub link at the start of this chapter.
How to do it...
- Open your AL project folder in Visual Studio Code. If you have not done so already, delete HelloWorld.al.
- In the Visual Studio Code Explorer, right-click and select New File. Name this file Television Show.al.
Repeat this process and create two more files:
-
- Television Show List.al
- Television Show Card.al
All files that contain AL code need to have an .al extension.
- Let's define the new table.
You can quickly add the basic structure for a table and field by using the ttable and tfield snippets. Do this by typing in your chosen snippet name and pressing Tab.
In Explorer, select Television Show.al. In the Editor tab, enter the following:
table 50100 "Television Show"
{
    fields
    {
        field(1; Code; Code[20])
        {
             NotBlank = true;
        }
        field(2; Name; Text[80])
        {
        }
        field(3; Synopsis; Text[250])
        {
        }
        field(4; Status; Option)
        {
            OptionCaption = 'Active,Finished';
            OptionMembers = Active,Finished;
        }
        field(5; "First Aired"; Date)
        {
        }
    }

    keys
    {
        key(PK; Code)
        {
            Clustered = true;
        }
    }
}
Make sure you save your changes.
- Now, let's create a card to display the detailed information for our Television Show records.
You can quickly add the basic structure for a card page by using the tpage snippet. There are multiple types of page snippets, so be sure to select the correct one.
In Explorer, select Television Show Card.al. In the Editor tab, enter the following:
page 50100 "Television Show Card"
{
    PageType = Card;
    SourceTable = "Television Show";
    DelayedInsert = true;

    layout
    {
        area(Content)
        {
            group(General)
            {
                field(Code; Code)
                {
                    ApplicationArea = All;
                }
                field(Name; Name)
                {
                    ApplicationArea = All;
                }
                field(Synopsis; Synopsis)
                {
                    ApplicationArea = All;
                }
                field(Status; Status)
                {
                    ApplicationArea = All;
                }
                field("First Aired"; "First Aired")
                {
                    ApplicationArea = All;
                }
            }
        }
    }
}
- Now, we'll build a list page to display the records from our new table.
Only show the most relevant and frequently used information on your list pages.
In Explorer, select Television Show List.al. In the Editor tab, enter the following:
page 50101 "Television Show List"
{
    PageType = List;
    ApplicationArea = All;
    UsageCategory = Lists;
    Editable = false;
    CardPageId = "Television Show Card";
    SourceTable = "Television Show";

    layout
    {
        area(Content)
        {
            repeater(Group)
            {
                field(Code; Code)
                {
                    ApplicationArea = All;
                }
                field(Name; Name)
                {
                    ApplicationArea = All;
                }
                field(Status; Status)
                {
                    ApplicationArea = All;
                }
            }
        }
    }
}
In order to make your pages (and reports) searchable in the Business Central Web Client, you need to populate ApplicationArea and UsageCategory in the AL object file.
- Our basic application is ready to be published for testing. In the launch.json file, set the following properties:
"startupObjectId": 50101
"startupObjectType": "Page"
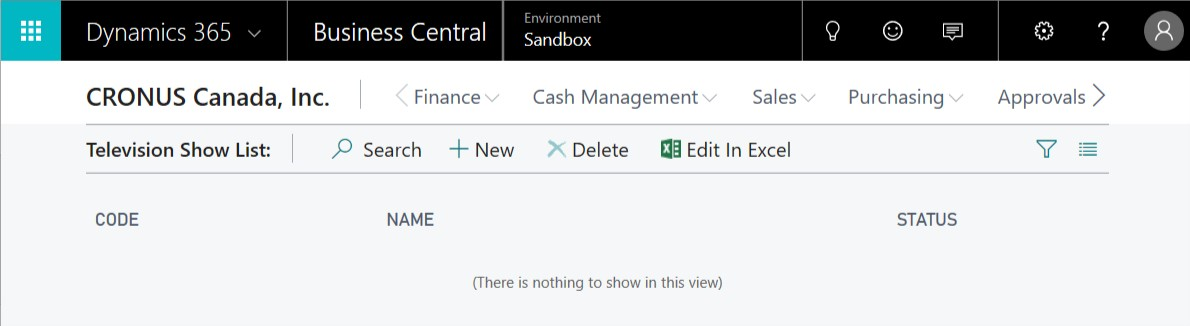
- Press F5 to publish the application to your development sandbox. Your web browser will open and, once you log in, you will be presented with your new Television Show List page:
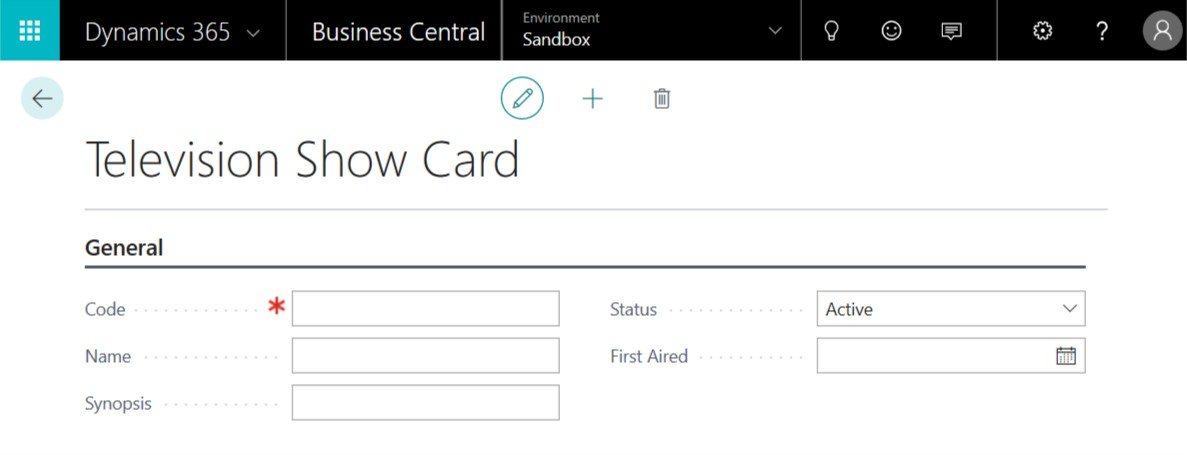
- Of course, there is not much to see until you enter some records. Try that out by clicking the +New button in the ribbon; the Television Show Card should open:
How it works...
We created a basic Business Central application and published it to our development sandbox.
Creating a table allows us to define what data we will capture in our application. We can define a number of properties for each table and field.
In order to display the data in the table, we need to create pages. These allow the user to interact with the data in our application. A list page is the first page that the user will get to when they want to access the data. From this list, they can search, filter existing data, create new data, modify data, and even delete data. When more detailed information is required, the user can navigate from the list page to the card page, which is meant to show more detailed information and actions regarding the data.
See also
We only touched on a very small portion of the full capabilities of tables and pages. You can find more information on tables and pages at the Microsoft Docs website: