
Now that there is more than one object in the scene, leaving their names as the basic shapes they started as can be confusing, especially as other objects enter the scene. It's best practice to name objects as something more descriptive. Let's look at how to rename an object.
Objects can be renamed in the Object tab in the properties panel—the one marked with an orange cube icon:
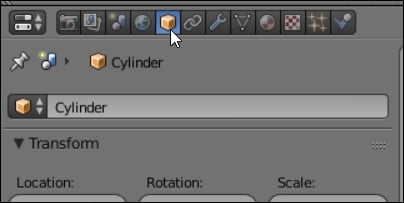
Select the octopus body in the 3D View (or Cylinder in the outliner panel). In the Objects menu, click on the name, currently Cylinder, and change it to Octopus Body:

Now, select the cube, and in the Objects menu, change its name to Floor.
Since the floor has served its purpose, in order to avoid it getting in the way or getting accidently transformed, hide it from view by selecting it and then navigating to Object | Show/Hide | Hide in the 3D View menu or by pressing H. The object is still in the outliner view but hidden in the 3D View:

Hidden objects can be unhidden by going to Object | Show/Hide ...