Book Image

Mastering Microsoft Dynamics 365 Customer Engagement - Second Edition

By : Deepesh Somani
Book Image

Mastering Microsoft Dynamics 365 Customer Engagement - Second Edition

By: Deepesh Somani

Overview of this book

Microsoft Dynamics 365 is an all-in-one business management solution that's easy to use and adapt. It helps you connect your finances, sales, service, and operations to streamline business processes, improve customer interactions, and enable growth. This book gives you all the information you need to become an expert in MS Dynamics 365. This book starts with a brief overview of the functional features of Dynamics 365. You will learn how to create Word and Excel templates using CRM data to enable customized data analysis for your organization. This book helps you understand how to use Dynamics 365 as an XRM Framework, gain a deep understanding of client-side scripting in Dynamics 365, and create client-side applications using JavaScript and the Web API. In addition to this, you will discover how to customize Dynamics 365, and quickly move on to grasp the app structure, which helps you customize Dynamics 365 better. You will also learn how Dynamics 365 can be seamlessly embedded into various productivity tools to customize them for machine learning and contextual guidance. By the end of this book, you will have mastered utilizing Dynamics 365 features through real-world scenarios.
Table of Contents (21 chapters)
Free Chapter
1
Section 1: Introduction to Sales, Service, and Marketing Modules with a Unified User Interface
6
Section 2: Understanding Customization and App Design
7
Designing Unified Interface Apps
10
Section 3: Development Enhancements and Code Improvements in Dynamics 365
16
Section 4: Learning about the Portal, Configuration, and Security Enhancements in Dynamics 365

Creating a Unified Interface

In Dynamics 365, you can create your own Hub, that is, a Unified Interface. The following steps will help you to create your own Dynamics 365 Hub:

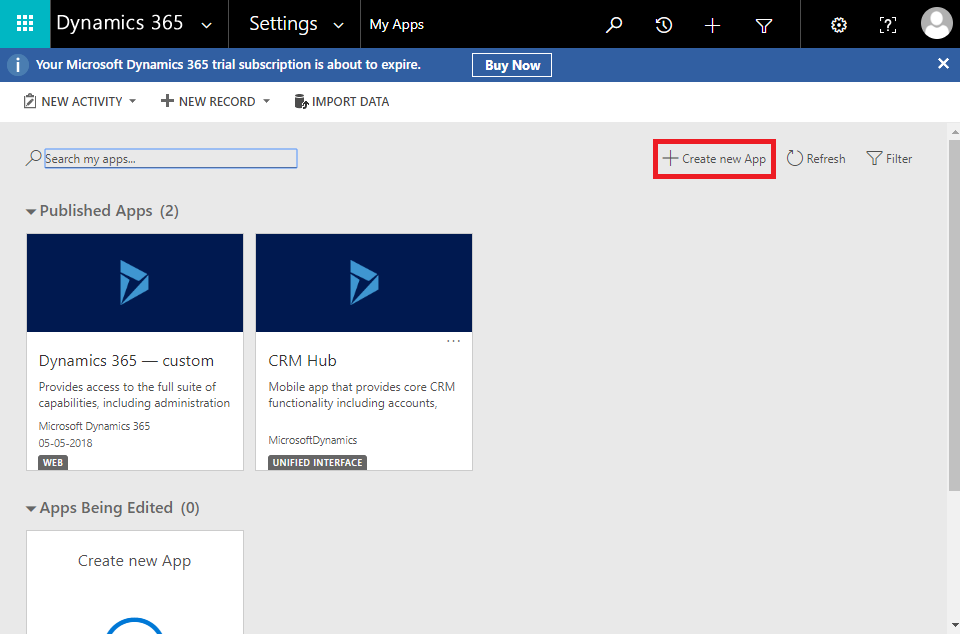
  1. Navigate to Settings | My Apps:
  1. Click on the +Create new App option:
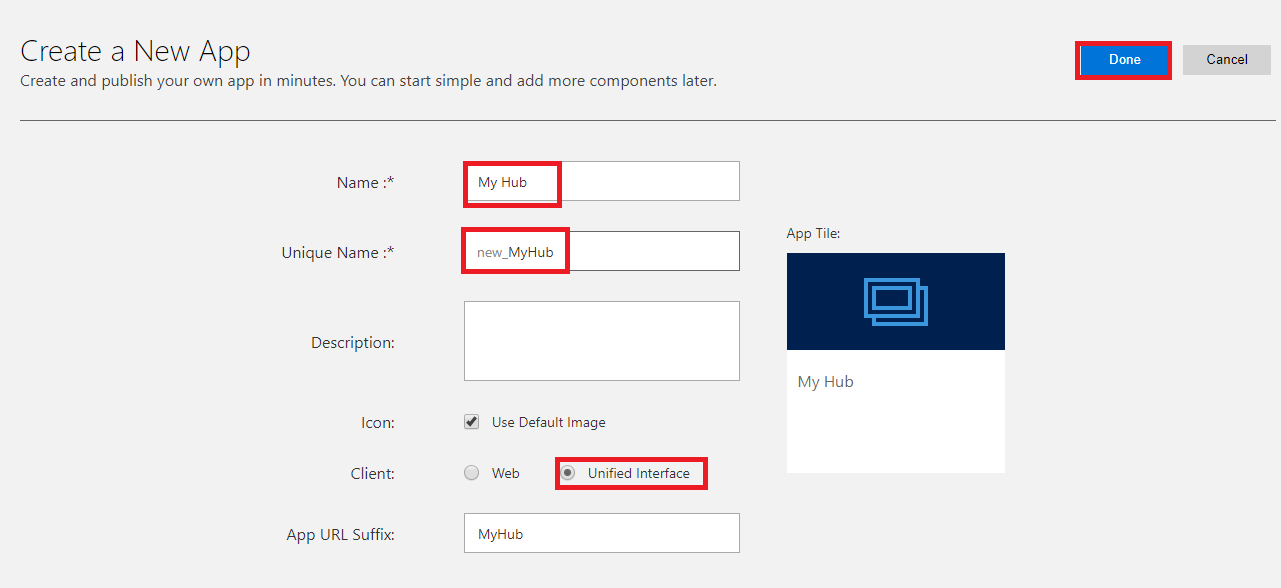
  1. Fill out the required fields for the Unified Interface Name and the Unique Name. Make sure to select the Client type as the Unified interface. Click the Done button after making the necessary changes, as shown in the following screenshot:
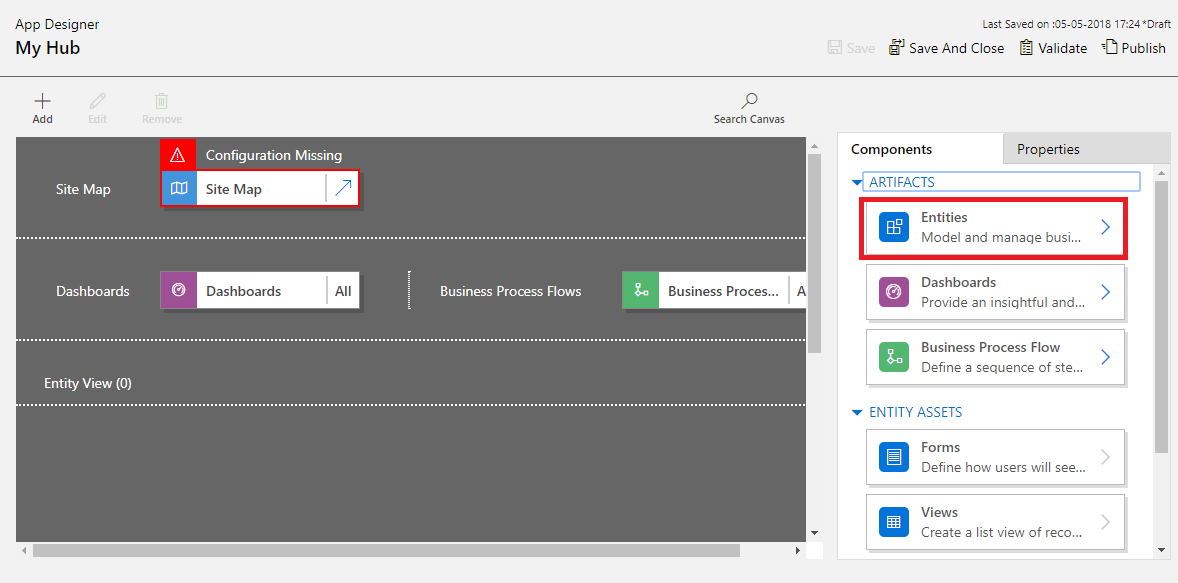
  1. After clicking the Done button, an App Designer will pop up. To add entities, click on Entities on the right side of the screen, as shown in the following screenshot:
  1. Select the check boxes of the entities to add to the current Unified Interface. When any entity is selected from a list of all the components, such as Forms, Views, Charts, and Dashboards, then that entity will be automatically...