
Taking this forward, let's write some basic scripts or programs using Python that can help us understand how to leverage Python in our daily automation tasks.
Basic programs
Validating an IPv4 address
This example will show us how to validate an IP address format, given as an input:
ip_address=input("Enter IP address: ")
#remove any extra characters
ip_address=ip_address.strip()

#initialize a flag to point to true for an ip address
ip_address_flag=True

#validate if there are only 3 dots (.) in ip address
if (not(ip_address.count('.') == 3)):
    ip_address_flag=False
else:
    #Validate if each of the octet is in range 0 - 255
    ip_address=ip_address.split(".")
    for val in ip_address:
        val=int(val)
        if (not(0 <= val <=255)):
            ip_address_flag=False

#based upon the flag value display the relevant message
if (ip_address_flag):
    print ("Given IP is correct")
else:
    print ("Given IP is not correct")
The sample output is as follows:
>>
 Enter IP address: 100.100.100.100
 Given IP is correct
 >>>
 Enter IP address: 2.2.2.258
 Given IP is not correct
 >>>
 Enter IP address: 4.7.2.1.3
 Given IP is not correct
 >>>
As we can see, based upon our validations in the script, the output of our program, returns a validation status of True or False for the IP address that was given as input.
As we move forward, it's important to know that Python, or any programming language, has multiple predefined functions/libraries that can be utilized to perform particular functions. As an example, let's see the earlier example of validating the IPv4 address, using a prebuild library (socket) in Python:
import socket
addr=input("Enter IP address: ")
try:
    socket.inet_aton(addr)
    print ("IP address is valid")
except socket.error:
    print ("IP address is NOT valid")
The sample output is as follows:
>>
 Enter IP address: 100.100.100.100
 IP address is valid
 >>>
 Enter IP address: 2.2.2.258
 IP address is NOT valid
 >>>
 Enter IP address: 4.7.2.1.3
 IP address is NOT valid
 >>>
In the preceding approach, using a prebuilt library helps us to ensure that we do not have to reinvent the wheel (or create our own logic for something that has already been developed by other developers), and also ensures our script remains lean and thin while achieving the same expected results.
Making the right choice
In this example, we will use a switch case to identify the right set of configurations based upon certain input given by the user.
As a prerequisite understanding, the syntax of the exec-timeout command based upon OS is as follows:
- Cisco IOS command: exec-timeout 15 0
- Cisco NXOS command: exec-timeout 15
#create a dictionary:
config={
    "IOS":"exec-timeout 15 0",
    "NXOS":"exec-timeout 15"
    }
getchoice=input("Enter IOS type (IOS/NXOS) : ")
if (getchoice == "IOS"):
 print (config.get("IOS"))
if (getchoice == "NXOS"):
 print (config.get("NXOS"))
The sample output is as follows:
>
 Enter IOS type (IOS/NXOS) : IOS
 exec-timeout 15 0
 >>>
 Enter IOS type (IOS/NXOS) : NXOS
 exec-timeout 15
 >>>
In the preceding example, we have tackled a common challenge of using a switch case in Python. Unlike some other languages, Python does not provide a switch case statement, hence we need to use a dictionary to overcome this. Using this approach, we can remove the usage of multiple if statements and directly call the dictionary values based upon the mappings done in the dictionary.
Hiding credentials
This is another common problem engineers face. There are times when we need to ask for password as input from the user. As the user types in the password, it is clearly visible on the screen, and view able by anyone watching the screen. Additionally, there are times when we need to save the credentials, but need to ensure they are not visible in the script as clear-text passwords (which is a cause of concern as we share the scripts among fellow engineers). In this example, we will see how to overcome this challenge.
The code to perform encryption and decryption on the given credentials is as follows:
import getpass
import base64
#ask for username .. will be displayed when typed
uname=input("Enter your username :")

#ask for password ... will not be displayed when typed
#(try in cmd or invoke using python command)
p = getpass.getpass(prompt="Enter your password: ")

#construct credential with *.* as separator between username and password
creds=uname+"*.*"+p

###Encrypt a given set of credentials
def encryptcredential(pwd):
  rvalue=base64.b64encode(pwd.encode())
  return rvalue

###Decrypt a given set of credentials
def decryptcredential(pwd):
    rvalue=base64.b64decode(pwd)
    rvalue=rvalue.decode()
    return rvalue

encryptedcreds=encryptcredential(creds)
print ("Simple creds: "+creds)
print ("Encrypted creds: "+str(encryptedcreds))
print ("Decrypted creds: "+decryptcredential(encryptedcreds))
The sample output is as follows:
C:\gdrive\book2\github\edition2\chapter1>python credential_hidings.py
 Enter your username :Myusername
 Enter your password:
 Simple creds: Myusername*.*mypassword
 Encrypted creds: b'TXl1c2VybmFtZSouKm15cGFzc3dvcmQ='
 Decrypted creds: Myusername*.*mypassword
As we can see in the preceding example, we have used two libraries: getpass and base64. The getpass library gives us the advantage of not echoing (or displaying) what we type on the screen, and the value gets stored in the variable that we provide.
Once we have the username and password, we can use it to pass it to the relevant places. Another aspect that we see here is that we can hard code our username and password in the script without showing it in clear text, using the base64 library to encode our credentials.
In the preceding example, a combination of the Myusername username and the mypassword password have been separated by a *.* tag and it is converted to base64 as b'TXl1c2VybmFtZSouKm15cGFzc3dvcmQ='. The b in front denotes the byte format as base64, which works on byte instead of strings. In this way, the same encoded value of bytes can be hardcoded in a script, and the decrypt function can take that as input and provide back the username and password to be used for authentication.
Accessing APIs
Here, we see a generic example of how to access an API and parse some basic values from the return values:
import requests
city="london"
#this would give a sample data of the city that was used in the variable
 urlx="https://samples.openweathermap.org/data/2.5/weather?q="+city+"&appid=b6907d289e10d714a6e88b30761fae22"
#send the request to URL using GET Method
 r = requests.get(url = urlx)
 output=r.json()
#parse the valuable information from the return JSON
 print ("Raw JSON \n")
 print (output)
 print ("\n")
#fetch and print latitude and longitude
 citylongitude=output['coord']['lon']
 citylatitude=output['coord']['lat']
 print ("Longitude: "+str(citylongitude)+" , "+"Latitude: "+str(citylatitude))
The sample output is as follows:
>>>
 Raw JSON
{'coord': {'lon': -0.13, 'lat': 51.51}, 'weather': [{'id': 300, 'main': 'Drizzle', 'description': 'light intensity drizzle', 'icon': '09d'}], 'base': 'stations', 'main': {'temp': 280.32, 'pressure': 1012, 'humidity': 81, 'temp_min': 279.15, 'temp_max': 281.15}, 'visibility': 10000, 'wind': {'speed': 4.1, 'deg': 80}, 'clouds': {'all': 90}, 'dt': 1485789600, 'sys': {'type': 1, 'id': 5091, 'message': 0.0103, 'country': 'GB', 'sunrise': 1485762037, 'sunset': 1485794875}, 'id': 2643743, 'name': 'London', 'cod': 200}

Longitude: -0.13, Latitude: 51.51
 >>>
Using the requests library, we fetch the sample weather information from an open API (public API) for London, England. The output returned is JSON, which we print first as raw (that is, print the output exactly as we got it back), and then parse out the meaningful info (the city's latitude and longitude) from the JSON payload.
This is an important concept to understand, since we make use of Application Program Interfaces (APIs) to interact with multiple tools, vendors, and even across applications to perform specific, simple, or complex tasks.
Using regular expressions (regex)
There are times when an engineer wants to parse specific data from a sentence or a big chunk of data. Regex is the best tool of the trade for this purpose. Regex is a common concept in every programming language, with the only difference being the syntax in each programming language.
The following example shows how to use regex in Python:
import re
sample="From Jan 2018 till Nov 2018 I was learning python daily at 10:00 PM"

# '\W+' represents Non-Alphanumeric characters or group of characters
print(re.split('\W+', sample))

#Extract only the month and Year from the string and print it
regex=re.compile('(?P<month>\w{3})\s+(?P<year>[0-9]{4})')

for m in regex.finditer(sample):
    value=m.groupdict()
    print ("Month: "+value['month']+" , "+"Year: "+value['year'])

# to extract the time with AM or PM addition
regex=re.compile('\d+:\d+\s[AP]M')
m=re.findall(regex,sample)
print (m)
The sample output is as follows:
>
 ['From', 'Jan', '2018', 'till', 'Nov', '2018', 'I', 'was', 'learning', 'python', 'daily', 'at', '10', '00', 'PM']
 Month: Jan , Year: 2018
 Month: Nov , Year: 2018
 ['10:00 PM']
As we can see in the preceding output, the first line of code, is a simple sentence split into separate words. The other output is a regex in a loop, which extracts all the months and years depicted by three characters (mmm) and four digits (yyyy). Finally, in the last line of code, a time extraction (extracting a time value using regex) is performed, based upon AM/PM in the hh:mm format.
There can be multiple variations that we can work with using regex. It would be beneficial to refer to online tutorials for detailed insight into the different types of regex and how to use the right one to extract information.
Handling files
Once in a while, we need to work on stored data or store some data from a script. For this purpose, we use file-handling techniques.
Consider the example for handling data storage (as a record) :
getinput=input("Do you want to store a new record (Y/N) ")
#this is to remove any extra spaces
 getinput=getinput.strip()
#this is to convert all input to lower case
 getinput=getinput.lower()
#read values and create a record
 if ("y" in getinput):
   readvaluename=input("Enter the Name: ")
   readvalueage=input("Enter the Age: ")
   readvaluelocation=input("Current location: ")
   tmpvariable=readvaluename+","+readvalueage+","+readvaluelocation+"\n"
### open a file myrecord.csv in write mode, write the record and close it
   fopen=open("myrecord.csv","w")
   fopen.write(tmpvariable)
   fopen.close()
The output is as follows:
>>
 ===== RESTART: C:/gdrive/book2/github/edition2/chapter1/file_handling.py =====
 Do you want to store a new record (Y/N) n
 >>>
 ===== RESTART: C:/gdrive/book2/github/edition2/chapter1/file_handling.py =====
 Do you want to store a new record (Y/N) y
 Enter the Name: abhishek
 Enter the Age: 10
 Current location: US
 >>>
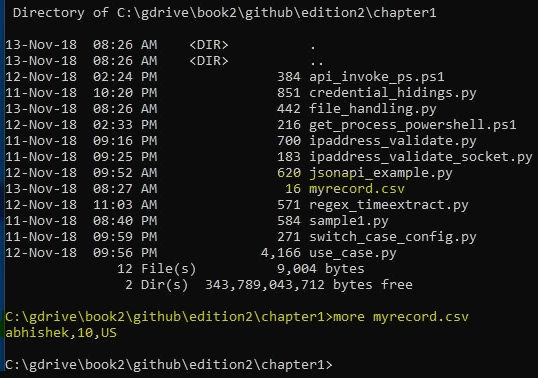
Once this is executed, a myrecord.csv file is created in the same location as the script (as we did not specify a file path):