

In this recipe, we are going to create a quick and easy sample application. Of course, you can start from a blank slate, but we'll start with the built-in Hello World application. It's the easiest way to get your AL development up and running.
Creating a new AL project
Getting ready
You need to have your development sandbox set up and know the address so that you can connect and log in to it. You should have also already installed the AL Language extension in Visual Studio Code. You're definitely going to need that!
How to do it...
- Open Visual Studio Code.
- Press Ctrl + Shift + P to open the Command Palette and type or select AL:Go! to create a sample Hello World application.
- When prompted, enter the path to where the new project will be stored. You can leave it as the default path or type in a new one. Press Enter to confirm the path.
- When prompted, you need to select the sandbox type based on what you are working with. You have two options:
- Microsoft Cloud Sandbox: Select this option if you are hosting your development sandbox in Business Central (Option 1 in the Setting up your development sandbox section). When you select this option, you will be prompted to log in with your Microsoft account. Use the account under which you created the Business Central sandbox.
- Your own server: Select this option if you chose to put your sandbox in an Azure virtual machine, or on your local machine using a container or the installation media (Options 2 - 4 in the Setting up your development sandbox section). When you select this option, you will be prompted to log in. Press Escape to cancel the login.
- This step is only required if you selected Your own server in the preceding step. Skip to the next step if you selected Microsoft Cloud Server.
Before we log in to our development sandbox, we need to make sure that we have the correct connection configuration.
This information is stored in the launch.json file in the .vscode folder. You can view the file's contents by selecting it in the Visual Studio Code Explorer.
There are three properties that we need to look at here and set based on how we set up our development sandbox:
| server | Here, you need to enter the connection URL into your sandbox. You can leave it at the default ("http://localhost") if you installed your sandbox using the installation media. If you hosted your sandbox on an Azure virtual machine, this will be the "server": value that you obtained from the virtual machine landing page. If you have your sandbox in a container on your local machine, this value will be the Dev. Server value you obtained from the PowerShell window. |
| serverInstance | Here, you need to specify the name of your server instance (or service tier name). You can leave it at the default ("BC130") if you installed your sandbox using the installation media. If your sandbox is hosted on an Azure virtual machine, this will be the "serverInstance": value that you obtained from the virtual machine landing page. If you have your sandbox in a container on your local machine, this value will be the Dev. ServerInstance value you obtained from the PowerShell window. |
| authentication | This defines the authentication method that will be used to connect to your sandbox. If you installed your sandbox using the installation media, you will set this value to "Windows". If you hosted your sandbox on an Azure virtual machine or it is in a container on your local machine, this value should be set to "UserPassword". |
As you're poking around the launch.json file, if you press Enter to create a new line within the file, you can then press Ctrl + Space to see a list of other properties that are available for you to use.
- Now that we have our configuration set up, we need to download symbols. At this point, Visual Studio Code may have already been prompting you to do that.
Press Ctrl + Shift + P to open the Command Palette and type or select AL: Download Symbols to download the symbols.
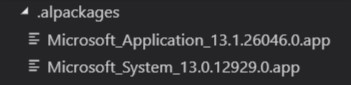
This will prompt a connection to be made to your development sandbox, and the symbols will be downloaded to your local machine. They will be placed in a folder named .alpackages, which you will see in the Explorer.
The symbol files are required for you to do any sort of AL development. They contain metadata that describes all the entities that exist in your development sandbox, such as tables, functions, and pages.
Once the symbols have been downloaded, you will see two files in the .alpackages folder, similar to what you can see in the following screenshot:
- Now, it's time to build and publish our application.
To do that, you can simply press F5, which will build the application and then publish it to your development sandbox in debug mode. If you do not want to publish it in debug mode, you can press Ctrl + F5.
If you simply want to build your application but are not ready to publish it, you can do that by pressing Ctrl + Shift + B, and your application will be built in, but not published to, your development sandbox.
How it works...
Creating the sample application is the quickest way to begin a new AL project. Once you connect your project to your development sandbox and download the symbols, you will be ready to code your AL application.
There's more...
Before you begin creating your new AL application using the sample application, you will need to delete the HelloWorld.al file that is in the sample application.