

Installing and upgrading local add-on modules
The core functionality of Odoo comes from its add-on modules. You have a wealth of add-ons available as part of Odoo itself, as well as add-on modules that you can download from the app store or that have been written by yourself.
In this recipe, we will demonstrate how to install and upgrade add-on modules through the web interface and from the command line.
The main benefits of using the command line for these operations include being able to act on more than one add-on at a time and having a clear view of the server logs as the installation or update progresses, which is very useful when in development mode or when scripting the installation of an instance.
Getting ready
Make sure that you have a running Odoo instance with its database initialized and the add-ons path properly set. In this recipe, we will install/upgrade a few add-on modules.
How to do it…
There are two possible methods to install or update add-ons—you can use the web interface or the command line.
From the web interface
To install a new add-on module in your database using the web interface, perform the following steps:
- Connect to the instance using the Administrator account and open the Apps menu:

Figure 2.1 – List of Odoo apps
- Use the search box to locate the add-on you want to install. Here are a few instructions to help you with this task:
- Activate the Not Installed filter.
- If you're looking for a specific functionality add-on rather than a broad functionality add-on, remove the Apps filter.
- Type a part of the module name in the search box and use this as a Module filter.
- You may find that using the list view gives something more readable.
- Click on the Install button under the module name in the card.
Note that some Odoo add-on modules have external Python dependencies. If Python dependencies are not installed in your system, then Odoo will abort the installation and it will show the following dialog:
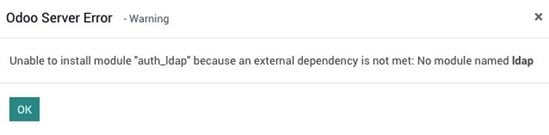
Figure 2.2 – Warning for external library dependency
To fix this, just install the relevant Python dependencies on your system.
To update a pre-installed module in your database, perform the following steps:
- Connect to the instance using the Administrator account.
- Open the Apps menu.
- Click on Apps:

Figure 2.3 – Odoo apps list
- Use the search box to locate the add-on you want to install. Here are a few tips:
- Activate the Installed filter.
- If you're looking for a specific functionality add-on rather than a broad functionality add-on, remove the Apps filter.
- Type a part of the add-on module name into the search box and then press Enter to use this as a Module filter. For example, type
CRMand press Enter to search CRM apps. - You may find that using the list view gives you something more readable.
- Click on the three dots in the top right-corner of the card and click on the Upgrade option:
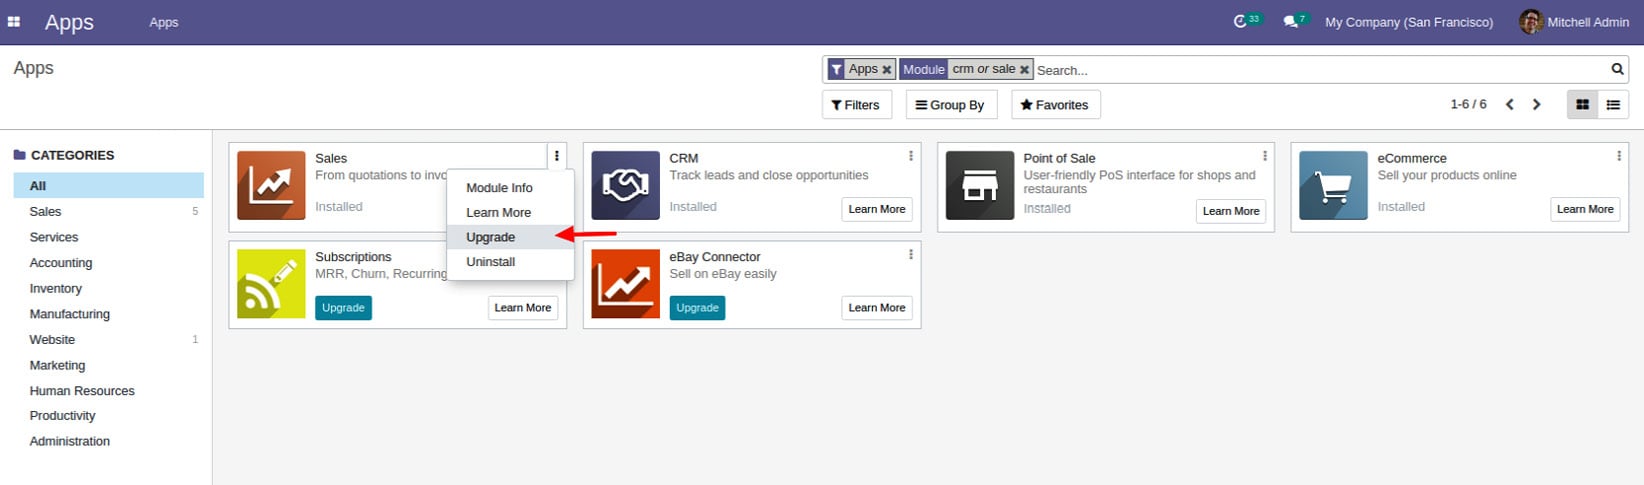
Figure 2.4 – Drop-down link for upgrading the module
Activate developer mode to see the technical name of the module. See Chapter 1, Installing the Odoo Development Environment, if you don't know how to activate developer mode:
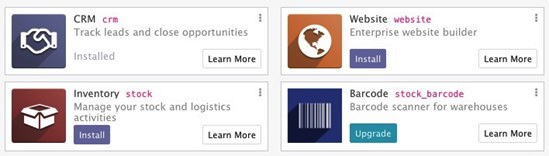
Figure 2.5 – Application's technical names
After activating developer mode, it will show the module's technical name in red. If you are using Odoo Community Edition, you will see some extra apps with the Upgrade button. Those apps are Odoo Enterprise Edition apps, and in order to install/use them, you need to purchase a license.
From the command line
To install new add-ons in your database, perform the following steps:
- Find the names of the add-ons. This is the name of the directory containing the _
manifest_.pyfile, without the leading path. - Stop the instance. If you are working on a production database, make a backup.
- Run the following command:
$ odoo/odoo-bin -c instance.cfg -d dbname -i addon1,addon2 \
--stop-after-init
You may omit
-d dbnameif this is set in your configuration file. - Restart the instance.
To update an already installed add-on module in your database, perform the following steps:
- Find the name of the add-on module to update; this is the name of the directory containing the _
manifest_.pyfile, without the leading path. - Stop the instance. If you are working on a production database, make a backup.
- Run the following command:
$ odoo/odoo-bin -c instance.cfg -d dbname -u addon1 \
--stop-after-init
You may omit
-d dbnameif this is set in your configuration file. - Restart the instance.
How it works…
The add-on module installation and update are two closely related processes, but there are some important differences, as highlighted in the following two sections.
Add-on installation
When you install an add-on, Odoo checks its list of available add-ons for an uninstalled add-on with the supplied name. It also checks for the dependencies of that add-on and, if there are any, it will recursively install them before installing the add-on.
The installation process of a single module consists of the following steps:
- If there are any, run the add-on
preinithook. - Load the model definitions from the Python source code and update the database structure, if necessary (refer to Chapter 4, Application Models, for details).
- Load the data files of the add-on and update the database contents, if necessary (refer to Chapter 6, Managing Module Data, for details).
- Install the add-on demo data if demo data has been enabled in the instance.
- If there are any, run the add-on
postinithook. - Run a validation of the view definitions of the add-on.
- If demo data is enabled and a test is enabled, run the tests of the add-on (refer to Chapter 18, Automated Test Cases, for details).
- Update the module state in the database.
- Update the translations in the database from the add-on's translations (refer to Chapter 11, Internationalization, for details).
Note
The
preinitandpostinithooks are defined in the _manifest_.pyfile using thepre_init_hookandpost_init_hookkeys, respectively. These hooks are used to invoke Python functions before and after the installation of an add-on module. To learn more aboutinithooks, refer to Chapter 3, Creating Odoo Add-On Modules.
Add-on update
When you update an add-on, Odoo checks in its list of available add-on modules for an installed add-on with the given name. It also checks for the reverse dependencies of that add-on (these are the add-ons that depend on the updated add-on). If any, it will recursively update them, too.
The update process of a single add-on module consists of the following steps:
- Run the add-on module's pre-migration steps, if any (refer to Chapter 6, Managing Module Data, for details).
- Load the model definitions from the Python source code and update the database structure if necessary (refer to Chapter 4, Application Models, for details).
- Load the data files of the add-on and update the database's contents if necessary (refer to Chapter 6, Managing Module Data, for details).
- Update the add-on's demo data if demo data is enabled in the instance.
- If your module has any migration methods, run the add-on post-migration steps (refer to Chapter 6, Managing Module Data, for details).
- Run a validation of the view definitions of the add-on.
- If demo data is enabled and a test is enabled, run the tests of the add-on (refer to Chapter 18, Automated Test Cases, for details).
- Update the module state in the database.
- Update the translations in the database from the add-on's translations (refer to Chapter 11, Internationalization, for details).
Note
Note that updating an add-on module that is not installed does nothing at all. However, installing an add-on module that is already installed reinstalls the add-on, which can have some unintended effects with some data files that contain data that is supposed to be updated by the user and not updated during the normal module update process (refer to the Using the noupdate and forcecreate flags recipe in Chapter 6, Managing Module Data). There is no risk of error from the user interface, but this can happen from the command line.
There's more…
Be careful with dependency handling. Consider an instance where you want to have the sale, sale_stock, and sale_specific add-ons installed, with sale_specific depending on sale_stock, and sale_stock depending on sale. To install all three, you only need to install sale_specific, as it will recursively install the sale_stock and sale dependencies. To update all three, you need to update sale, as this will recursively update the reverse dependencies, sale_stock and sale_specific.
Another tricky part with managing dependencies is when you add a dependency to an add-on that already has a version installed. Let's understand this by continuing with the previous example. Imagine that you add a dependency on stock_dropshipping in sale_specific. Updating the sale_specific add-on will not automatically install the new dependency, and neither will requesting the installation of sale_specific. In this situation, you can get very nasty error messages because the Python code of the add-on is not successfully loaded, but the data of the add-on and the models' tables in the database are present. To resolve this, you need to stop the instance and manually install the new dependency.