Book Image

Mastering QuickBooks 2021 - Second Edition

By : Crystalynn Shelton
Book Image

Mastering QuickBooks 2021 - Second Edition

By: Crystalynn Shelton

Overview of this book

Intuit QuickBooks is an accounting software package that helps small business owners to manage all their bookkeeping tasks independently. This latest edition of Mastering QuickBooks takes you through the range of new features and updates available in QuickBooks Online (QBO). Creating multilingual invoices, tracking mileage, working with a cash flow dashboard that helps you with cash forecasting and planning reports, and uploading a batch of bills and checks are just a few of the new features covered in this edition. As you progress, you’ll learn how to manage sales tax, including how to set up, collect, track, pay, and report sales tax payments. Dedicated sections will also take you through new content focused on the latest features in the QBO line-up, while also showing you the different types of businesses that can benefit from QBO Advanced. In addition to this, you’ll explore how to export reports to Google Sheets, use the custom chart builder, import budgets, perform smart reporting with Fathom, and much more. By the end of this QuickBooks book, you'll be well-versed with the features of QuickBooks and have the confidence to manage all your bookkeeping tasks with ease.
Table of Contents (26 chapters)
1
Section 1: Setting Up Your Company File
8
Section 2: Recording Transactions in QuickBooks Online
13
Section 3: Generating Reports in QuickBooks Online
18
Section 4: Managing Employees and Contractors
21
Section 5: Closing the Books and Handling Special Transactions

Creating an invoice that includes sales tax

After completing the setup for sales tax, you are ready to create invoices and sales receipts with sales tax. In this section, we will create an invoice and show you how to include sales tax.

Perform the following steps to create an invoice with sales tax:

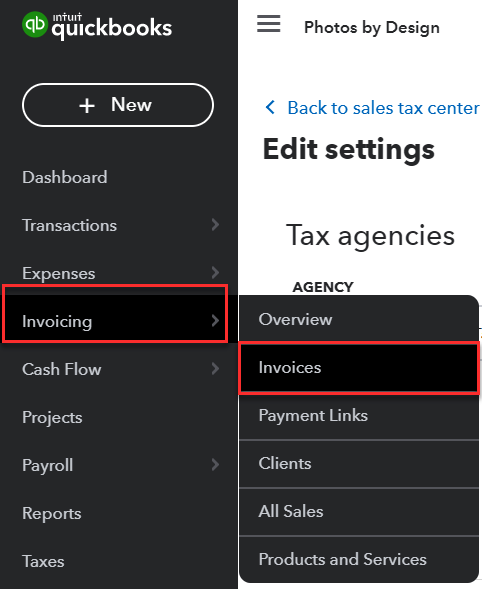
  1. From the left menu bar, click on Invoicing and then select Invoicesas indicated in the following screenshot:

2. Click the Create invoice button, as indicated in the following screenshot:

3. A blank invoice template displays. Complete the fields as follows:

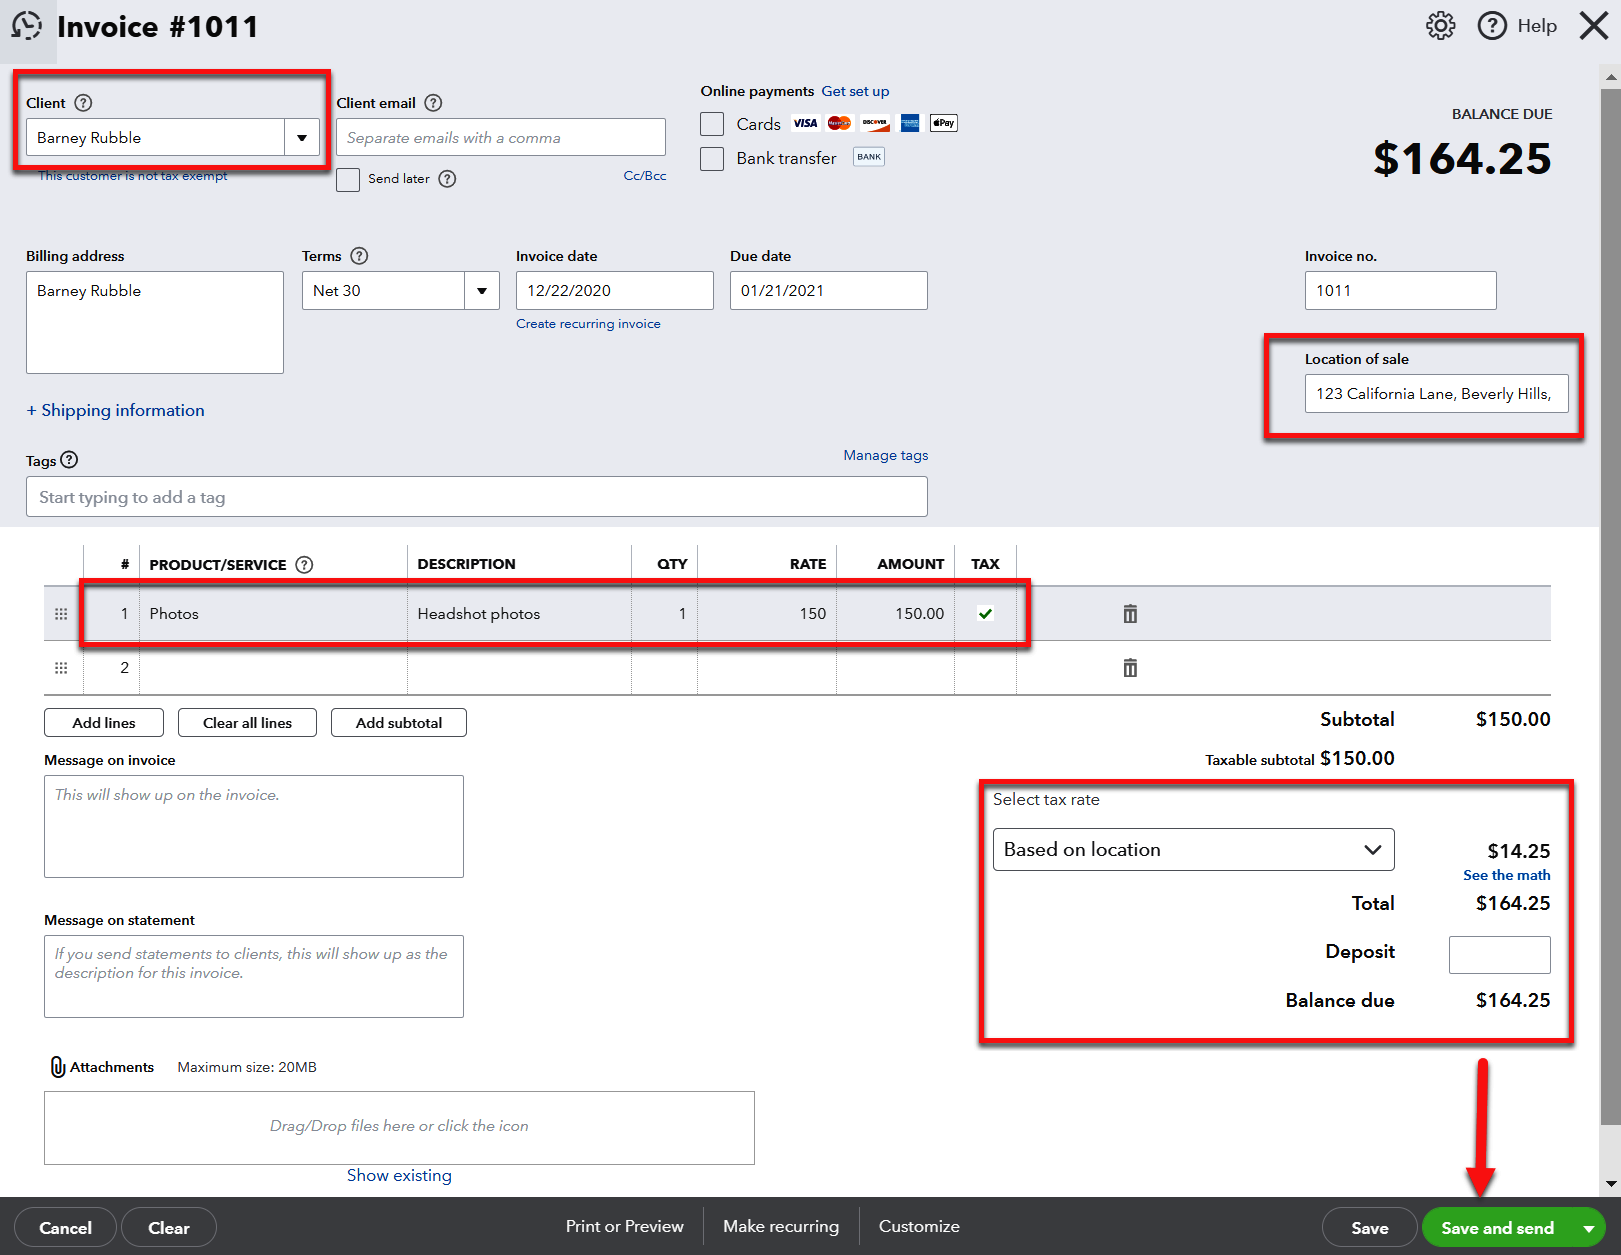
  • Client: From the dropdown, select the customer/client you are invoicing (in other words, Barney Rubble). Press tab and the email, billing address and payment terms, and due date fields will populate automatically.
  • PRODUCT/SERVICE: From the dropdown, select the product/service you are invoicing the customer for. Note: If the DESCRIPTION, QTY, RATE, and AMOUNT fields don't auto-populate manually, enter this...