
File formats – JPEG and RAW
Nearly all digital cameras these days can shoot and record two formats of image files: JPEG and RAW files. Some newer models can also record digital negative RAW files. We'll look at these later in this chapter.
The difference between JPEGs and RAW files is simple: JPEG files are 8-bit picture files. These are processed in-camera and then compressed (squashed) to maximize storage space, before being saved to the memory card.
RAW files are usually 10-bit files that have little or no processing applied in-camera, and they are not compressed before being saved to the memory card. The result is a file that is several times larger than a JPEG, but one that can be edited to a far higher degree of accuracy than the humble JPEG.
Tip
Bit depth relates to the amount of color information held in an image file. The higher the bit depth in that file, the more color information it contains; more information produces smoother tonal gradation. Single-bit color is made up of two colors only: black and white. 8-bit color produces 256 tones, while 24-bit color can have millions of tones.
Although shooting with RAW files is highly recommended, you will find that your camera's files are quite different to another model's (RAW) files. For example, Sony RAW files use the suffix .ARN; Olympus uses .ORW; Nikon uses .NEF; and Pentax uses .PEF. The following is a view of an original (Canon) RAW file displayed in a browser window. It has the .CR2 suffix common to all Canon cameras:
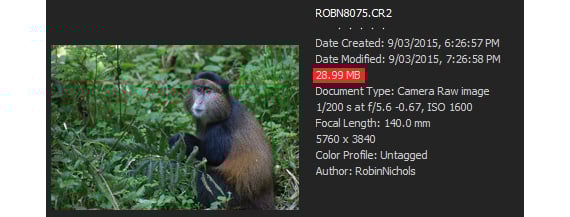
Although each camera manufacturer shares the same three-letter suffix across all of its camera range, RAW files produced by different models are quite different to each other (that is, RAW files from the Nikon D7000 are different to the Nikon D7200, D800, and D850 RAW files. This is why it takes companies such as Adobe several months to provide an update for the different RAW file types designed for each new camera make and model. If you are an early adopter, waiting for Adobe to "catch up" and release a compatibility update can be a source of frustration.
RAW files have to be edited in a specific RAW editing window, called Camera RAW, which is separate from the regular Quick, Guided, or Expert mode windows. Once edited in this space, a RAW file must be either closed (there's no saving with RAW files – it automatically records all the edits applied to it), or it can be saved in a more universally acceptable file format for storage, backup, or later distribution.
Such formats include JPEGs, TIFF files, digital negative files, and even Photoshop files. But what's the difference between these formats and when would be the best situation for us to use each of them?
File format characteristics
Choosing the right format to save your edited work can be an important decision because it can have direct ramifications on both the final image quality and your backup and archiving practices:
- JPEG (.jpg): This is a compressed lossy format (lossy means it loses quality when saved and compressed) that's ideal for emailing, photo books, web, social media, and photo lab printing (note: most photo book companies only accept JPEG and PNG files).
- RAW: RAW files are essentially untouched data straight from the camera. They typically contain four times more picture information than a JPEG and are therefore a good choice for shooting in tricky lighting. RAW files are big, can take any amount of editing, do not deteriorate (as JPEGs do with too much editing), and have to be saved in a more universal format such as JPEG in order to be printed or included in a digital photo book.
- DNG (.dng): A digital negative file is like a universal RAW file, retaining all of the benefits of regular RAW files while retaining a higher degree of application than a regular RAW file. Adobe Lightroom, for example, is a program optimized to work best with
.dngfiles. - PSD (.psd): Photoshop files have no compression and can store extra Photoshop data within the file itself, such as layers, paths, selections, and more advanced features. Because everything can be saved in layers, you retain a high degree of editability. This is good for preserving the best quality for complex editing and commercial print projects.
- TIFF: Similar to
.psdfiles, TIFF files can be compressed by up to 25% with no loss of quality (this is called LZW or lossless compression). It also preserves many features including selections and layers. It's good for preserving the best quality for editing and commercial printing. TIFF files can end up being larger than the same file saved in.psdformat. - Photoshop PDF: These files are very similar to regular Acrobat PDF files. These are good for general distribution.
- PNG: Portable Network Graphics (PNG) files are used primarily for website design and in photo books, where background transparency is a requirement.
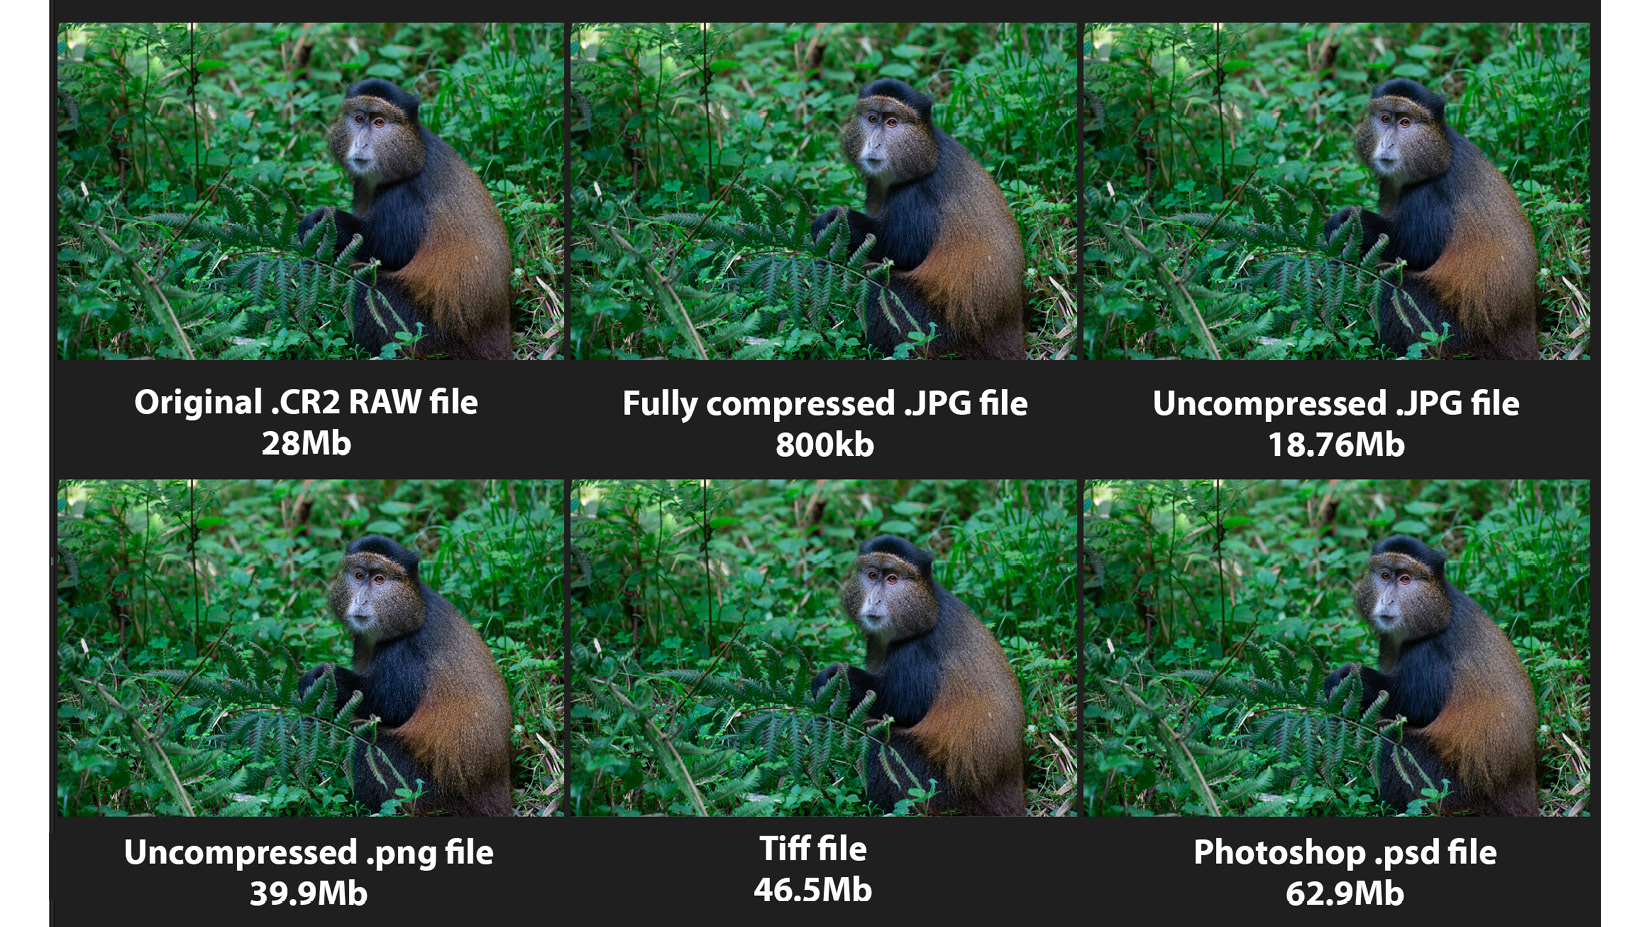
To illustrate the different properties of image files, I saved the same image (a golden monkey) in six different file formats. Because the JPEG format is compressible, its saved state is considerably smaller than everything else, hence its popularity in social media, on the web, and for emailing, among other uses. Compressing it to the maximum (that is, the smallest possible file size) brings it out at only 800 KB—less than 1 MB—but the extreme compression would damage the quality irreparably.
Despite my original .CR2 RAW file being 28.99 MB, the .png file is larger (39.9 MB), followed by the slightly compressed (though lossless) TIFF file (46.5 MB), the Photoshop file (62.9 MB), and the uncompressed TIFF file (63.3 MB).
Of all the file formats available in Elements, the one that's perhaps the most useful is JPEG. The following close-ups of this bespectacled gentleman nicely display the problems that over-compressing JPEG files might create:
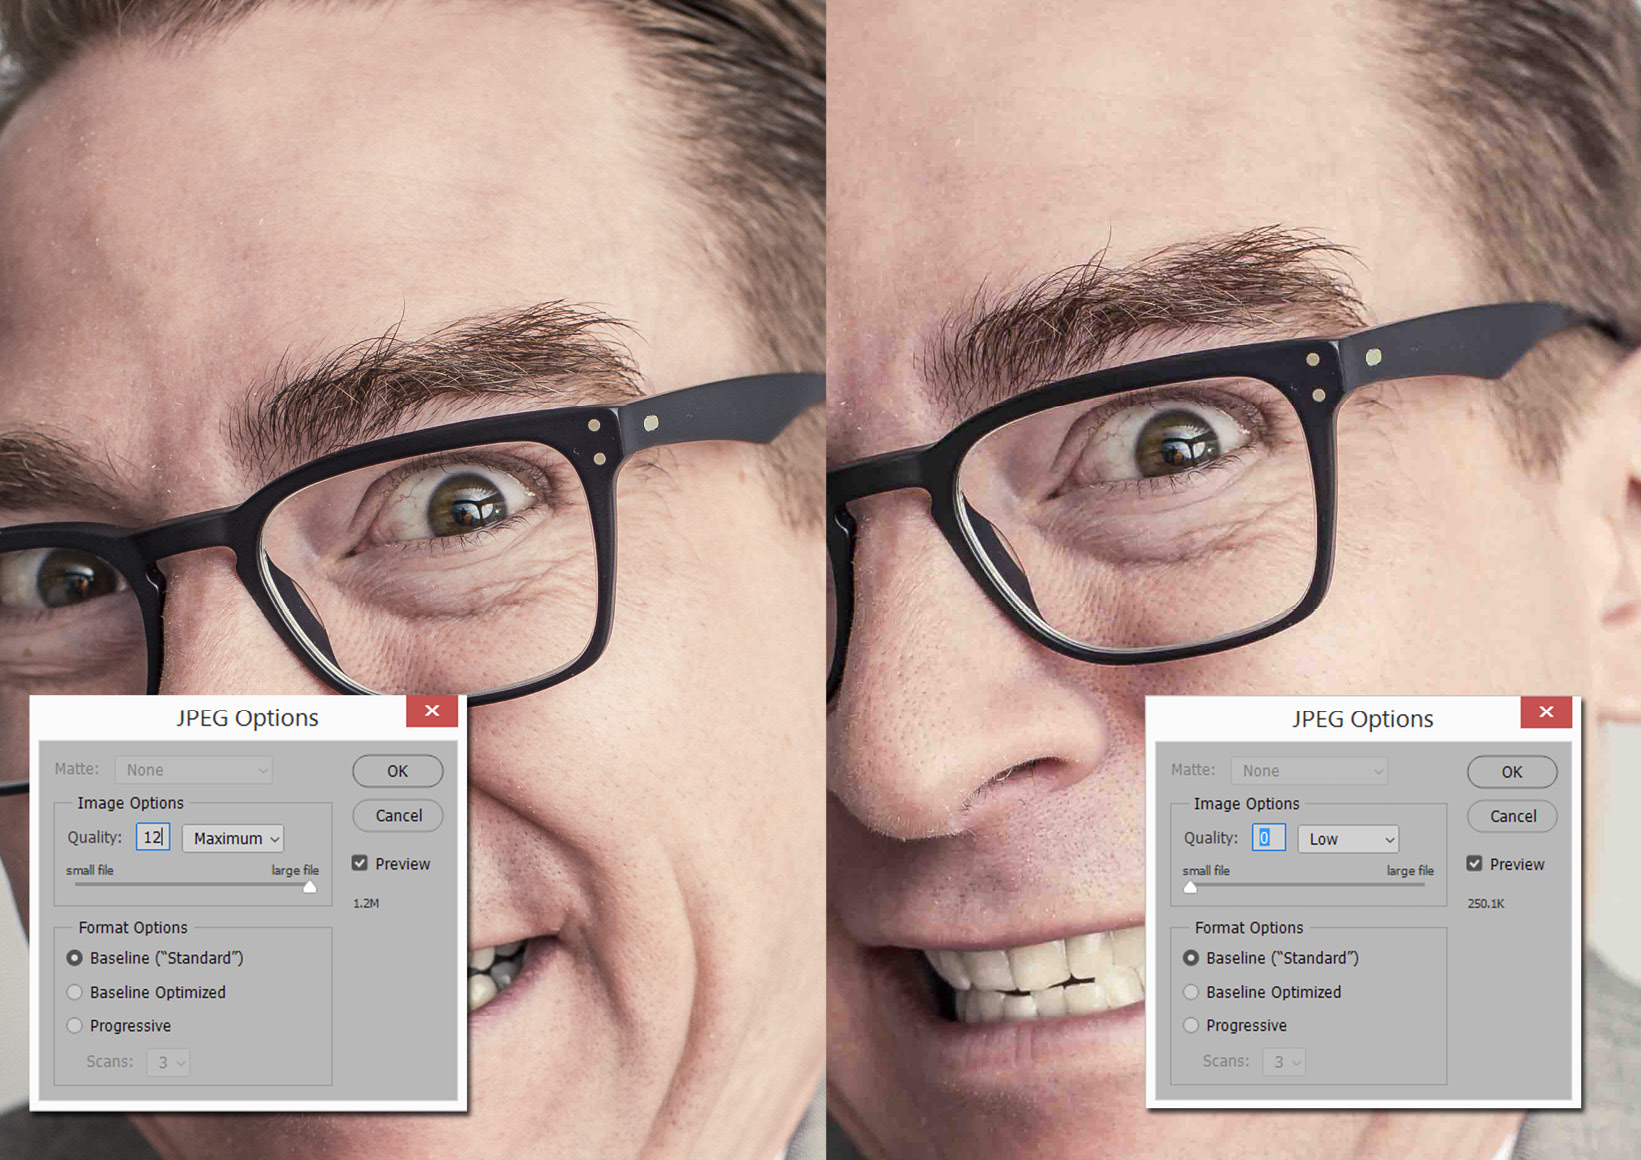
Don't get me wrong here – JPEG files are great because they can be compressed. However, if they are compressed too much (that is, set to level 7 or lower in the JPEG Options box), you'll see a significant deterioration in image clarity and color (the right half of the previous composite image was set to Quality: 0, producing a tiny file).
However, too much compression at this stage or repeated saving (and therefore repeated compression) will generate image artifacts, for example, in the form of posterization (banding) seen mostly in the smoother tones. Overcompression will also create inaccurate color, and might even introduce blocky-looking pixels when compared to the minimal compression setting of level 12, as seen on the left of the preceding screenshot, producing a far larger saved file with smoother, more accurate tones.
Let's now go ahead and look at how we can create the ideal imaging computer.