

Familiarizing yourself with navigation on the Zapier platform
Zapier has made its UI helpful for navigating easily around the platform. When you sign in to Zapier, the first thing you will see is the main dashboard. The central dashboard area provides you with useful information to help you get started with tutorials, creating your own workflows, and using some pre-built workflow examples.
The dashboard layout is as shown in the following screenshot:
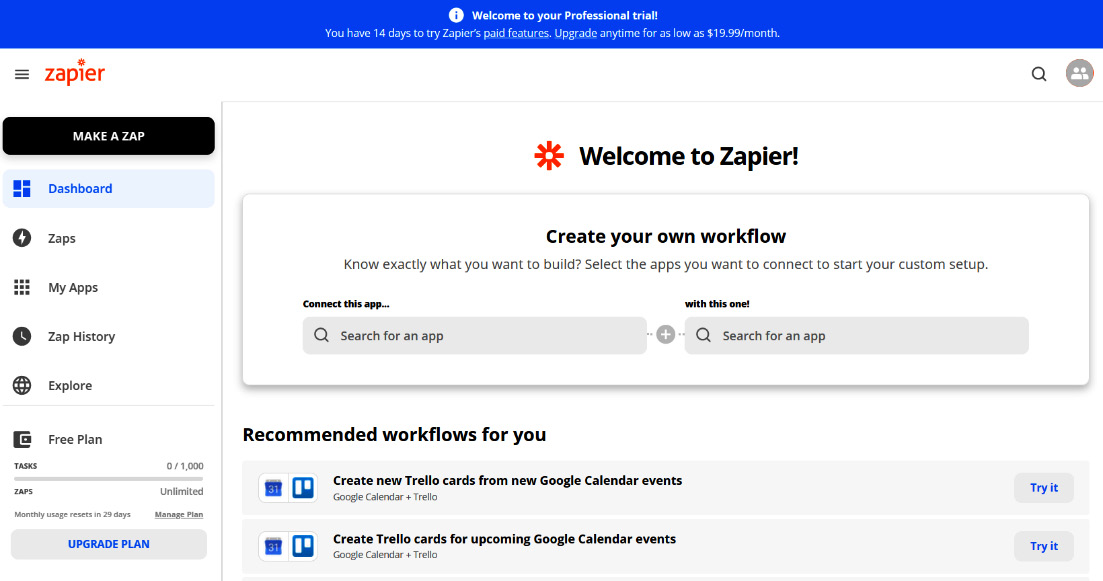
Figure 1.6 – The Zapier main dashboard layout
From the majority of pages within the platform, you have multiple navigation options:
- Icons in the left sidebar
- Icons on the top right
- Footer menu
Important note
These navigation options are available on most Zapier pages except within the Settings and Zap editor modules.
Icons in the left sidebar
The left sidebar is the most commonly used navigational bar in Zapier. It is found on every page within the platform (except on information pages and within the Settings and Zap editor modules). The sidebar can be expanded and reduced using the hamburger menu next to the Zapier logo. The following screenshot shows the navigation options in this bar:
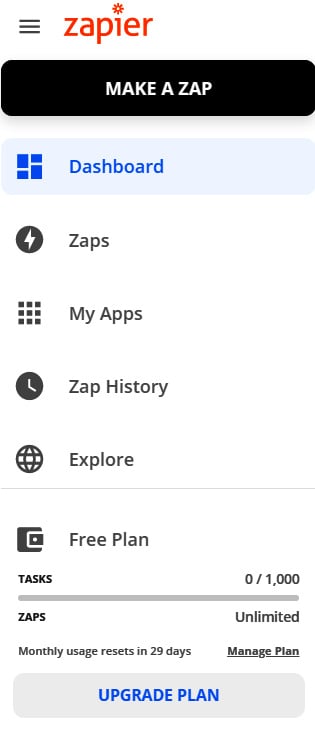
Figure 1.7 – Navigation options in the left sidebar
These navigation options are as follows:
- MAKE A ZAP: This button takes you straight into the Zap editor, where you can start building a Zap. We cover the Zap editor in more detail in Chapter 3, Building Your First Automated Workflow (Zap).
- Dashboard: This icon link will take you back to the main dashboard at any time.
- Zaps: This icon link will take you into your Zap management area. This area gives you a list of all of your Zaps, where you can organize them into different folders and change team sharing preferences. We cover the Zap management area in more detail in Chapter 4, Managing Your Zaps.
- My Apps: The My Apps icon link will take you into your list of connected apps. From there, you can connect and authenticate all your relevant business apps. We cover the My Apps module and how to connect your apps in more detail in Chapter 3, Building Your First Automated Workflow (Zap), and Chapter 4, Managing Your Zaps.
- Zap History: This icon link will take you into your Zap history, where you can review data that has run in your triggered Zaps. We cover Zap history in more detail in Chapter 5, Troubleshooting and Handling Zap Errors.
- Explore: This icon link will take you into the Explore area, where you will find a wide range of information on different ways to use Zapier to automate your business processes.
- Get Help: The Get Help icon link will take you into the help center, with comprehensive how-to articles, FAQs, and support options. We cover this in more detail in Chapter 5, Troubleshooting and Handling Zap Errors.
- Wallet: This gives you a handy snapshot view of your current plan, task usage relative to your monthly limit, and the number of Zaps relative to your plan limit. From here, you can also manage or upgrade your plan using the links provided.
Icons on the top right
In the top-right corner, you will find the following icons:
- Magnifying glass: This icon gives you the ability to search for apps to find out whether Zapier integrates with them. The app ecosystem directory contains a comprehensive list of app integrations and details about them.
- People icon: This icon displays a drop-down menu with your account settings and an option to log out of Zapier.
Footer menu
In the footer menu, you will find additional navigation options that are available on all pages. The two most useful ones are as follows:
- Pricing: This link will take you to the Plans page, which will show you the different Zapier plans, features, and associated prices. You can choose to trial, upgrade, or downgrade your plan, while reviewing the features and pricing of different plans.
- Help: This link will take you into the Help area, which we described earlier.
You now have a better understanding of and have become familiarized with navigation in the Zapier platform. Next, we discuss how to change our settings and preferences.