

Changing your settings and preferences
Ensuring that your settings are correct and understanding how specific settings impact other areas of your account is essential for successful account management.
You can access your settings by clicking on the circle icon with your initials in the top right of your dashboard and selecting the cogwheel icon/settings option. The settings menu will be shown in a left sidebar, as shown in the following screenshot:
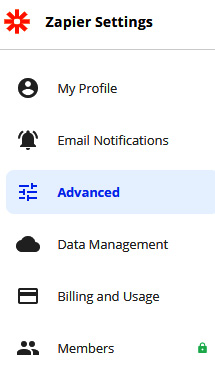
Figure 1.8 – The left sidebar menu in the settings area
Important note
Team and Company plans have an extra Organization menu item, and the Company plan has an Advanced Security option. We cover these settings in Chapter 5, Troubleshooting and Handling Zap Errors.
My Profile
This area contains basic data about you and allows you to do the following:
- Authenticate your email address.
- Add/change a profile image using Gravatar (an online service that links a picture of you with your email address).
- Change your email address, first and last name, password, and company.
- Change your role.
- Adjust your timezone.
The following screenshot shows the layout of the My Profile area:
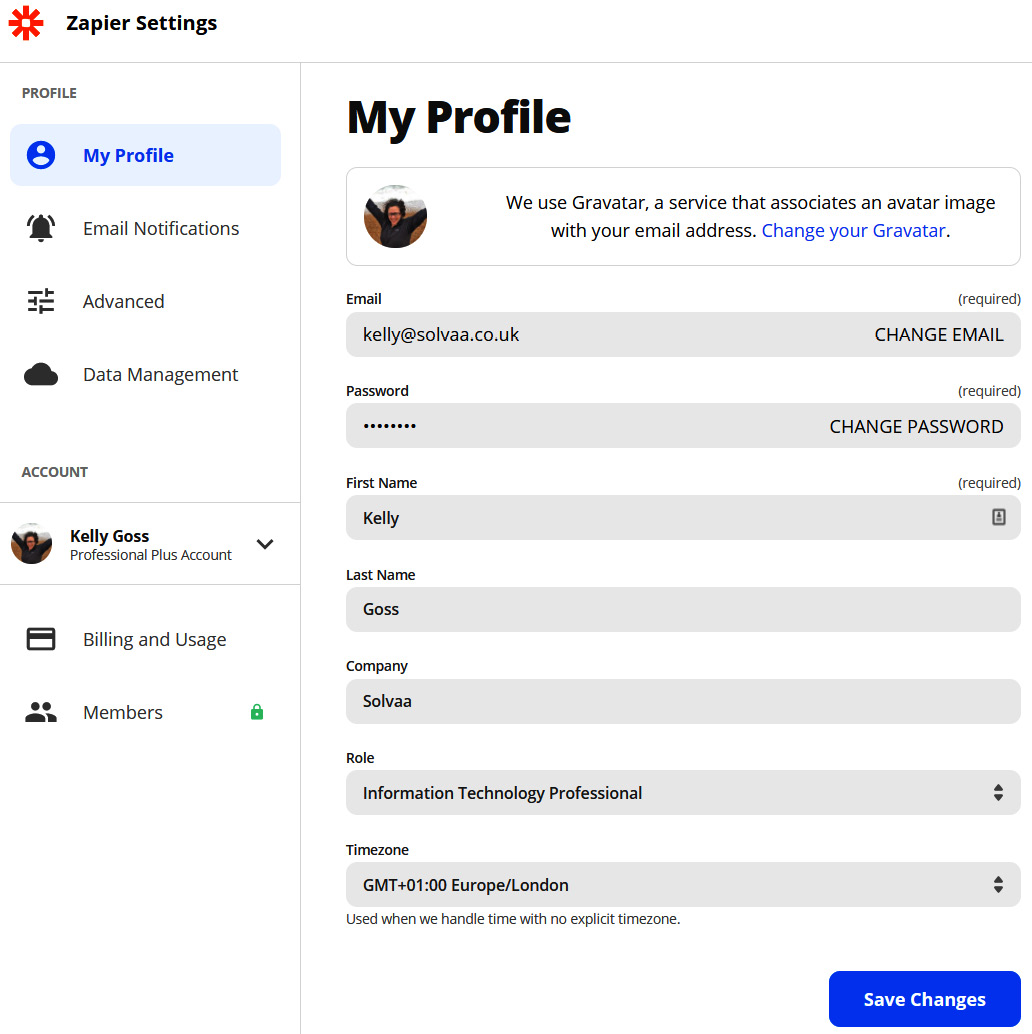
Figure 1.9 – Layout of the My Profile area
Important settings to customize in My Profile
There are a few things that you should do once you have set up your Zapier account:
- Validate your email address.
- Add your role.
- Add your timezone.
Let's go through how to do each of these in Zapier.
Validating your email address
Work through the following steps to adjust these settings:
- Click on the highlighted text (marked as important) to confirm your email address.
- Follow the instructions in the email you are sent from Zapier.
This is the first step to protecting your account and allowing Zapier to ensure that it has the right email address to send notifications.
Adding your role
If you did not add your role in the two-step onboarding process when you set up your Zapier account, you can do it here. To do this, scroll to Role and choose the closest match to your role from the drop-down list. Completing this step will enable Zapier to make workflow suggestions based on what other users with the same role might be using.
Adding your timezone
To adjust these settings, scroll to Timezone and choose your timezone from the drop-down list.
Completing this step will enable Zapier to use your timezone when displaying and handling time in your account. The default is UTC (Coordinated Universal Time).
An example of this would be in your Zap history. Times would be displayed in your timezone rather than in UTC. It is much easier to keep track of times when investigating errors if they are in your timezone.
Email Notifications
This area will enable you to alter your preferences for how and when you want to receive email communications. The following screenshot shows the layout of the Email Notifications area:
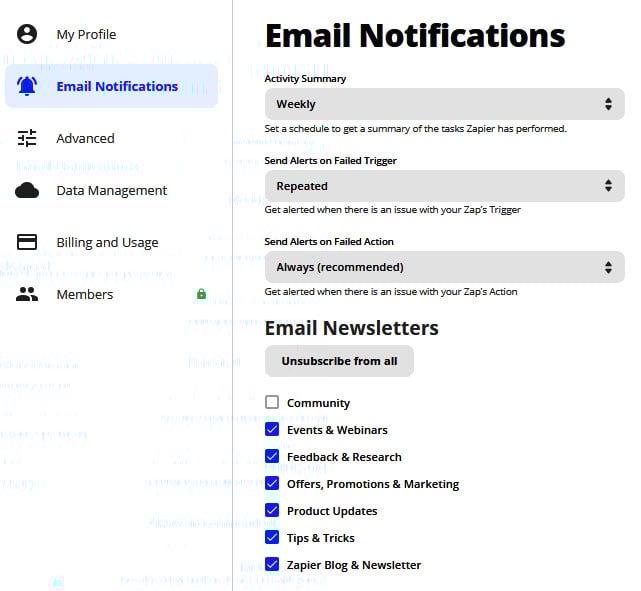
Figure 1.10 – Layout of the Email Notifications area
You can change your preferences for the following:
- Activity Summary: Zapier regularly sends you summaries of all the tasks that have been performed over a period of time (within the set frequency). You can choose to receive activity summaries daily or weekly, or if you prefer, never.
- Send Alerts on Failed Trigger: You can choose to receive alerts if any of your triggers have issues. It is useful to have this information so that you can sort out a problem soon after it happens. You can choose to receive failed trigger alerts repeatedly, always (this is the recommended setting), or if you prefer, never. Another option available is Only Zapier Manager Trigger, which we will discuss in more detail in Chapter 5, Troubleshooting and Handling Zap Errors.
- Send Alerts on Failed Action: As with failed trigger alerts, you can choose to receive alerts if any of your actions have issues.
- Email Newsletters: You can choose what kind of content you want Zapier to send you. You can also unsubscribe from receiving any newsletter content.
Advanced
In the Advanced area, you can change your preferences for the following:
- Two-Factor Authentication: Two-Factor Authentication (2FA) gives you more security by requiring you to enter your standard login details (email address and password) as well as an authentication code generated and sent to a nominated email address or mobile phone number. It is recommended that you set up 2FA on your account.
- Authorized Applications: This shows a list of apps that you have granted access to your Zapier account. You can remove apps from this area as needed. This area differs from your connected apps in My Apps.
- SSL Checks: SSL certificates allow scrambled information to be sent between Zapier and its partners. These settings are turned "on" by default and should only be altered if you have experience with changing them and know the consequences or if you have been advised to do so by the Zapier support team.
- Sign-in With: This allows you to change your sign-in settings to use your Google account instead of the standard email and password.
- Delete My Account: If you want to close your Zapier account and delete all your account data, you can use this area to proceed. If you wish to delete some data periodically, you can do so through the Data Management area.
Data Management
Zapier gives account owners the ability to control their data. In this area, you can export and delete your data periodically and read more about data regulation and GDPR compliance.
Team and Company plans have additional Data Management settings that allow you to import and export Zaps in bulk (in a JSON file) so that you can make backups or share them with others.
Account
If you have access to your personal account as well as one or more Team or Company accounts, a drop-down option will be displayed allowing you to navigate between your different accounts to view the settings for each account.
Billing and Usage
This area is essential for anything related to billing, task, and Zap usage. You will have access to more detailed information about your usage than in the snapshot wallet in the expandable left navigation bar. You can see how many tasks have been used and how many Zaps have been built in relation to your limit and what date your usage resets on. You will also be able to adjust your price plan, payment method, and billing information and view your invoices.
Members
Unless you are on a Team or Company plan, this area will be locked, denoted with a padlock icon.
The Members area gives you an overview of tasks related to Zaps built and owned by this member. You can adjust team member settings as follows:
- Add or remove members.
- Change member roles (Admin or Member).
You now have a better understanding of how to change your settings and preferences.