
Maintaining list data
Regardless of whether you've created an empty list or imported a list with data from Excel, the next step is usually to add some information to your list, followed by updating any existing information.
Adding items to a list
To create a new entry in a list, click on the New button. A new form will appear, where you will be able to provide relevant information based on the columns that you've added to the list:
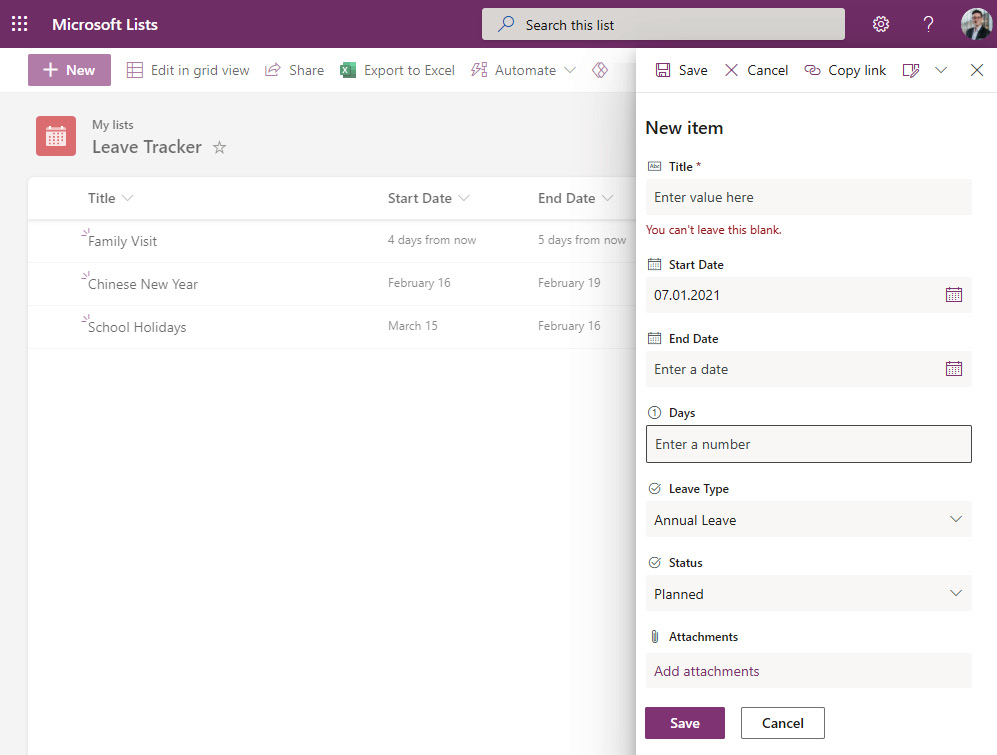
Figure 2.26 – Adding a new item to a list
Depending on the column type, the individual controls are rendered differently. For example, for simple text fields, a normal text area will be shown, where you can enter required information. Where possible, more user-friendly controls are used. For date fields, date pickers are shown, allowing users to either enter the date manually or select it from the date picker control. Clicking Save will create the new entry, whereas clicking Cancel will close the dialog without storing anything that was entered.
Another way to add information is to use Edit in grid view mode, as you will see in the next chapter. While this mode is mainly used to edit existing entries, you can also use the Add new item row at the bottom of your list to create a new entry and add relevant data directly into the cells shown:
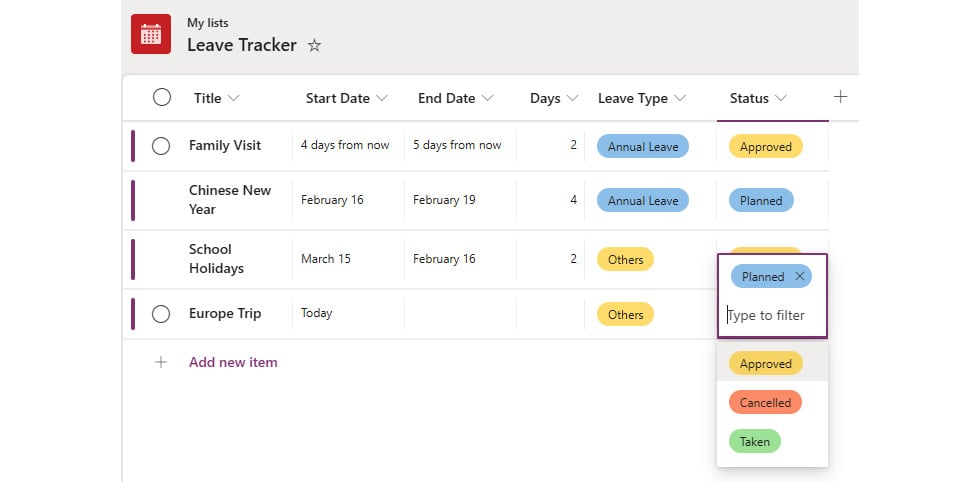
Figure 2.27 – Adding a new entry in grid view mode
One benefit of doing so is that items are rendered directly on screen. As an example, for a Choice column with entries that are different colors, you will be able to see these background colors when you're entering your data, something that is not available in the regular New entry form.
Editing items in a list
To edit an item, you can click on the item's Title value, which opens a preview pane. Here, you can edit the column values individually, or you can click on Edit all at the top to open the full edit form. The edit form can also be accessed by clicking on the ellipsis of the item and choosing Edit:
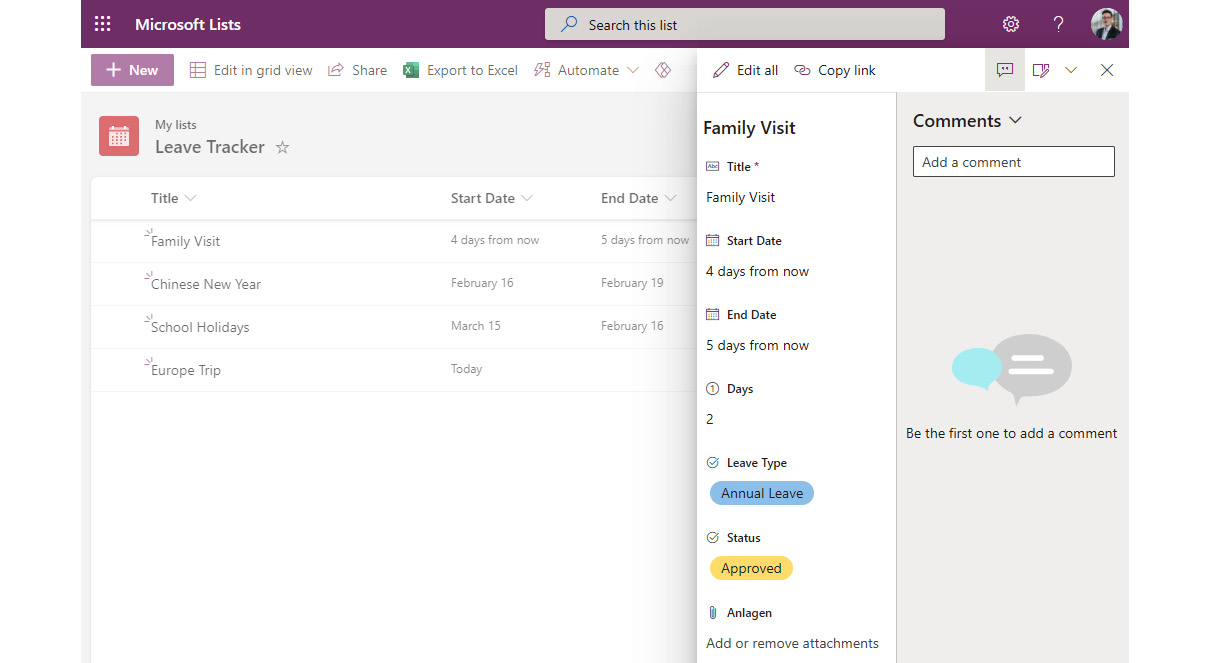
Figure 2.28 – Editing an existing item
It is also possible to edit items individually or in bulk in Edit in grid view mode. One of the benefits of doing so is that you can easily update a column for multiple items with the same value. You can select multiple cells within the same column by selecting the first item to be selected, pressing the Shift button, and finally selecting the final item to be selected. All the cells for the items between these two will be highlighted, and you can paste a value into all of them in one go. Alternatively, if you want to copy the value from the first cell into the cells below, you can select the first cell by clicking on the small square in the bottom-right corner of it and dragging it down across all the cells to be filled with the selected cell's value:
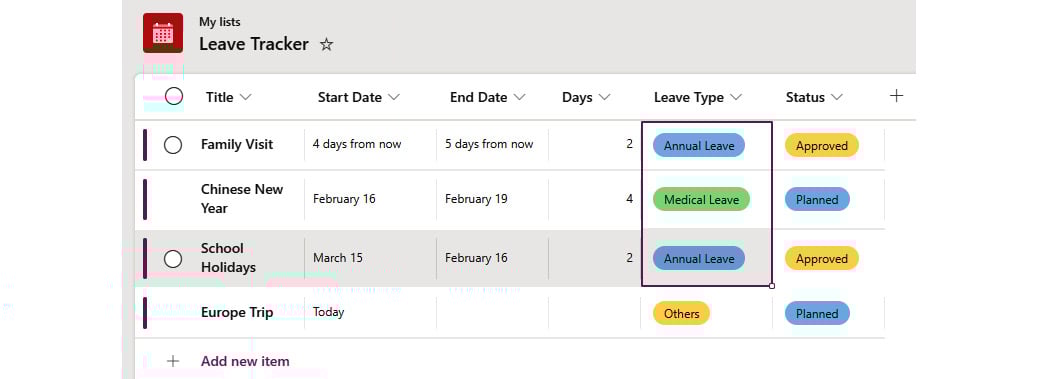
Figure 2.29 – Editing the items in a list in bulk
Any changes that you've made to items and cells will be saved immediately in the grid view, as well as in the preview pane. Only in the full edit form are you required to click on Save to save your changes.
Deleting items from a list
The last action we want to cover is deleting items from a list. When an item is no longer required, you can right-click on it and select Delete either from the menu that appears or from the options menu on top of the list. If there are multiple items you wish to delete, you can also select all of them first by clicking on the checkbox in front of each relevant item, and then selecting Delete:
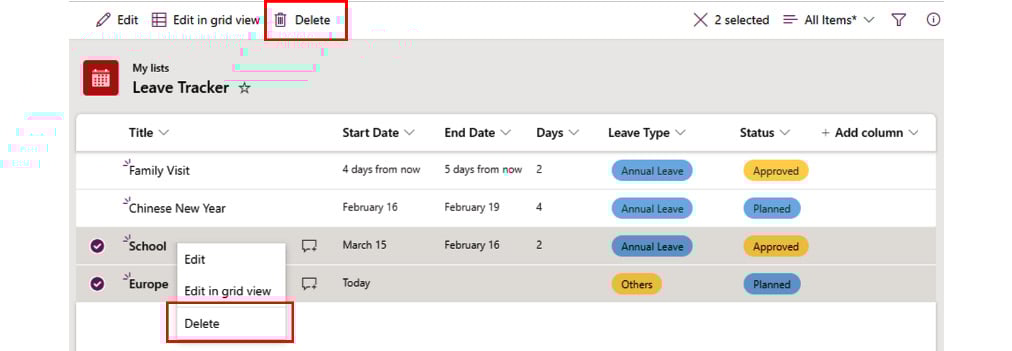
Figure 2.30 – Selecting and deleting multiple items
Items that you delete will be moved to your site's recycle bin, where they will remain for the duration of the retention period that has been set up. The default duration for this is set to 93 days, during which you are still able to restore deleted items when needed.
A list without any data in it does not provide any value. In this section, we have shown how to maintain entries in your list by adding new items, editing them, and also deleting them when they are no longer required. This equips you with the knowledge to utilize your lists efficiently and to start using them within your organization.