

Using boxes to limit the width of paragraphs
We won't always write text just from left to right over the complete text width. Sometimes, we'd like a paragraph to have a smaller width, for instance, when we would like to put text and a picture side by side.
In the following sections, we will look at how to work with paragraph boxes in LaTeX.
Creating a narrow text box
For our example, we would like to explain the acronym TUG in a text column of only 3 cm width. To do this, follow these steps:
- Create a new document containing these four lines:
\documentclass{article} \begin{document} \parbox{3cm}{TUG is an acronym. It means \TeX\ Users Group.} \end{document} - Click on Typeset and take a critical look at the output with the too-wide spacing:
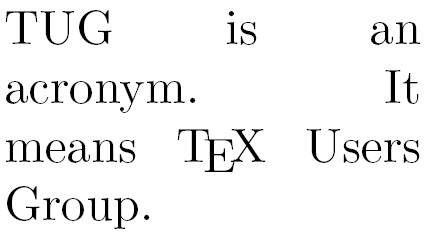
Figure 2.12 – A narrow justified paragraph
We used the \parbox command in the highlighted code line to create a column. The first argument to the \parbox command sets the width to 3 cm, and the second argument to \parbox contains the text.
\parbox takes the argument text and formats the output to fit the specified width. We see that the text is fully justified; however, our example shows an obvious problem: insisting on full justification could lead to undesirable big gaps in the text. Possible solutions are as follows:
- We introduce hyphenation; the word acronym could easily be hyphenated.
- We improve justification in general.
- We give up on full justification; narrow text could look better when it's only left-justified.
We will check out all of these options in the Breaking lines and paragraphs and Turning off full justification sections.
But first, let's understand how \parbox works.
Producing common paragraph boxes
Usually, we just need a text box with a certain width; occasionally, we would like to have some additional alignment to the surrounding text. So, the common definition of the \parbox command is as follows:
\parbox[alignment]{width}{text}
The meanings of the parameters are as follows:
alignment: That's the optional argument for vertical alignment. Statetto align at the baseline of the top line of the box; writebto align at the baseline of its bottom line. The default behavior is to place the box such that its center is in line with the center of the current text line.width: That's the width of the box. It can be given in ISO units, such as 3 cm, 44 mm, or 2 in.text: That's the text that you want to put in that box. It should be a short piece of common text. For complicated or longer content, we can use theminipageenvironment, which we will use in the next section.
Here's a demonstration of the effect of the alignment parameters:
\documentclass{article}
\begin{document}
Text line
\quad\parbox[b]{1.8cm}{this parbox is aligned
at its bottom line}
\quad\parbox{1.5cm}{center-aligned parbox}
\quad\parbox[t]{2cm}{another parbox aligned at its top line}
\end{document}
The \quad command produces some space; we used it to separate the boxes a bit. Here's the output:

Figure 2.13 – Aligned paragraph boxes
The output in Figure 2.13 shows how the alignment works. Text line is our base line, and referring to that base line, the following boxes are aligned at the bottom, the center, or the top line, respectively.
Exploring further features of paragraph boxes
\parbox is capable of doing even more. If you need advanced positioning, here's the complete \parbox definition:
\parbox[alignment][height][inner alignment]{width}{text}The meanings of the parameters are as follows:
height: If this optional argument isn't given, the box will have just the natural height of the text inside. Use this argument if you want to change the height of the box to make it bigger or smaller.inner alignment: If the height of the box is different from the natural height of the contained text, you might want to adjust the text position. You can add the following values:c: Vertically centers the text in the boxt: Places text at the top of the boxb: Places text at its bottoms: Stretches the text vertically (if possible)If you omit this argument, the
alignmentargument will be used here as the default value.
Take our previous demonstration example and try the effect of the optional arguments. Use the \fbox command, which helps to visualize the effect; if you write \fbox{\parbox[...]{...}{text}}, the complete parbox will be framed.
Using mini pages
Paragraph boxes are suitable for boxes with only a little text inside. In the case of a box containing a large amount of text, the closing brace could easily be forgotten or overlooked. The minipage environment would then be a better choice.
In this example, we will use the minipage environment instead of \parbox to get a sample of text with a width of just 3 cm:
- Modify the parbox example to get the following code:
\documentclass{article} \begin{document} \begin{minipage}{3cm} TUG is an acronym. It means \TeX\ Users Group. \end{minipage} \end{document} - Click on Typeset and look at the output:

Figure 2.14 – A minipage example
By using \begin{minipage}, we started a "page in a page." We specified that the width of 3 cm will be the mandatory argument. From this point onward, the text lines will have a width of 3 cm; they will be automatically wrapped and fully justified. We ended this restriction with \end{minipage}. Any text typed afterward would run over the complete body text width.
Preventing page breaks
There will never be a page break within a minipage environment, so that's a way to prevent page breaks within a text area. If that text within the minipage environment doesn't fit on the page, it will move to the next page.
The minipage environment accepts all arguments similar to \parbox with the same meanings.
If text is wrapped in a box or just in a normal line, it may automatically fit well. However, we may need to consider completing line breaking and justification manually. Let's see how to do this in the next sections.