
Required roles
You could be from the Partner or the customer side, I don't know. Not every employee can enter the Admin Center. In this section, we will look at both user types and at the roles that they need to have.
Internal users
For internal users, you must be one of the following to enter:
- Global administrator
- Dynamics 365 administrator
If you just need to manage Business Central environments, you can use the Dynamics 365 administrator role.
However, in most cases, the person who manages your Business Central infrastructure also creates users and assigns licenses for them, so this way, it is better to have a Global administrator role.
In the next screenshot, you can see how the roles assignment looks from the Azure portal side:
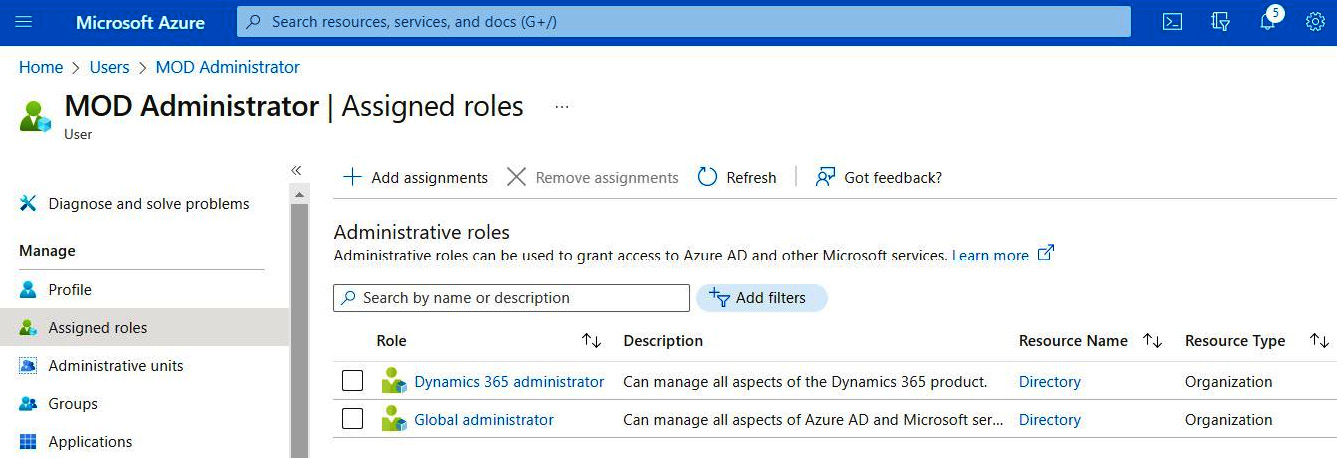
Figure 1.9 – Azure Active Directory roles assignment
In addition, you do not need a Dynamics 365 Business Central license to access the Admin Center or even Business Central itself, but without the license, you will have read-only access.
To assign a license to a user, your Global administrator should complete these steps:
- Open the Licenses page in Azure Active Directory, select All products and choose your Dynamics 365 Business Central license, Essentials or Premium, depending on what type of environment you have. You can see how many licenses you have and how many of them are currently in use and available to use:
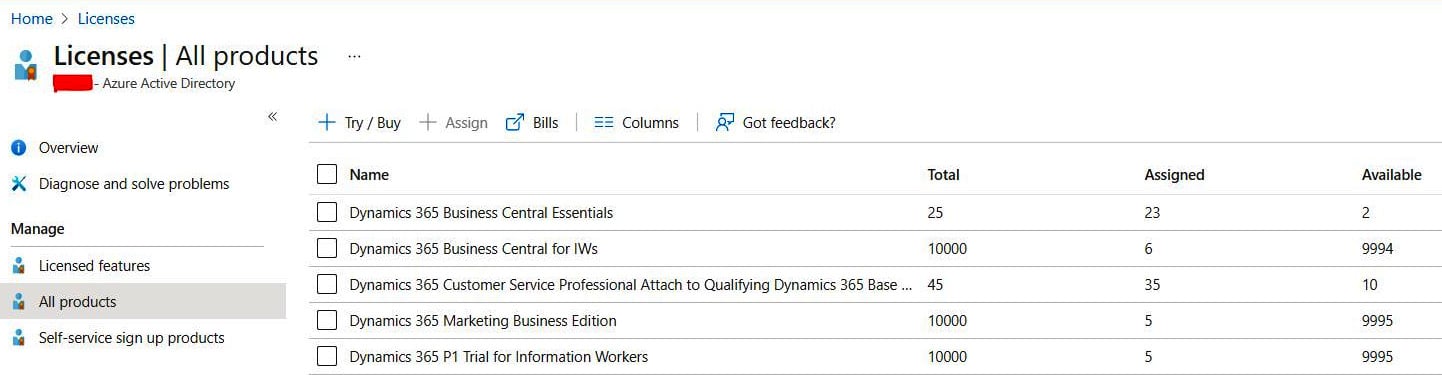
Figure 1.10 – License list
- Next, you will see your assigned users list. Then, click + Assign:
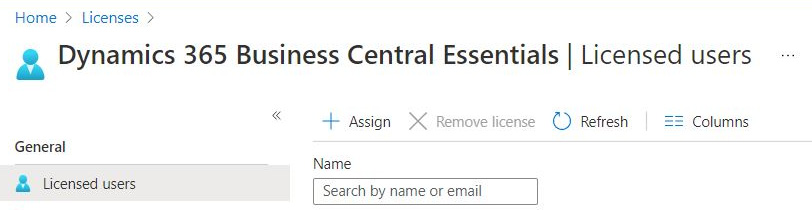
Figure 1.11 – License assignment 1
- In the final step, click on + Add users and groups to choose the users you want to assign. You can select several users or even user groups:
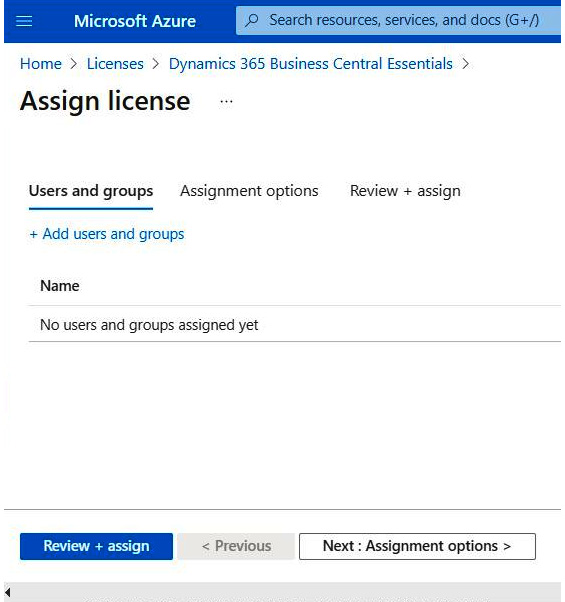
Figure 1.12 – License assignment 2
Delegated admins
A delegated admin is a reselling partner's account that has access to the customer's Dynamics 365 Business Central environment and Admin Center with administrator permissions. This account does not count in Business Central licenses usage, is not visible in the customer's Azure Active Directory, and the customer cannot manage this account, but the customer can remove delegated admin privileges from the partner.
If you are a partner, first of all, the customer must grant you administrator permissions through the relationship request. For this, you need to perform the next actions:
- Open the Partner Center.
- Open the CSP | Customers menu.
- Click on Request a reseller relationship:
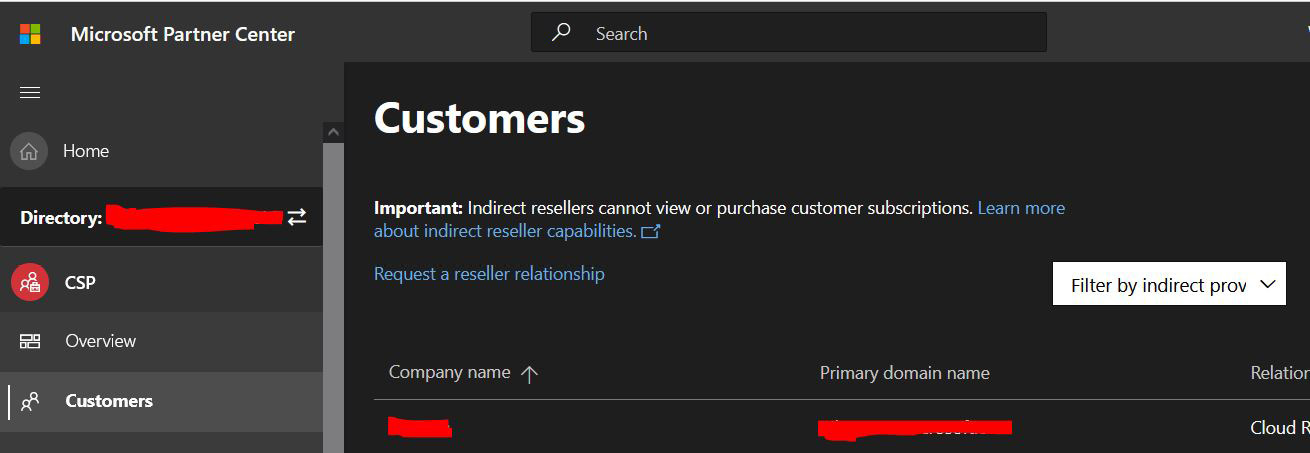
Figure 1.13 – Request a reseller relationship
- Choose your customer from the list, make sure that the Include delegated administration privileges for Azure Active Directory and Office 365 box is checked, and send the invitation by clicking the Done button:
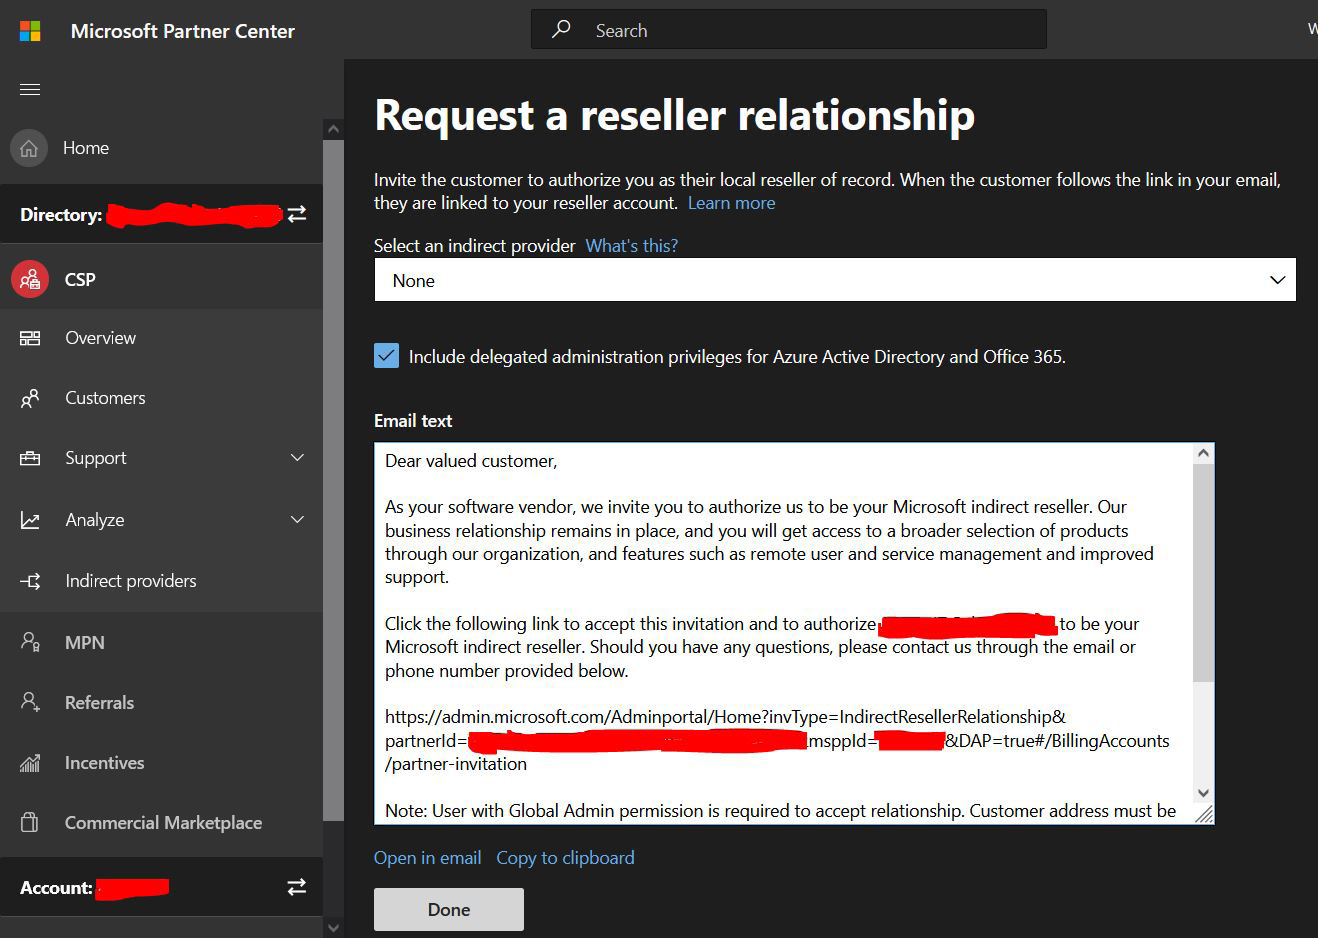
Figure 1.14 – Relationship invitation
After that, you need to be included in one of these two groups:
- Admin Agents – These will be Global administrators
- Helpdesk Agents – These will be Helpdesk administrators.
Both roles will have access to the Admin Center. The customer could remove this permission from a partner from the Microsoft 365 Admin Center: https://admin.microsoft.com/AdminPortal/Home#/partners/.