Book Image

Workflow Automation with Microsoft Power Automate - Second Edition

By : Aaron Guilmette
4 (2)
Book Image

Workflow Automation with Microsoft Power Automate - Second Edition

4 (2)
By: Aaron Guilmette

Overview of this book

MS Power Automate is a workflow automation tool built into MS 365 to help businesses automate repetitive tasks or trigger business processes without user intervention. It is a low-code tool that is part of the Microsoft applications framework, the Power Platform. If you are new to Power Automate, this book will give you a comprehensive introduction and a smooth transition from beginner to advanced topics to help you get up to speed with business process automation. Complete with hands-on tutorials and projects, this easy-to-follow guide will show you how to configure automation workflows for business processes between hundreds of applications, using examples within Microsoft and including third-party apps like Dropbox and Twitter. Once you understand how to use connectors, triggers, and actions to automate business processes, you’ll learn how to manage user input, documents, and approvals, as well as interact with databases. This edition also introduces new Power Automate features such as using robotic process automation (RPA) to automate legacy applications, interacting with the Microsoft Graph API, and working with artificial intelligence models to do sentiment analysis. By the end of this digital transformation book, you’ll have mastered the basics of using Power Automate to replace repetitive tasks with automation technology.
Table of Contents (22 chapters)
20
Other Books You May Enjoy
21
Index

Creating a basic form

The Forms application is relatively straightforward to use. In this section, we’ll create a basic form to collect user information. To create the form, follow these steps:

  1. Launch the Forms application by navigating to https://forms.office.com and signing in.
  2. If this is your first time signing into Forms, click the Create a new form button on the splash page. If you’ve logged into Forms previously, you can click the New Form button on the dashboard:

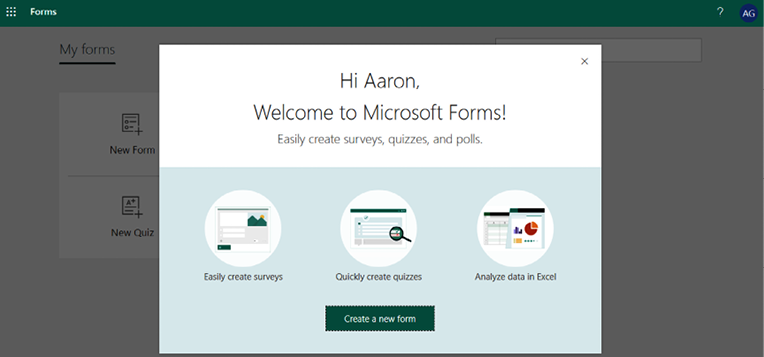
Figure 13.1: Microsoft Forms splash page

  1. Click the title area (Untitled form) text box and enter a name for the form, such as Customer Survey, as shown in Figure 13.2:

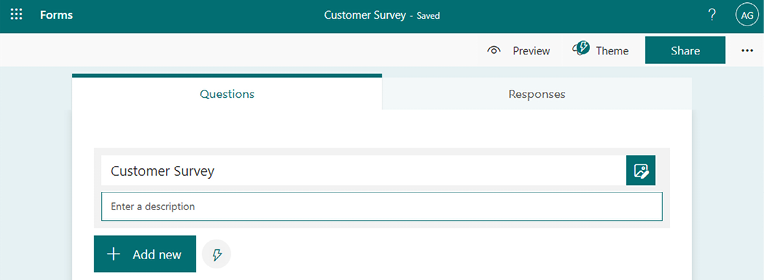
Figure 13.2: Adding a title to the form

  1. Click Add new to add a new item.
  2. Select the Text option:

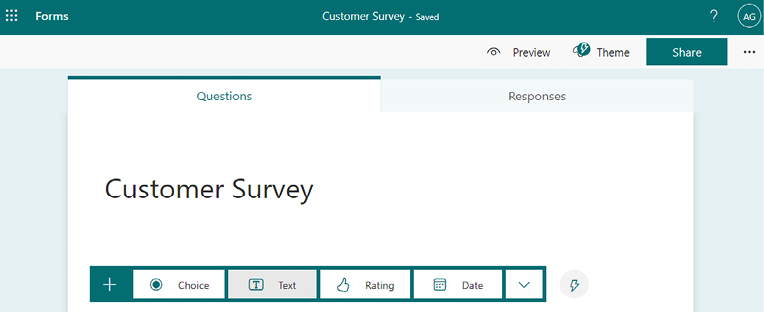
Figure 13.3: Selecting the text data type

  1. Enter the value CompanyName. You can enter something more descriptive if desired, but for the purposes...