

Getting to know the Visio user interface
A template is a predefined page size and orientation, along with a predefined number of stencils open by default. Each stencil has a number of master shapes that can be dragged and dropped onto the page. More stencils can be opened to provide more master shapes, either by searching for a published master shape or by adding a stencil to the user interface.
Creating a new Visio drawing within a Microsoft Teams channel will create a blank drawing with two open stencils, Basic Shapes, and Arrow Shapes, although more stencils can be added with the + button.
All of the different user interfaces have a ribbon along the top and a status area along the bottom. The bottom - right edge of the Visio app has the following elements in all of the editions:
- A Zoom out button
- A Zoom slider, which allows us to increment or decrement the zoom level
- A Zoom in button
- A Fit page to current window button, which zooms to display the whole page
There is a zoom level status message and a Give Feedback to Microsoft button too.
Understanding the desktop Visio user interface
This is the most feature-rich user interface of all Visio editions and has no fewer than four anchor windows that can be moved, anchored, or docked around the screen. These are the top four items displayed in the View | Show | Task Panes drop-down menu and are as follows:
- Shapes: This displays the stencils in our workspace, a Search shapes input box, and a More Shapes button
- Shape Data: This is an edit window for data within each selected shape or page
- Pan & Zoom: This is a window that always displays the whole page and the currently visible area as a red rectangle and can be used to pan and zoom around the page
- Size & Position: This is an editable window for the position, size, and angle of the selected shapes
The last one on the Task Panes menu is Navigation, which is a pane that always positions itself fixed on the far-right edge of the application windows, labeled as Diagram Navigation. This window allows us to re-order the tabbing order of diagram elements, which is especially important for increasing accessibility.
The Format Shape pane is opened from the menu displayed if you right mouse click on a selected shape and is also positioned to the right. It will be to the left of the Diagram Navigation pane if that is also open:
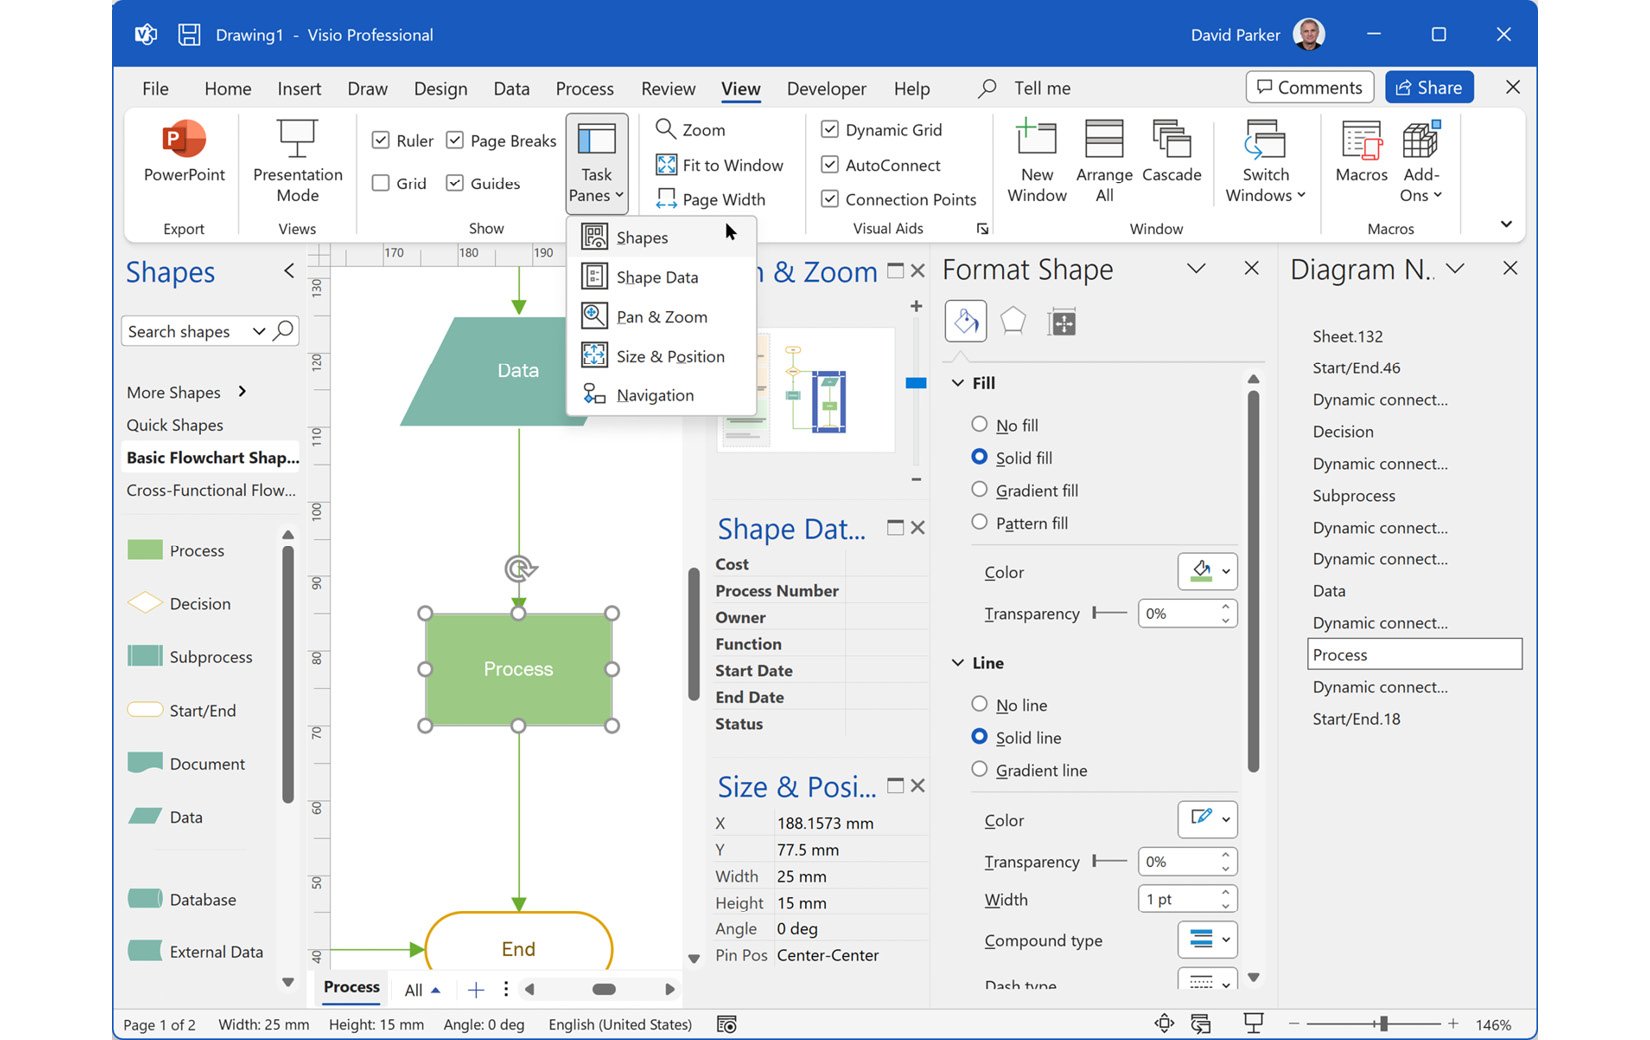
Figure 2.6 – The components of the desktop Visio user interface
There are some more task panes, such as Comments, that can be opened from ribbon tabs and will be introduced in later chapters.
Visio also allows us to draw primitive shapes, such as Rectangle, Ellipse, and Line or more complex shapes with the Freeform, Arc, and Pencil tools. These can be drawn by selecting an option from the Home | Tools group, where we can also find the Text and Connector tools:
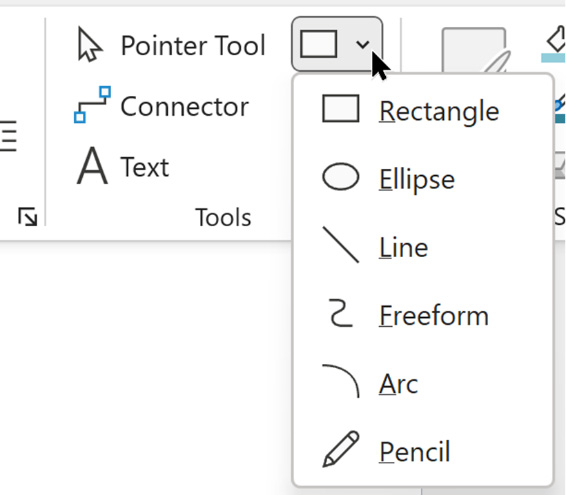
Figure 2.7 – Drawing a shape in desktop Visio
In desktop Visio, we can hold down the Shift key with the Rectangle and Ellipse tools to draw a square and circle respectively.
Pictures and Icons can be inserted from the Insert | Pictures ribbon group:
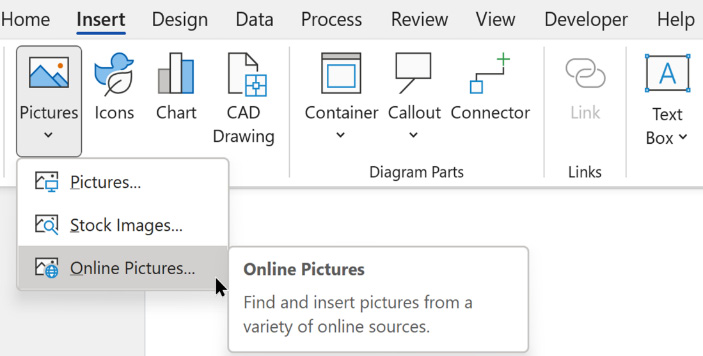
Figure 2.8 – Inserting an image in desktop Visio
The Insert | Diagram Parts ribbon group allows us to enclose shapes together within Container, associate a Callout shape with a target shape, or link shapes together with Connector. We cannot create the Container and Callout shapes currently in Visio for Web, and the Connector tool is also not available in Visio for Web. However, connector shapes can be created with the auto-connect arrows and by dragging and dropping connector shapes from a few stencils. For example, we can search for connector in the Shapes panel.
Important note
There is a particularly significant difference between shapes that are created by dragging and dropping a master shape from a stencil and those created by drawing, grouping, and inserting images. The ones from a stencil are all linked to a master shape in the document’s own, normally hidden stencil. The last two chapters, Chapter 10, and Chapter 11, will show us how to take advantage of this to increase productivity.
Understanding the Visio online editor user interface
This interface for Visio is the same online or within Microsoft Teams and has far fewer components than the desktop interface. There are only three task panes:
- Shapes: This is fixed to the left edge of the Visio app
- Format Options: This is opened from the menu that appears when you right-click a shape and it is fixed to the right edge of the Visio app and shares this position with Comments
- Comments: This can be opened from a button present in the right corner of the header bar
The Search for shapes textbox allows us to search for more shapes to add the stencil that the found shape is on:
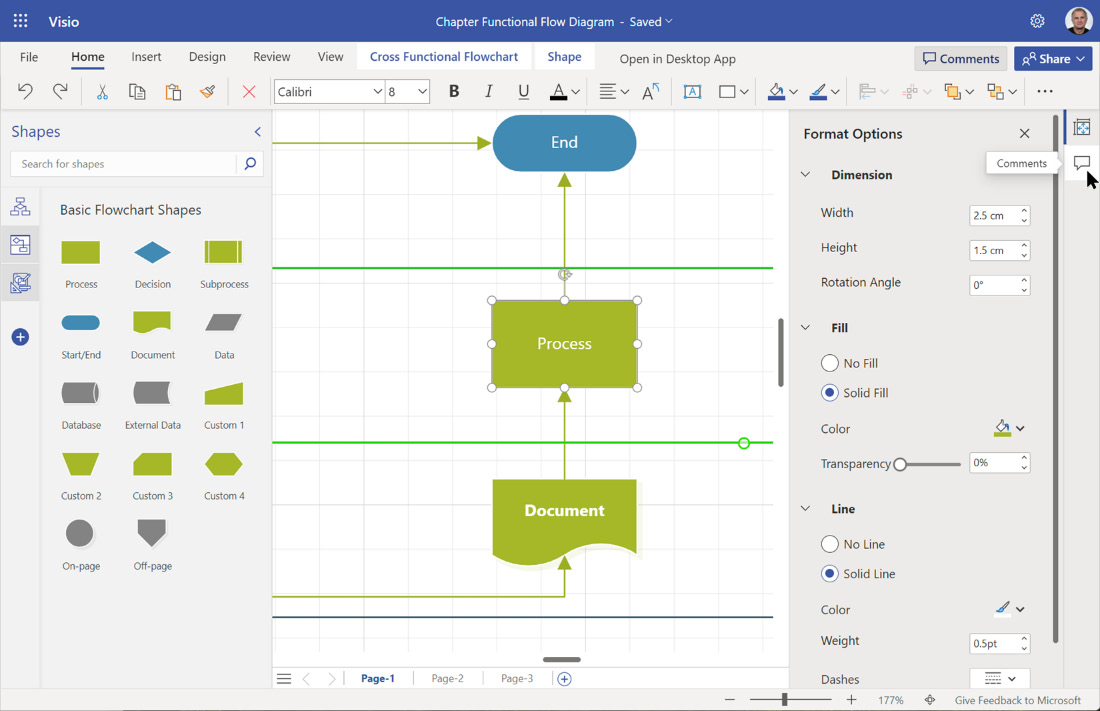
Figure 2.9 – The components of the Visio editor user interface
The left bar of the Shapes pane has a button for each open stencil, with a + sign button to add another stencil.
Important note
A Visio Plan 2 subscriber has an additional Shapes in the document button above the + button. This will show the master of each master shape instance that exists in the document. This is equivalent to More Shapes | Show Document Stencil in the desktop version of Visio.
The shapes that are not instances of a master shape are created with the Insert ribbon. These can be images from several sources, or a primitive shape, such as Rectangle, Line, or Ellipse.
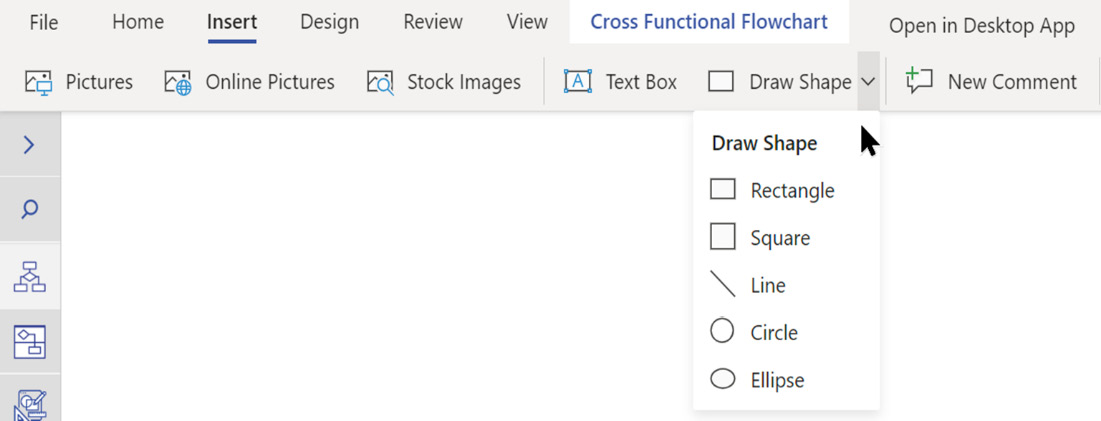
Figure 2.10 – Inserting images and drawing shapes in the Visio online editor
Square is just Rectangle where the width is equal to the height, and similarly, Circle is just Ellipse, as far as Visio is concerned. Notice that there is currently no option to create the desktop Visio Freeform or Arc shapes or to use the Pencil tool.
Understanding the Visio Reading View user interface
This is the same as selecting View | Reading View in the Visio online editor. It has the following options:
- Pan & Zoom: This is an anchored window that can be opened from a button on the bottom right of the status bar
- Shape Info: This is a task pane, fixed to the right edge, which displays Hyperlinks and Shape Data of the currently selected shape
- Comments: This is a pane that allows you to view and add threaded comments and
@mentions
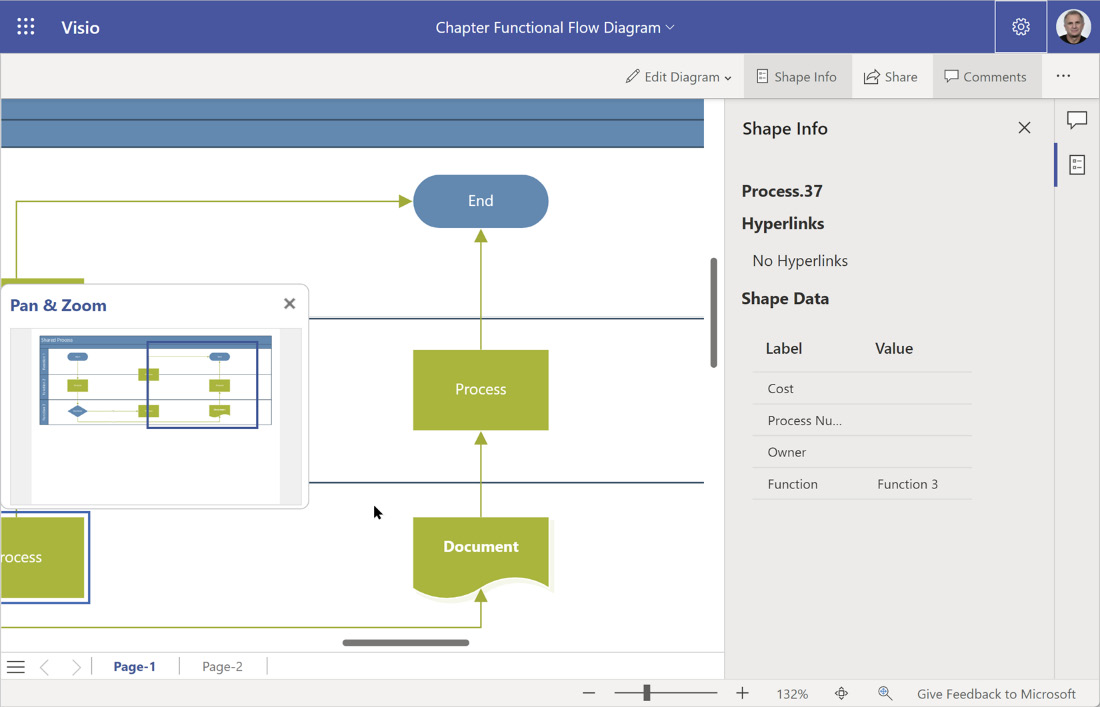
Figure 2.11 – The components of the Visio Reading View user interface
We can switch to editing the current diagram if we have a suitable license. Within the Microsoft Teams context, we will get the options Edit in Teams, Open in Desktop App (if we have desktop Visio installed), or Open In Browser:
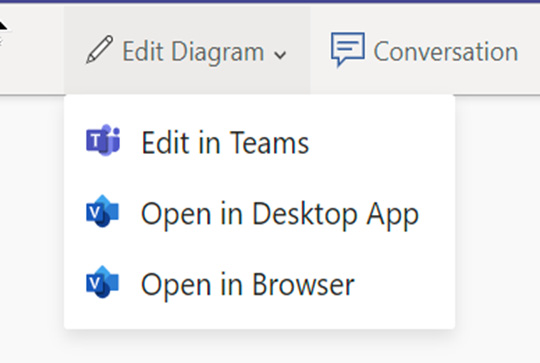
Figure 2.12 – The Visio file viewer Edit Diagram menu in Microsoft Teams
If you are viewing the Visio document in the browser, then the options are Edit in Browser or Edit in Desktop App (if Visio for Desktop is installed). The last option, View in legacy Visio service, is no longer available and can be ignored.
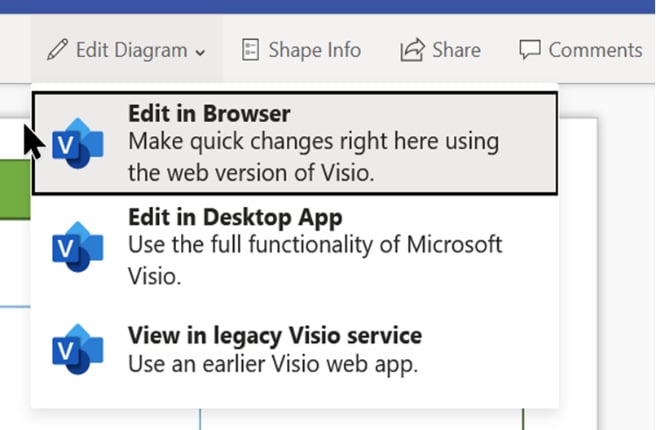
Figure 2.13 – The Visio online Edit Diagram menu options
We now have a better understanding of the Visio user interface in the online and desktop editions; however, we may want to use more than the master shapes on the stencils opened by the template defaults.
Adding stencils to the workspace
The template will usually open one or more default stencils, but we can add more stencils to our workspace to give us additional master shapes to drag and drop onto our page.
In Visio online, we can use the Add Shapes button at the bottom of the Stencils tab on the left of the Shapes pane, as shown in the left section of the following screenshot.
In the Visio desktop version, there is a More Shapes > button below the Search for shapes input box. This button will list the categories of stencils that are installed locally on our PC:
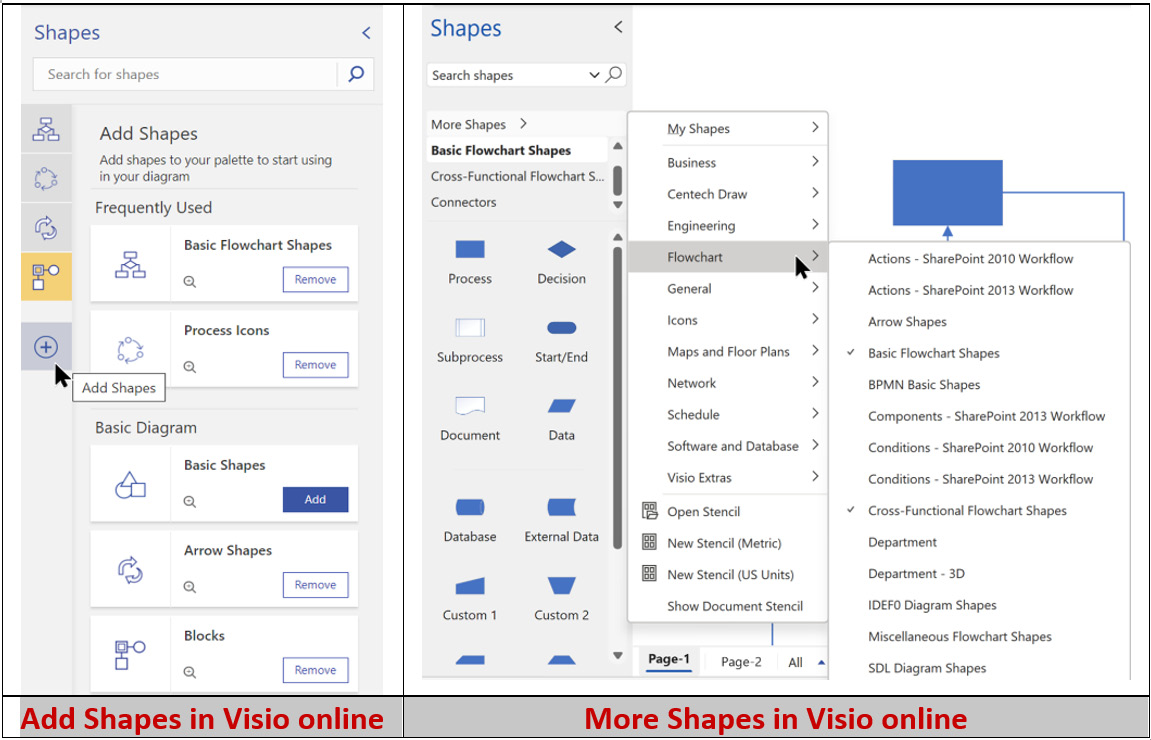
Figure 2.14 – Adding stencils in Visio online and desktop
Note that Visio desktop has a My Shapes category that can include any stencils that we add to the <Documents>/My Shapes folder locally.
We may also see categories that are not provided by Microsoft but are from a third party and have been installed locally, such as the Centech Draw category in the previous example.
The menu opened by the More Shapes > button also has the following commands at the bottom:
- Open Stencil: This opens Windows File Manager to select a Visio stencil (
*.vssxor*.vssm) from our network folders - New Stencil (Metric): This creates a new stencil with Metric units
- New Stencil (US Units): This creates a new stencil with US Units
- Show Document Stencil: This displays Document Stencil for the active document
Searching for shapes
In Visio online, we can use the plus button at the bottom of the Stencils tab on the left of the Shapes pane or enter a search term in the Search for shapes input box.
When the search shows results, which are grouped by the stencil that they are from, we can either drag and drop from the Results pane onto the page, or we can choose to click the small plus sign in a magnifier glass to the right of the stencil name. This will add the stencil to our workspace.
In the Visio desktop version, the Shapes search feature will check the locally installed and the Microsoft online stencils. We can drag and drop directly from the Local results tab, but we must download the online stencil to add it to our workspace before dragging and dropping a master shape:
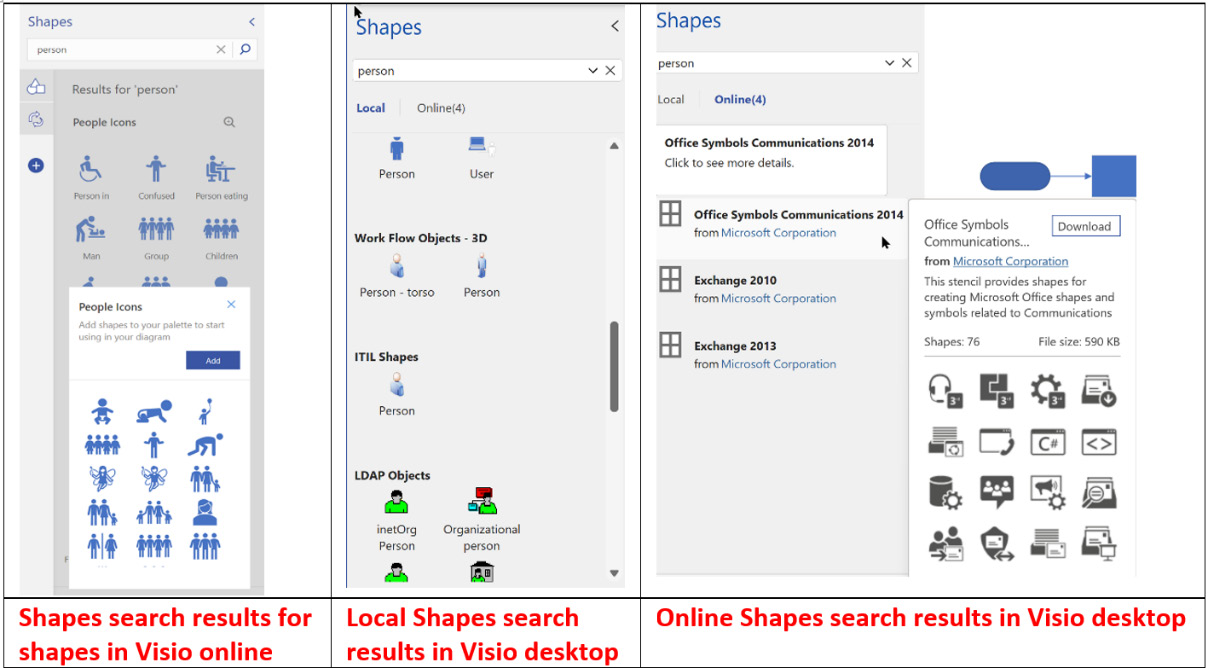
Figure 2.15 – Searching for more shapes in Visio online and desktop
We have learned how to add more stencils to our workspace in Visio online and Visio desktop, and we have seen how we can search for more Microsoft-provided master shapes.
Visio desktop users have the additional capability of adding more stencils from third-party or internal developers. They can also create their own custom master shapes, add them to a custom stencil or template, and distribute them to others. These custom templates and stencils can be installed so that they are available in the Visio desktop user interface.