Book Image

Learn Microsoft Office 2019

By : Linda Foulkes
Book Image

Learn Microsoft Office 2019

By: Linda Foulkes

Overview of this book

Learn Microsoft Office 2019 provides a comprehensive introduction to the latest versions of Microsoft Word, Excel, PowerPoint, Access, and Outlook. With the help of illustrated explanations, this Microsoft Office book will take you through the updated Office 2019 applications and guide you through implementing them using practical examples. You'll start by exploring the Word 2019 interface and creating professional Word documents using elements such as citations and cover pages, tracking changes, and performing mail merge. You'll then learn how to create impressive PowerPoint presentations and advance to performing calculations and setting up workbooks in Excel 2019, along with discovering its data analysis features. Later chapters will focus on Access 2019, assisting you in everything from organizing a database to constructing advanced queries. You'll then get up to speed with Outlook, covering how to create and manage tasks, as well as how to handle your mail and contacts effortlessly. Finally, you'll find solutions to commonly encountered issues and best practices for streamlining various workplace tasks. By the end of this book, you'll have learned the essentials of Office business apps and be ready to work with them to boost your productivity.
Table of Contents (26 chapters)
1
Section 1: Word
6
Section 2: PowerPoint
10
Section 3: Excel
14
Section 4: Common Tasks
17
Section 5: Access
21
Section 6: Outlook

Formatting text, styles, and paragraphs

Formatting means changing the way your document looks. A character is a letter, number, or symbol that makes up the text of your document. We will look at the formatting of characters and paragraphs in this section.

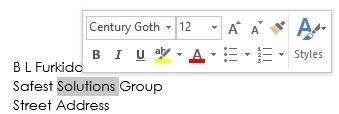
To format text in a document, we can use the icons under the Home tab or the mini toolbar. Although you cannot edit through the mini toolbar, when select text in a document, it offers you the frequently used formatting options. If you rest your mouse pointer on the mini toolbar, it stays active. If you ignore it, the mini toolbar becomes transparent, disappears, then reappears when you next select some text to format:

Remember that the icons in the ribbon can easily be identified by placing your mouse on the icon for a second. This presents a tooltip with a short description of the icon. We will investigate the various formatting options under the Home tab in the following section.

Basic text formatting

  1. Select some text to format in your document.
  2. Locate the Font group, then select the Font drop-down arrow.
  1. A list will unfold, listing a number of fonts. Your frequently used fonts are listed near the top of the list. The list is in alphabetical order. Each font type presented in the drop-down list is written in that font, demonstrating how it will look. Select the desired font by selecting it with your mouse pointer. Alternatively, start typing the font name you want to use, then press Enter on your keyboard to apply it to the selected text:
  1. To select a point size to apply to the text, simply click on the tiny arrow just after the font face list. Choose a point size from the list provided or enter a font size of your own by typing it into the number placeholder provided. For example, you can type the size you require into the text area, replacing the size 11 font with size 13. Don't forget to press Enter once you are done!
  2. Next to the font size icon are two icons—one for increasing and the other for decreasing the font size. This is another quick method of changing the size of elements in a document:
  1. The bold attribute can be applied to make text bold by clicking on the bold icon on the toolbar. The procedure is the same for the italic and underline icons. By clicking on the drop-down arrow to the right of the underline icon, a list of underline styles will appear. There are also shortcut keys for all of these attributes, which are Ctrl + B, Ctrl + I, and Ctrl + U, respectively:

If you see that a formatting control (such as bold, italic, or underline) is selected, it means that the option is already active on the selected text or paragraphs in the document. To remove the formatting, simply select the paragraph or text that has the formatting applied to it and click on the relevant icon on the ribbon. Sometimes, there are multiple formats applied to the same selection in a document. If so, you will need to remove the formats from them individually. This concept works in much the same way as a light switch; you can switch it on and off using the same button.

Changing the font colors

  1. Select some text and locate the font color icon on the toolbar:
  1. In the preceding screenshot, the A icon has a colored line directly below it. This indicates what the last selected font color was. If you select some text and then click on this icon, the selected document text will change to this color. The icon's line color is black by default. To change the color, click on the arrow next to the font color icon. A color palette will appear, where you can select a different color.
  1. Click on the More Colors... option in the font drop-down list. A dialog box will appear, where you can select from a palette of additional colors:
  1. By clicking on the Custom option above the color wheel, you are able to select specific tones of color using either the RGB or HSL color models:
  1. Once a specific shade of color is selected for a particular purpose, it is always a good idea to jot down the RGB color model numbers. This way, if you want to produce the exact same color again—for example, for some promotional material for a marketing brochure—you can type in the specific RGB colors into the relevant fields to get the same color. This is especially useful when working across multiple Office 2019 applications.
To change a paragraph's fill color, use the fill bucket icon located under the Paragraph group. Apply the color to text or an entire paragraph by selecting the text. Alternatively, use the borders and shading icon, also located under the Paragraph group. Select the desired option in the Apply To: drop-down list box.

Adding text effects

The text effects and typography icon is located under the Font group. Simply click on the A icon to add some creativity to selected text or paragraph headings:


Removing text formatting

The clear all formatting icon is an excellent way of getting rid of multiple formats on selected text, as well as to return text to the plain default text:

  1. Simply highlight the text that you wish to remove formatting from.
  2. Click on the clear all formatting icon:
  1. The text is now set to the normal font attributes.

Changing the casing of text

Word specifically provides an icon to change between different text case options. This icon is located under the Home tab, to the right of the increase and decrease font size icons:

  1. Select some text or a paragraph.
  2. From the Home tab, select the change case icon:
  1. Select the case you would like to apply to the selected text or paragraph.
  2. You can also use a shortcut key to cycle through the change case options. After selecting the text that you want to change to another case type, press the Shift key on your keyboard and hold it down while you press the F3 function key (if you are using a laptop, you may need to press the Shift key, the Fn key, and the F3 key together).

Copying multiple formats

The format painter tool allows you to copy multiple formats from selected text to other parts of a file. It is normally used to copy heading styles from one heading to another, which can save a huge amount of time instead of repeating formatting manually over and over on each individual heading:

  1. Select some text to format.
  2. Format the text—for instance, set it to bold or underline or change the font color to blue, the font size to 20, or the font face to Courgette.
  3. Make sure the text stays selected once the formatting is complete.
  4. Double-click on the Format Painter icon located under the Clipboard group:
  1. Double-clicking on the Format Painter icon allows you to copy the formatting more than once.
  2. Notice that the mouse pointer changes to a brush shape when hovering over text in the document:
  1. Select the next heading in the document to apply the format. Once this is complete, you will see that the text is now formatted in the same way as the first heading.
  2. Repeat this process until each of your document headings have the new format.
  3. To stop the format painter, simply put the icon back in place by clicking on the format painter icon on the ribbon. Alternatively, press the Esc key on your keyboard.
The format painter icon is also available on the mini formatting toolbar.

Formatting using font attributes

Some character formats are not available through the toolbar icons. You will have to use the Font dialog box to access them:

  1. Select the text you want to format.
  2. Go to Home | Font, then click on the attributes below the Effects heading that you would like to add to the selected text:

Once you have altered the options in this dialog box, you will be able to preview the changes at the bottom of the dialog box. Be sure to go to the underlined options to see what options are available to enhance your document.

Changing the text alignment options

There are different types of alignment options in Word 2019. You will find each type located under the Home tab:

The alignment options are located under the Paragraph group, as shown. After applying each of the alignment types, you will see the following result:

The justify option is very useful when you want to create professional documents to meet any legal formatting requirements.

Applying a drop cap

A drop cap is the inclusion of a large capital letter at the start of a paragraph. Dropped caps are usually found in children's storybooks:

  1. Select the first letter of a word at the start of a paragraph.
  2. Click to select the Insert tab, locate the Text group at the end of the ribbon, then click on the drop cap icon.
  3. Choose a drop cap style to apply to the selected letter:
  1. The drop cap is inserted into the document:
  1. From the Drop Cap Options… option, you can edit the font face, line, or distance attributes.

Inserting special characters and symbols

  1. Click at the end of a word or anywhere in a document where you need to place a symbol.
  2. Click on the Insert tab, locate the Symbol group at the end of the Insert ribbon, then click on the drop-down arrow next to Symbol:
  1. Your recently used symbols are listed in this list. To access more symbols, click on More Symbols… to populate the dialog box with a range of symbols:
  1. Click on a symbol that you wish to insert to the document. You can apply formatting options to symbols just as you would any other text.
  2. Special characters allow you to insert different dash types, as well as commonly used characters such as the copyright, registered trademark, and trademark symbols:

You can also use your keyboard to insert symbols to a Word document:

  • To insert the copyright symbol, type (c) and you will get the © symbol.
  • To insert the trademark symbol, type (tm) and you will get the ™ symbol.
  • To insert the registered trademark, type (r) and you will get the ® symbol.

Indenting paragraphs

Indents are applied using various methods. The simplest method is to use the increase or decrease indent icon, which we highlighted earlier. Alternatively, you can use the ruler bar to manipulate indent icons along the ruler or go to the Paragraph dialog box to set indents.

On your ruler bar, you will find the indent button—it looks like an egg timer. We will use this indent button to create various types of indents in our document. Select a paragraph to indent, then click on the increase indent button in the Paragraph group:

  • First-line indent: Select a paragraph to apply an indent to and drag the top slider of the egg timer to the position you want on the ruler bar:
  • Hanging indent: Select a paragraph to apply an indent to and drag the hanging indent slider (the middle slider of the egg timer) to the position you want on the ruler bar:
  • Left indent: Select a paragraph to apply an indent to and drag the left indent marker (the entire egg timer) to the desired position on the ruler:
  • Right indent: Select a paragraph to apply an indent to and drag the right indent marker to the desired position on the ruler:

Although it is not that important to check whether the indents are positioned at the correct position on the ruler, we need it to be accurate in the certification exam. Therefore, it is imperative that you go to the Paragraph dialog box and set indents with accurate measurements:

Setting spacing before or after a paragraph

You might want to automatically increase or decrease the amount of space before or after a paragraph so that the document looks consistent and flows easily. This is especially important when typing a thesis. The secret is not to format the document beforehand so that the result is consistent.

Remember that this option replaces a certain point size of space either before or after each paragraph marker. Every time you press the Enter key after a heading or a paragraph of text, Word automatically adds a certain amount of space either before or after the new paragraph. The amount of space it inserts is controlled by the space before or space after settings.

Follow these easy steps to set the spacing:

  1. Highlight the paragraphs you want to apply the spacing to.
  2. To apply or remove the spacing, use the line and paragraph spacing drop-down icon. Select the desired option at the bottom of the list. Don't add spaces between paragraphs of the same style.
  3. To control the amount of space you would like either in front of or after a paragraph, go to the Paragraph dialog box. Right-click on the selected text and choose Paragraph…:
  1. The Paragraph formatting dialog opens.
  2. In the Spacing section, adjust the paragraph spacing options as desired by clicking with the mouse pointer on the up arrow next to the Before: option. In the case of the preceding example, we used 6 pt before the paragraphs.
  1. Add 6 pt of blank space to the After: field.
  2. Click on OK to save the change. Note the changes.

Here, we can see these changes applied to the preceding example paragraph:

If styles have been applied throughout a document when formatting, it is important not to add a space between paragraphs of the same style. To explain further, if I applied 18 pt of spacing (after each paragraph) to the entire document but do not wish to add any extra space after all the main headings (which I have used the Heading 1 style for), then this option comes in handy. Adding a checkmark to this option prevents space from being added after all the Heading 1 styles in the document:

Adjusting the line spacing

To set the line spacing, try one of the following methods:

  1. Click on the paragraph that you would like to set the line spacing for.
  2. Click on the Paragraph dialog launcher to the right of the Paragraph group.
  3. Locate the Line Spacing drop-down list to select the desired spacing:
Alternatively, you can either press Ctrl + 5 on your keyboard to set the line spacing to 5 lines, Ctrl + 2 for double-line spacing, or Ctrl + 1 to return it to single-line spacing. You could also use the line spacing icon in the formatting toolbar to change the line spacing.

Creating a new style

Word 2019 also offers styles, which are a named set of formatting conditions to help you create a consistent-looking document, which is especially useful for documents with more than one page. Instead of having to apply multiple attributes, such as the color, size, font, spacing, and alignment, separately on each part of your document, Word offers predefined collections of attributes that can be quickly applied to parts of your document.

The existing styles in the Word 2019 environment are located under the Home tab. Title, Heading 1, Heading 2, and Heading 3 are the most popular options. You will also see the Normal style in the Styles drop-down list:

  1. Select some text in the document and format the text, choosing the formats of your choice (for example, underline, dark blue color, size 12, and the Courgette font type):
  1. With your selected text still highlighted, click on the drop-down arrow of the Styles group and select Create a Style:
  1. A dialog box will appear asking you to name the style:
  1. Click on Modify... to access more options relating to the style.
  2. Click OK to save the style to the gallery:
  1. The new style is now visible in the Styles group and you can apply it to other headings or text throughout your document.

Modifying a style

At some stage, you may need to update a style, such as with a different font attribute. There are a few ways to do this. We will cover the most efficient method here:

  1. Select the text in the document that already has the style applied to it.
  2. Make the formatting changes to the text.
  3. With the text still selected, right-click on the existing style name in the Styles group.
  4. Click on Update ReferenceStyle to Match Selection (ReferenceStyle is the name that we chose for the style earlier):
  1. The style is updated to include the changes. The beauty of this tool is that any text that has the old style applied to it in the document will update automatically!