Book Image

AWS Automation Cookbook

By : Nikit Swaraj
5 (1)
Book Image

AWS Automation Cookbook

5 (1)
By: Nikit Swaraj

Overview of this book

AWS CodeDeploy, AWS CodeBuild, and CodePipeline are scalable services offered by AWS that automate an application's build and deployment pipeline. In order to deliver tremendous speed and agility, every organization is moving toward automating their entire application pipeline. This book will cover all the AWS services required to automate your deployment to your instances. You'll begin by setting up and using one of the AWS services for automation –CodeCommit. Next, you'll learn how to build a sample Maven and NodeJS application using CodeBuild. After you've built the application, you'll see how to use CodeDeploy to deploy the application in EC2/Auto Scaling. You'll also build a highly scalable and fault tolerant Continuous Integration (CI)/Continuous Deployment (CD) pipeline using some easy-to-follow recipes. Following this, you'll achieve CI/CD for a microservice application and reduce the risk within your software development life cycle globally. You'll also learn to set up an infrastructure using CloudFormation templates and Ansible, and see how to automate AWS resources using AWS Lambda. Finally, you'll learn to automate instances in AWS and automate the deployment lifecycle of applications. By the end of this book, you'll be able to minimize application downtime and implement CI/CD, gaining total control over your software development lifecycle.
Table of Contents (11 chapters)

Getting started with CodeCommit for HTTP users

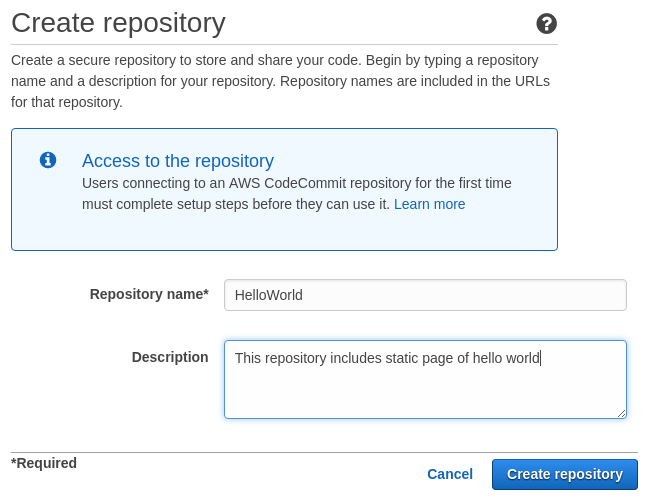
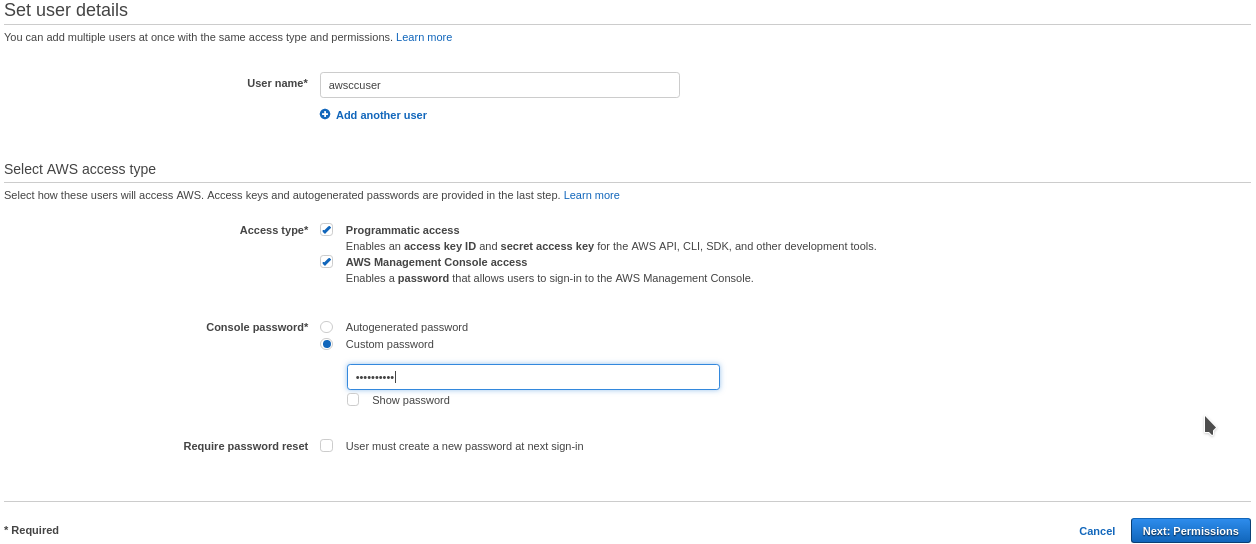
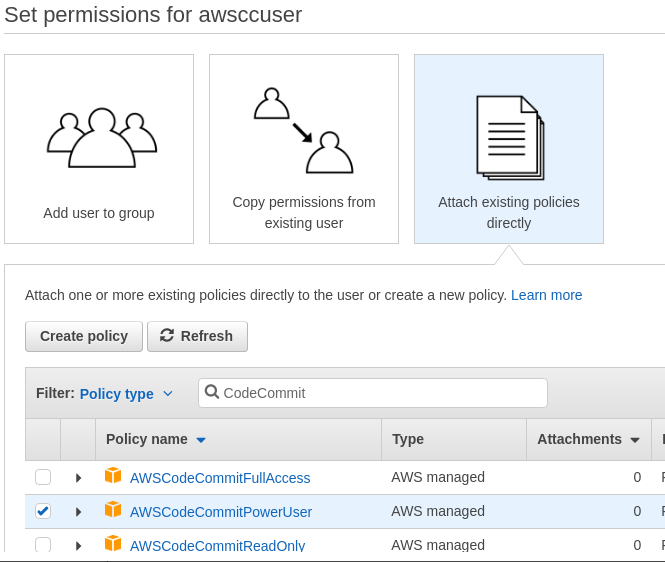
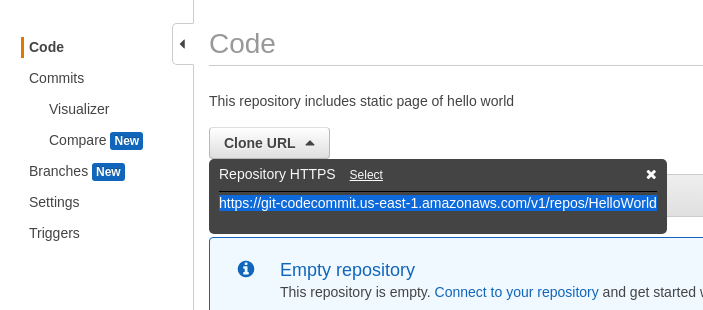
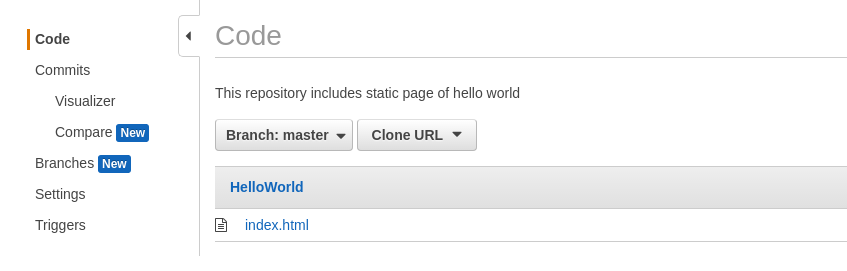
AWS provides both Console and CLI access to create a repository in AWS CodeCommit. Let's get started and create a repository, then clone it in development using HTTPS credentials.

How to do it...

  1. Open the AWS CodeCommit console at https://console.aws.amazon.com/codecommit.

  1. On the welcome page, choose Get Started Now (if a dashboard page appears instead of the welcome page, choose Create repository):
  1. Then, we will get a box, Connect to your Repository, which will provide further instructions on ways of connecting to CodeCommit via HTTPS or SSH. We can close that and move further, but it's advisable to read every message or information prompt from AWS.

  1. Now, we will clone the repository, but before that, we need HTTPS Git credentials. We will get the HTTPS Git credentials of an IAM user, which is attached with the policy of CodeCommit access through IAM console. So let's try to create a user first, assign the CodeCommit policy, and get the HTTPS Git credentials for that user.
  2. Open the AWS IAM console by hitting https://console.aws.amazon.com/iam in a new tab.
  3. Click on Add User.
  4. Give IAM user a username as awsccuser and check both the Access type boxes (Programmatic access /AWS Management Console access), set a Custom password, and click on Next:Permission:
  1. We then get the set permission on the username page. On this page, first click on Attach existing Policies directly after which we search CodeCommit in the search box of Policy type:
  1. Click on the AWSCodeCommitPowerUser policy and click on Next.
  2. Post review, click on Create User.
  3. Download credentials provided by the AWS IAM user; these credentials are basically secret and access key.
  4. After that, we need to click on the User section. Then, click on Security credentials.

  1. Scroll down and we will see a section called HTTPS Git credentials for AWS CodeCommit; after that, click on Generate:
  2. Once we click on Generate, we will get a username and password; then, click on Download credentials.
  3. Again, let's go to the CodeCommit console and click on Clone URL and then HTTPS.
  4. Copy the link and enter the following command on the development machine:
    # git clone https://git-codecommit.us-east-    1.amazonaws.com/v1/repos/HelloWorld
    root@awsstar:~# git clone https://git-codecommit.us-east-    1.amazonaws.com/v1/repos/HelloWorld
Cloning into 'HelloWorld'...
Username for 'https://git-codecommit.us-east-1.amazonaws.com': awsccuser-at-160384169139
Password for 'https://awsccuser-at-160384169139@git- codecommit.us- east-1.amazonaws.com':
warning: You appear to have cloned an empty repository.
Checking connectivity... done.
root@awsstar:~# ls
HelloWorld
root@awsstar:~#
  1. We just cloned an empty repository; now, it's time to put a sample index.html file in the CodeCommit HelloWorld repository. We will now create a file named index.html and put some content in it. Add content and commit it, before pushing it to the repository:
     root@awsstar:~# cd HelloWorld/
root@awsstar:~/HelloWorld# echo '<h1> Hello World </h1>' > index.html
root@awsstar:~/HelloWorld# git add .
root@awsstar:~/HelloWorld# git commit -m " index.html push "
[master (root-commit) bc76f76] index.html push
1 file changed, 1 insertion(+)
create mode 100644 index.html
root@awsstar:~/HelloWorld# git push origin master
Username for 'https://git-codecommit.us-east-1.amazonaws.com': awsccuser-at-160384169139
Password for 'https://awsccuser-at-160384169139@git- codecommit.us- east-1.amazonaws.com':
Counting objects: 3, done.
Writing objects: 100% (3/3), 233 bytes | 0 bytes/s, done.
Total 3 (delta 0), reused 0 (delta 0)
To https://git-codecommit.us-east- 1.amazonaws.com/v1/repos/HelloWorld
* [new branch] master -> master
  1. Now, we pushed a file to our newly created repository in AWS CodeCommit. To verify this, let's see the AWS CodeCommit console, and see whether the checked-in file is there or not (refresh the CodeCommit console, if you were there from the start):

  1. To see more details, click on Commits, and see which user has committed and which files have changed:
  1. This shows information such as when index.html got pushed, on what date, and by whom.

  1. Now, to wrap up or to delete the repository, click on the Settings section and on the Delete Repository; then a prompt box will pop up, where we put the repository name and click on Delete:
  1. After clicking on Delete, your repository will get deleted: