For any environment that spans multiple cloud providers, cloud security services must span multiple cloud platforms as well.
Connecting a Google Cloud Platform (GCP) environment to Microsoft Defender for Cloud involves several steps. We will break this process into separate recipes so that this will be easier to understand and implement.
To onboard a Google Cloud Platform account into Microsoft Defender for Cloud, you need to configure GCP Security Center and enable Security Health Analytics first.
Getting ready
Before configuring GCP Security Center, you should have GCP Organization and a Google Cloud Identity account set up.
Open a web browser and navigate to https://console.cloud.google.com.
How to do it…
To onboard a GCP account into Microsoft Defender for Cloud, complete the following steps:
- In GCP Console, in the top-right corner select, an account. The selected account should belong to a GCP organization that contains or will contain a project you will connect to Security Command Center. If you already have a project, skip to Step 4.
- If the dashboard area is empty and you do not have a project, click Create project.
- On the New Project page, enter a value for Project name. Choose the project's Organization and Location and click Create.
- On the left-hand side menu, under Security, click Security Command Center. If you get a message stating Page not viewable for projects. This page is only viewable in the project/folder scope for Premium Tier organizations. Upgrade your organization to Premium, then from the drop-down menu on the right, select an Organization and click Select.
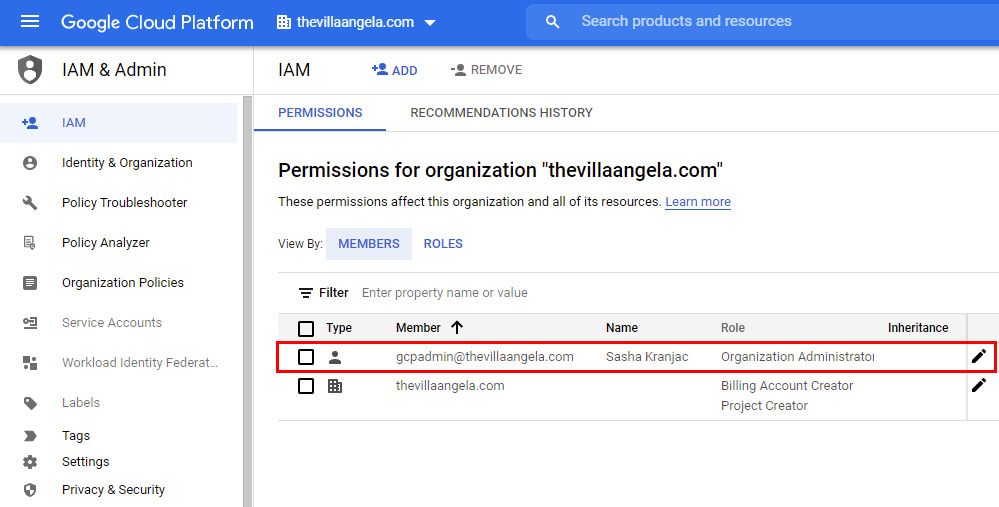
- If you get an error message stating You do not have sufficient permissions to view this page, from the top-left corner, click Google Cloud Platform. Then, under IAM & Admin menu, select IAM:
Figure 2.28 – Editing the service account role permissions
- Identify the account with an Organization Administrator role or the account that you are currently logged into and using to set up Security Command Center. To edit the account, click the pencil icon next to it.
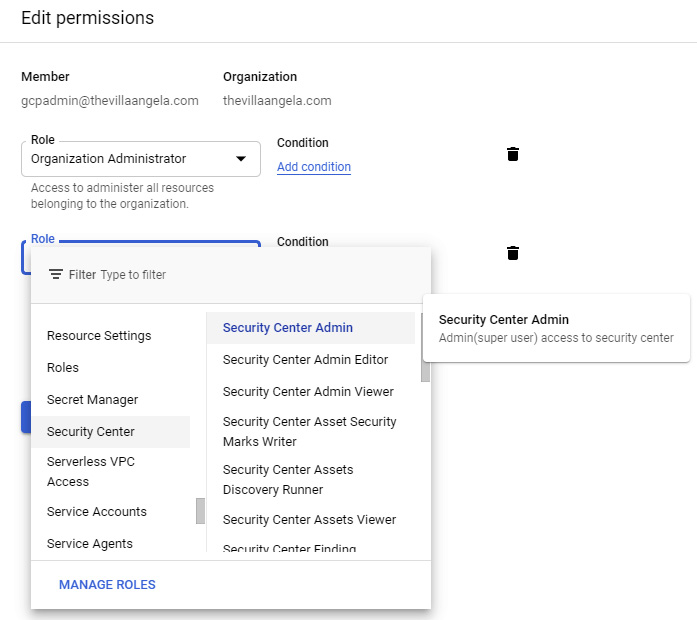
- Click + ADD ANOTHER ROLE to add a role. Add the Security Center Admin, Security Admin, and Create Service Account roles and click SAVE:
Figure 2.29 – Adding roles to a service account
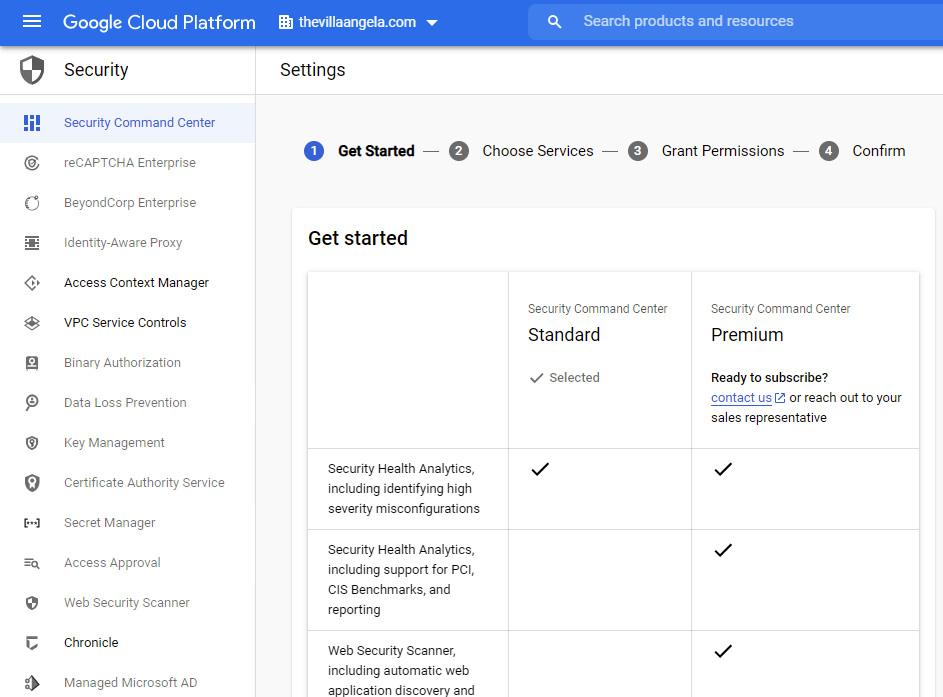
- If you receive a message stating that Security Command Center has not been onboarded or activated yet, refresh the browser tab. Make sure you selected the right organization. After few moments, the Settings – ❶ Get started page should open, and Security Command Center, Standard tier should be selected. Click NEXT:
Figure 2.30 – Security Command Center – Choosing a tier
- On the ❷ Choose Services page, check whether Security Health Analytics is Enabled by default, and review the rest of the information. Click NEXT.
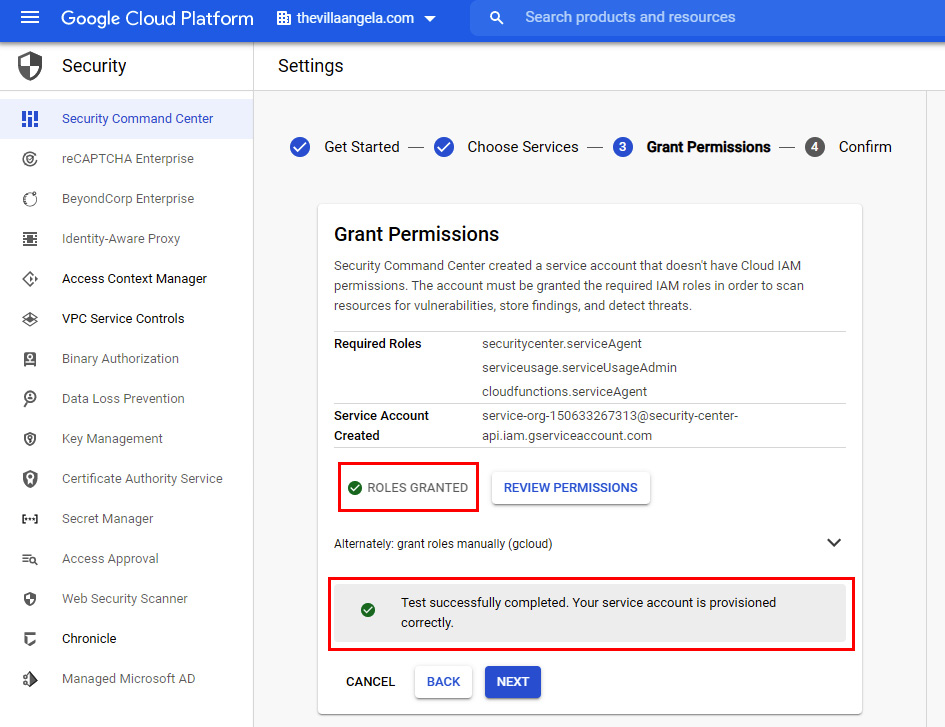
- On the ❸ Grant Permissions page, review the Required Roles and Service Account Created information. Click GRANT ROLES. The messages should indicate if the process of granting roles and the test have been completed. Click NEXT:
Figure 2.31 – Granting permissions to a service account
- On the ❹ Confirm page, Ready to complete setup will inform you that you are ready to finish setting up Security Command Center. Click FINISH to complete the Security Command Center setup process.
- Click the Vulnerabilities tab to display Security Health Analytics findings for the organization. To display Security Health Analytics for a project, under Projects Filter, click the plus (+) sign to Add a project to the Projects Filter.
- In GCP Console, under APIs & Services, click Dashboard. Click on Library or + ENABLE APIS AND SERVICES.
- On the Welcome to the API Library page, in the Search for APIs & Services search bar, type
security.
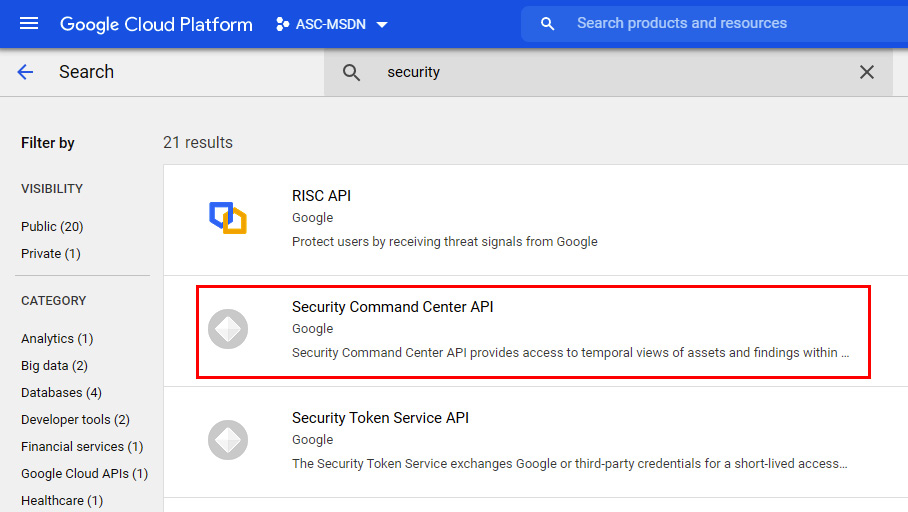
- Click on an entry representing Security Command Center API:
Figure 2.32 – Choosing a Security Command Center API
- On the Security Command Center API page, click ENABLE.
How it works…
The first part of connecting a GCP account to Microsoft Defender for Cloud is to set up Security Command Center for your organization. First, you must grant appropriate permissions to an administrative account. This way, Security Command Center will display security-related information about services. Once you've completed the necessary setup, it may take some time for security information to be displayed in Security Command Center. To enable Security Command Center's functionality, you must provide access to cloud assets and findings within an organization via the Security Command Center API.


 Free Chapter

