-
Book Overview & Buying
-
Table Of Contents

Securing Remote Access in Palo Alto Networks
By :
Securing Remote Access in Palo Alto Networks
By:
Overview of this book
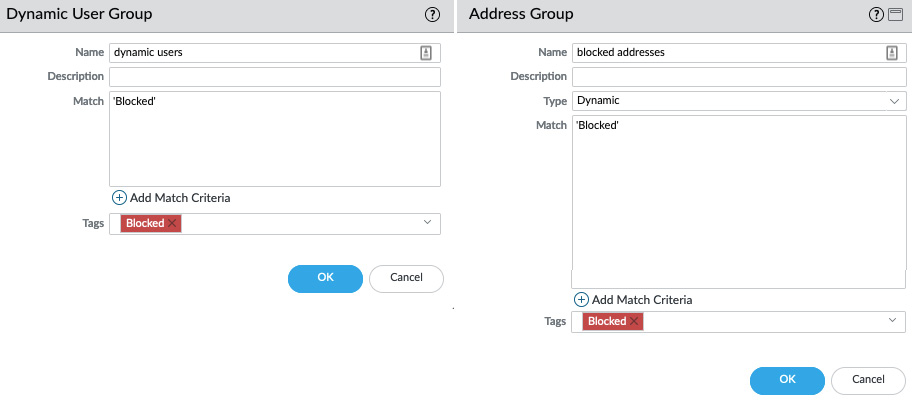
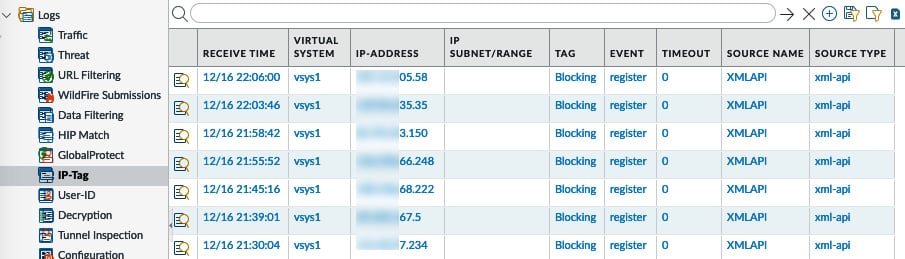
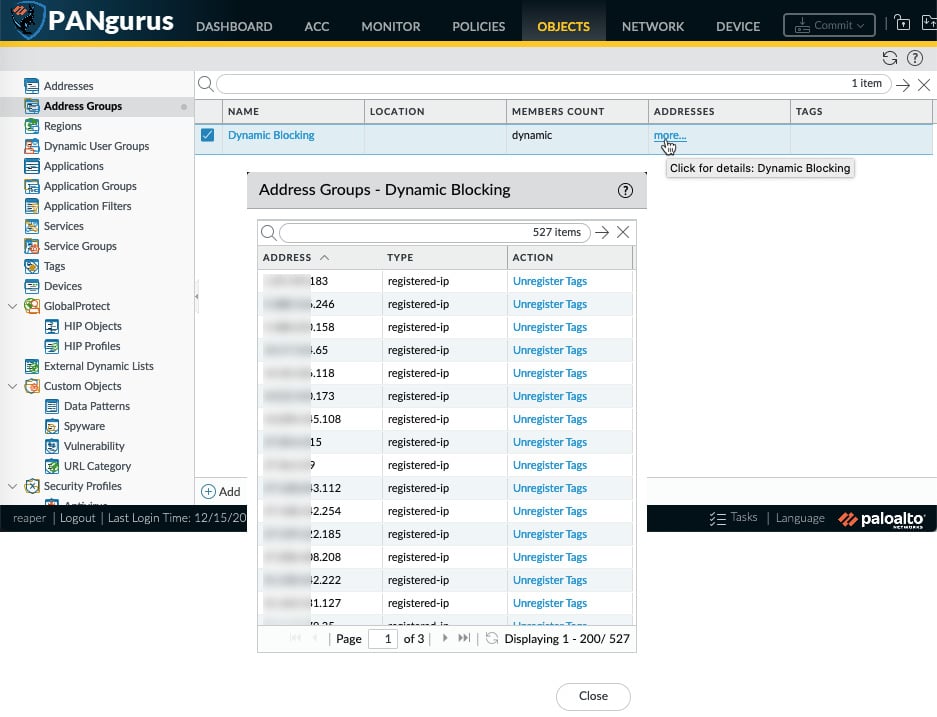
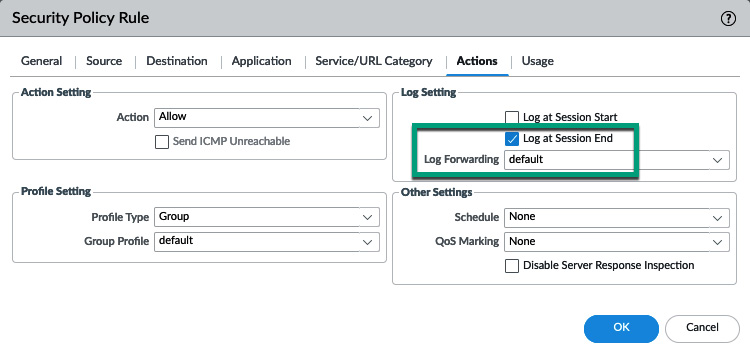
This book builds on the content found in Mastering Palo Alto Networks, focusing on the different methods of establishing remote connectivity, automating log actions, and protecting against phishing attacks through user credential detection.
Complete with step-by-step instructions, practical examples, and troubleshooting tips, you will gain a solid understanding of how to configure and deploy Palo Alto Networks remote access products. As you advance, you will learn how to design, deploy, and troubleshoot large-scale end-to-end user VPNs. Later, you will explore new features and discover how to incorporate them into your environment.
By the end of this Palo Alto Networks book, you will have mastered the skills needed to design and configure SASE-compliant remote connectivity and prevent credential theft with credential detection.
Table of Contents (11 chapters)
Preface

Section 1: Leveraging the Cloud and Enabling Remote Access
 Free Chapter
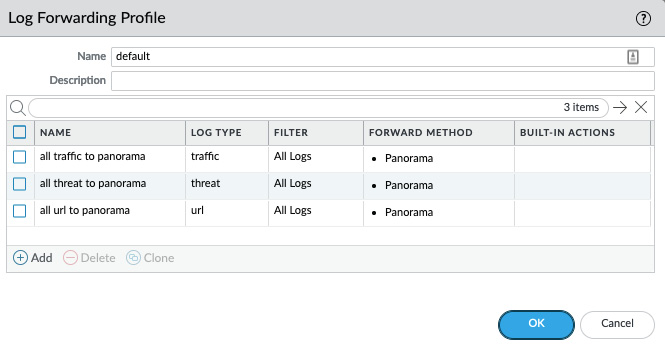
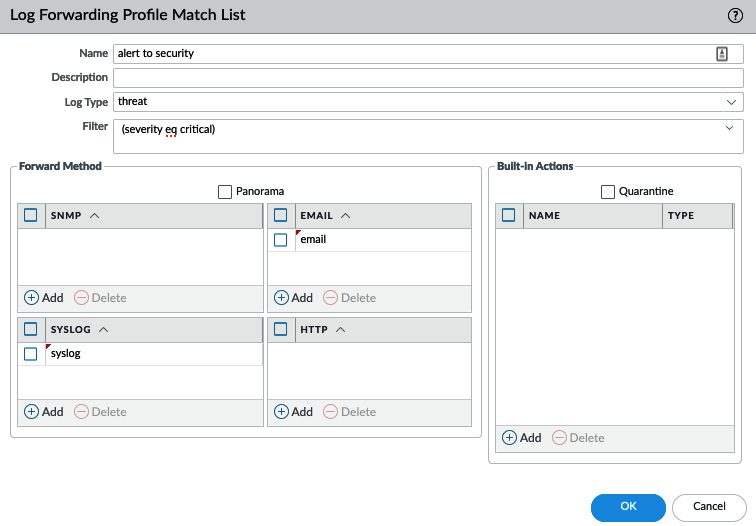
Chapter 1: Centralizing Logs
Chapter 2: Configuring Advanced GlobalProtect Features
Chapter 3: Setting up Site-to-Site VPNs and Large-Scale VPNs
Chapter 4: Configuring Prisma Access
Section 2: Tools, Troubleshooting, and Best Practices
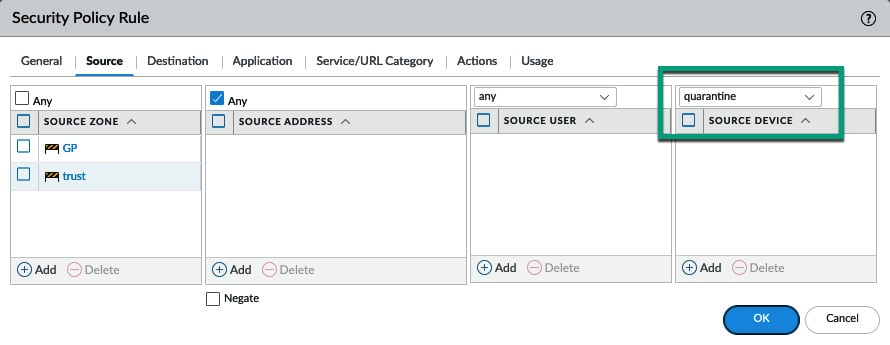
Chapter 5: Enabling Features to Improve Your Security Posture
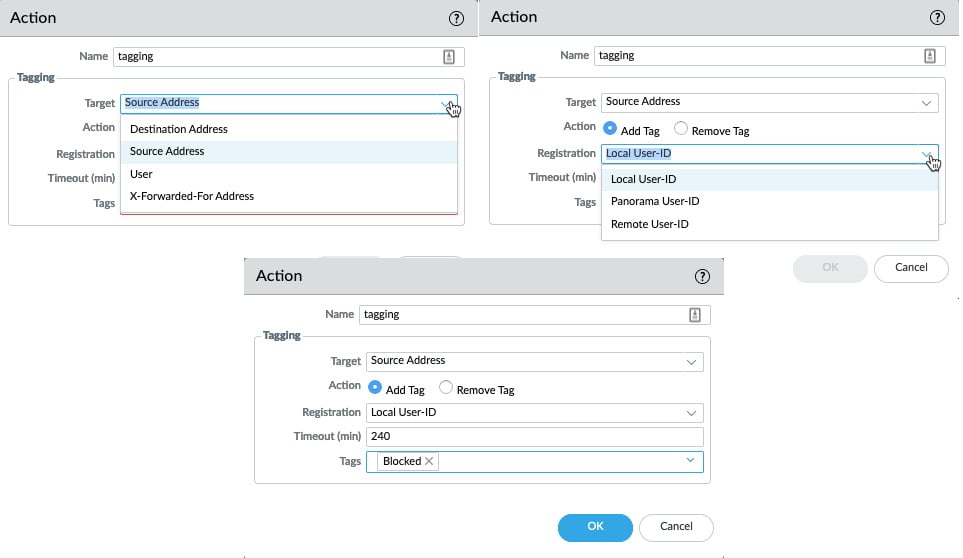
Chapter 6: Anti-Phishing with User Credential Detection
Chapter 7: Practical Troubleshooting and Best Practices Tools