In Ansible, nothing happens without an inventory. Even ad hoc actions performed on the localhost require an inventory – although that inventory might just consist of the localhost. The inventory is the most basic building block of Ansible architecture. When executing ansible or ansible-playbook, an inventory must be referenced. Inventories are files or directories that exist on the same system that runs ansible or ansible-playbook. The location of the inventory can be defined at runtime with the --inventory-file (-i) argument or by defining the path in an Ansible config file.
Inventories can be static or dynamic, or even a combination of both, and Ansible is not limited to a single inventory. The standard practice is to split inventories across logical boundaries, such as staging and production, allowing an engineer to run a set of plays against their staging environment for validation, and then follow with the exact plays run against the production inventory set.
Variable data, such as specific details a how to connect to a particular host in your inventory, can be included, along with an inventory in a variety of ways, and we'll explore the options available to you.
Static inventories
The static inventory is the most basic of all the inventory options. Typically, a static inventory will consist of a single file in ini format. Other formats are supported, including YAML, but you will find that ini is commonly used when most people start out with Ansible. Here is an example of a static inventory file describing a single host, mastery.example.name:
mastery.example.name
That is all there is to it. Simply list the names of the systems in your inventory. Of course, this does not take full advantage of all that an inventory has to offer. If every name were listed like this, all plays would have to reference specific hostnames, or the special built-in all group (which, as the name suggests, contains all hosts inside the inventory). This can be quite tedious when developing a playbook that operates across different environments within your infrastructure. At the very least, hosts should be arranged into groups.
A design pattern that works well is arranging your systems into groups based on expected functionality. At first, this might seem difficult if you have an environment where single systems can play many different roles, but that is perfectly fine. Systems in an inventory can exist in more than one group, and groups can even consist of other groups! Additionally, when listing groups and hosts, it is possible to list hosts without a group. These would have to be listed first before any other group is defined. Let's build on our previous example and expand our inventory with a few more hosts and groupings, as follows:
[web]
mastery.example.name

[dns]
backend.example.name

[database]
backend.example.name

[frontend:children]
web

[backend:children]
dns
database
Here, we have created a set of three groups with one system in each, and then two more groups, which logically group all three together. Yes, that's right: you can have groups of groups. The syntax used here is [groupname:children], which indicates to Ansible's inventory parser that this group, going by the name of groupname, is nothing more than a grouping of other groups.
The children, in this case, are the names of the other groups. This inventory now allows writing plays against specific hosts, low-level role-specific groups, or high-level logical groupings, or any combination thereof.
By utilizing generic group names, such as dns and database, Ansible plays can reference these generic groups rather than the explicit hosts within. An engineer can create one inventory file that fills in these groups with hosts from a preproduction staging environment, and another inventory file with the production versions of these groupings. The content of the playbook does not need to change when executing on either a staging or production environment because it refers to the generic group names that exist in both inventories. Simply refer to the correct inventory to execute it in the desired environment.
Inventory ordering
A new play-level keyword, order, was added to Ansible in version 2.4. Prior to this, Ansible processed the hosts in the order specified in the inventory file, and it continues to do so by default, even in newer versions. However, the following values can be set for the order keyword for a given play, resulting in the processing order of hosts, which is described as follows:
inventory: This is the default option. It simply means that Ansible proceeds as it always has, processing the hosts in the order that is specified in the inventory file.reverse_inventory: This results in the hosts being processed in the reverse order that is specified in the inventory file.sorted: The hosts are processed in alphabetical order by name.reverse_sorted: The hosts are processed in reverse alphabetical order.shuffle: The hosts are processed in a random order, with the order being randomized on each run.
In Ansible, the alphabetical sorting used is alternatively known as lexicographical. Put simply, this means that values are sorted as strings, with the strings being processed from left to right. Therefore, let's say that we have three hosts: mastery1, mastery11, and mastery2. In this list, mastery1 comes first as the character, as position 8 is a 1. Then comes mastery11, as the character at position 8 is still a 1, but now there is an additional character at position 9. Finally comes mastery2, as character 8 is a 2, and 2 comes after 1. This is important as, numerically, we know that 11 is greater than 2. However, in this list, mastery11 comes before mastery2. You can easily work around this by adding leading zeros to any numbers on your hostnames; for example, mastery01, mastery02, and mastery11 will be processed in the order they have been listed in this sentence, resolving the lexicographical issue described.
Inventory variable data
Inventories provide more than just system names and groupings. Data regarding the systems can be passed along as well. This data could include the following:
- Host-specific data to use in templates
- Group-specific data to use in task arguments or conditionals
- Behavioral parameters to tune how Ansible interacts with a system
Variables are a powerful construct within Ansible and can be used in a variety of ways, not just those described here. Nearly every single thing done in Ansible can include a variable reference. While Ansible can discover data about a system during the setup phase, not all of the data can be discovered. Defining data with the inventory expands this. Note that variable data can come from many different sources, and one source could override another. We will cover the order of variable precedence later in this chapter.
Let's improve upon our existing example inventory and add to it some variable data. We will add some host-specific data and group-specific data:
[web]
mastery.example.name ansible_host=192.168.10.25

[dns]
backend.example.name

[database]
backend.example.name

[frontend:children]
web

[backend:children]
dns
database

[web:vars]
http_port=88
proxy_timeout=5

[backend:vars]
ansible_port=314

[all:vars]
ansible_ssh_user=otto
In this example, we defined ansible_host for mastery.example.name to be the IP address of 192.168.10.25. The ansible_host variable is a behavioral inventory variable, which is intended to alter the way Ansible behaves when operating with this host. In this case, the variable instructs Ansible to connect to the system using the IP address provided, rather than performing a DNS lookup on the name using mastery.example.name. There are a number of other behavioral inventory variables that are listed at the end of this section, along with their intended use.
Our new inventory data also provides group-level variables for the web and backend groups. The web group defines http_port, which could be used in an NGINX configuration file, and proxy_timeout, which might be used to determine HAProxy behavior. The backend group makes use of another behavioral inventory parameter to instruct Ansible to connect to the hosts in this group using port 314 for SSH, rather than the default of 22.
Finally, a construct is introduced that provides variable data across all the hosts in the inventory by utilizing a built-in all group. Variables defined within this group will apply to every host in the inventory. In this particular example, we instruct Ansible to log in as the otto user when connecting to the systems. This is also a behavioral change, as the Ansible default behavior is to log in as a user with the same name as the user executing ansible or ansible-playbook on the control host.
Here is a list of behavior inventory variables and the behaviors they intend to modify:
ansible_host: This is the DNS name or the Docker container name that Ansible will initiate a connection to.ansible_port: This specifies the port number that Ansible will use to connect to the inventory host if it is not the default value of 22.ansible_user: This specifies the username that Ansible will use to connect with the inventory host, regardless of the connection type.ansible_password: This is used to provide Ansible with the password for authentication to the inventory host in conjunction with ansible_user. Use this for testing purposes only – you should always use a vault to store sensitive data such as passwords (please refer to Chapter 3, Protecting Your Secrets with Ansible).ansible_ssh_private_key_file: This is used to specify which SSH private key file will be used to connect to the inventory host if you are not using the default one or ssh-agent.ansible_ssh_common_args: This defines SSH arguments to append to the default arguments for ssh, sftp, and scp.ansible_sftp_extra_args: This is used to specify additional arguments that will be passed to the sftp binary when called by Ansible.ansible_scp_extra_args: This is used to specify additional arguments that will be passed to the scp binary when called by Ansible.ansible_ssh_extra_args: This is used to specify additional arguments that will be passed to the ssh binary when called by Ansible.ansible_ssh_pipelining: This setting uses a Boolean to define whether SSH pipelining should be used for this host.ansible_ssh_executable: This setting overrides the path to the SSH executable for this host.ansible_become: This defines whether privilege escalation (sudo or something else) should be used with this host.ansible_become_method: This is the method to use for privilege escalation and can be one of sudo, su, pbrun, pfexec, doas, dzdo, or ksu.ansible_become_user: This is the user to switch to through privilege escalation, typically root on Linux and Unix systems.ansible_become_password: This is the password to use for privilege escalation. Only use this for testing purposes; you should always use a vault to store sensitive data such as passwords (please refer to Chapter 3, Protecting Your Secrets with Ansible).ansible_become_exe: This is used to set the executable that was used for the chosen escalation method if you are not using the default one defined by the system.ansible_become_flags: This is used to set the flags passed to the chosen escalation executable if required.ansible_connection: This is the connection type of the host. Candidates are local, smart, ssh, paramiko, docker, or winrm (we will look at this in more detail later in the book). The default setting is smart in any modern Ansible distribution (this detects whether the ControlPersist SSH feature is supported and, if so, uses ssh as the connection type; otherwise, it falls back to paramiko).ansible_docker_extra_args: This is used to specify the extra argument that will be passed to a remote Docker daemon on a given inventory host.ansible_shell_type: This is used to determine the shell type on the inventory host(s) in question. It defaults to the sh-style syntax but can be set to csh or fish to work with systems that use these shells.ansible_shell_executable: This is used to determine the shell type on the inventory host(s) in question. It defaults to the sh-style syntax but can be set to csh or fish to work with systems that use these shells.ansible_python_interpreter: This is used to manually set the path to Python on a given host in the inventory. For example, some distributions of Linux have more than one Python version installed, and it is important to ensure that the correct one is set. For example, a host might have both /usr/bin/python27 and /usr/bin/python3, and this is used to define which one will be used.ansible_*_interpreter: This is used for any other interpreted language that Ansible might depend upon (for example, Perl or Ruby). This replaces the interpreter binary with the one that is specified.
Dynamic inventories
A static inventory is great and can be enough for many situations. However, there are times when a statically written set of hosts is just too unwieldy to manage. Consider situations where inventory data already exists in a different system, such as LDAP, a cloud computing provider, or an in-house configuration management database (CMDB) (inventory, asset tracking, and data warehousing) system. It would be a waste of time and energy to duplicate that data and, in the modern world of on-demand infrastructure, that data would quickly grow stale or become disastrously incorrect.
Another example of when a dynamic inventory source might be desired is when your site grows beyond a single set of playbooks. Multiple playbook repositories can fall into the trap of holding multiple copies of the same inventory data, or complicated processes have to be created to reference a single copy of the data. An external inventory can easily be leveraged to access the common inventory data that is stored outside of the playbook repository to simplify the setup. Thankfully, Ansible is not limited to static inventory files.
A dynamic inventory source (or plugin) is an executable that Ansible will call at runtime to discover real-time inventory data. This executable can reach out to external data sources and return data, or it can just parse local data that already exists but might not be in the ini/yaml Ansible inventory format. While it is possible, and easy, to develop your own dynamic inventory source, which we will cover in a later chapter, Ansible provides an ever-growing number of example inventory plugins. This includes, but is not limited to, the following:
- OpenStack Nova
- Rackspace Public Cloud
- DigitalOcean
- Linode
- Amazon EC2
- Google Compute Engine
- Microsoft Azure
- Docker
- Vagrant
Many of these plugins require some level of configuration, such as user credentials for EC2 or an authentication endpoint for OpenStack Nova. Since it is not possible to configure additional arguments for Ansible to pass along to the inventory script, the configuration for the script must either be managed via an ini config file that is read from a known location or environment variables that are read from the shell environment used to execute ansible or ansible-playbook. Also, note that, sometimes, external libraries are required for these inventory scripts to function.
When ansible or ansible-playbook is directed at an executable file for an inventory source, Ansible will execute that script with a single argument, --list. This is so that Ansible can get a listing of the entire inventory in order to build up its internal objects to represent the data. Once that data is built up, Ansible will then execute the script with a different argument for every host in the data to discover variable data. The argument used in this execution is --host <hostname>, which will return any variable data that is specific to that host.
The number of inventory plugins is too numerous for us to go through each of them in detail in this book. However, similar processes are needed to set up and use just about all of them. So, to demonstrate the process, we will work through the use of the EC2 dynamic inventory.
Many of the dynamic inventory plugins are installed as part of the community.general collection, which is installed, by default, when you install Ansible 4.0.0. Nonetheless, the first part of working with any dynamic inventory plugin is finding out which collection the plugin is part of and, if required, installing that collection. The EC2 dynamic inventory plugin is installed as part of the amazon.aws collection. So, your first step will be to install this collection – you can do this with the following command:
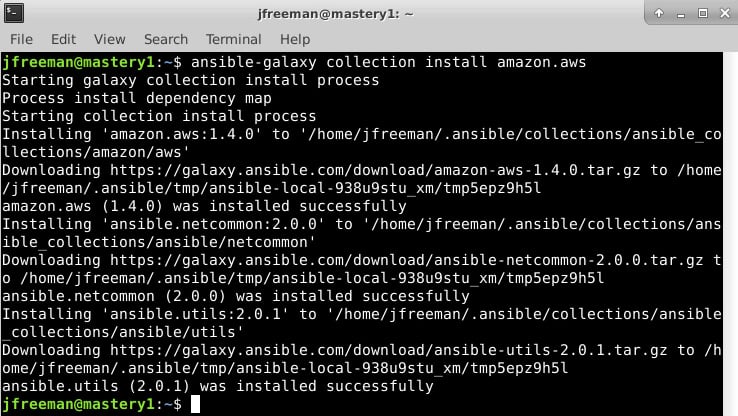
ansible-galaxy collection install amazon.aws
If all goes well, you should see a similar output on your Terminal to that in Figure 1.2:
Figure 1.2 – The installation of the amazon.aws collection using ansible-galaxy
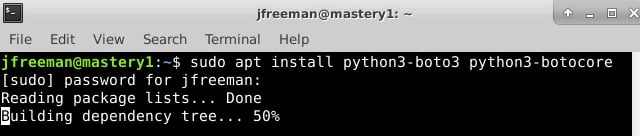
Whenever you install a new plugin or collection, it is always advisable to read the accompanying documentation as some of the dynamic inventory plugins require additional libraries or tools to function correctly. For example, if you refer to the documentation for the aws_ec2 plugin at https://docs.ansible.com/ansible/latest/collections/amazon/aws/aws_ec2_inventory.html, you will see that both the boto3 and botocore libraries are required for this plugin to operate. Installing this will depend on your operating system and Python environment. However, on Ubuntu Server 20.04 (and other Debian variants), it can be done with the following command:
sudo apt install python3-boto3 python3-botocore
Here's the output for the preceding command:
Figure 1.3 – Installing the Python dependencies for the EC2 dynamic inventory script
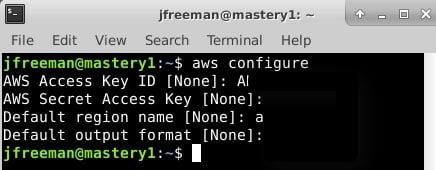
Now, looking at the documentation for the plugin (often, you can also find helpful hints by looking within the code and any accompanying configuration files), you will note that we need to provide our AWS credentials to this script in some manner. There are several possible ways in which to do this – one example is to use the awscli tool (if you have it installed) to define the configuration, and then reference this configuration profile from your inventory. For example, I configured my default AWS CLI profile using the following command:
aws configure
The output will appear similar to the following screenshot (the secure details have been redacted for obvious reasons!):
Figure 1.4 – Configuring AWS credentials using the AWS CLI utility
With this done, we can now create out inventory definition, telling Ansible which plugin to use, and passing the appropriate parameters to it. In our example here, we simply need to tell the plugin to use the default profile we created earlier. Create a file called mastery_aws_ec2.yml, which contains the following content:
---
plugin: amazon.aws.aws_ec2
boto_profile: default
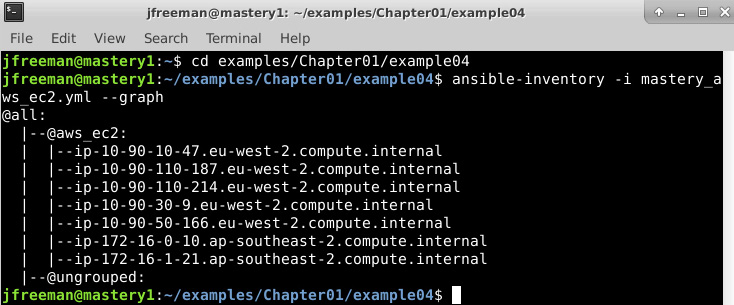
Finally, we will test our new inventory plugin configuration by passing it to the ansible-inventory command with the –graph parameter:
ansible-inventory -i mastery_aws_ec2.yml –-graph
Assuming you have some instances running in AWS EC2, you will see a similar output to the following:
Figure 1.5 – An example output from the dynamic inventory plugin
Voila! We have a listing of our current AWS inventory, along with a glimpse into the automatic grouping performed by the plugin. If you want to delve further into the capabilities of the plugin and view, for example, all the inventory variables assigned to each host (which contain useful information, including instance type and sizing), try passing the–-list parameter to ansible-inventory instead of–-graph.
With the AWS inventory in place, you could use this right away to run a single task or the entire playbook against this dynamic inventory. For example, to use the ansible.builtin.ping module to check Ansible authentication and connectivity to all the hosts in the inventory, you could run the following command:
ansible -i mastery_aws_ec2.yml all -m ansible.builtin.ping
Of course, this is just one example. However, if you follow this process for other dynamic inventory providers, you should get them to work with ease.
In Chapter 10, Extending Ansible, we will develop our own custom inventory plugin to demonstrate how they operate.
Runtime inventory additions
Just like static inventory files, it is important to remember that Ansible will parse this data once, and only once, per the ansible or ansible-playbook execution. This is a fairly common stumbling point for users of cloud dynamic sources, where, frequently, a playbook will create a new cloud resource and then attempt to use it as if it were part of the inventory. This will fail, as the resource was not part of the inventory when the playbook launched. All is not lost, though! A special module is provided that allows a playbook to temporarily add an inventory to the in-memory inventory object, that is, the ansible.builtin.add_host module.
This module takes two options: name and groups. The name option should be obvious; it defines the hostname that Ansible will use when connecting to this particular system. The groups option is a comma-separated list of groups that you can add to this new system. Any other option passed to this module will become the host variable data for this host. For example, if we want to add a new system, name it newmastery.example.name, add it to the web group, and instruct Ansible to connect to it by way of IP address 192.168.10.30. This will create a task that resembles the following:
- name: add new node into runtime inventory
  ansible.builtin.add_host:
    name: newmastery.example.name
    groups: web
    ansible_host: 192.168.10.30
This new host will be available to use – either by way of the name provided or by way of the web group – for the rest of the ansible-playbook execution. However, once the execution has been completed, this host will not be available unless it has been added to the inventory source itself. Of course, if this were a new cloud resource that had been created, the next ansible or ansible-playbook execution that sourced a dynamic inventory from that cloud would pick up the new member.
Inventory limiting
As mentioned earlier, every execution of ansible or ansible-playbook will parse the entire inventory it has been provided with. This is even true when a limit has been applied. Put simply, a limit is applied at runtime by making use of the --limit runtime argument to ansible or ansible-playbook. This argument accepts a pattern, which is essentially a mask to apply to the inventory. The entire inventory is parsed, and at each play, the limit mask that is supplied restricts the play to only run against the pattern that has been specified.
Let's take our previous inventory example and demonstrate the behavior of Ansible with and without a limit. If you recall, we have a special group, all, that we can use to reference all of the hosts within an inventory. Let's assume that our inventory is written out in the current working directory, in a file named mastery-hosts, and we will construct a playbook to demonstrate the host on which Ansible is operating. Let's write this playbook out as mastery.yaml:
---
- name: limit example play
  hosts: all
  gather_facts: false

  tasks:
    - name: tell us which host we are on
      ansible.builtin.debug:
        var: inventory_hostname
The ansible.builtin.debug module is used to print out text or values of variables. We'll use this module a lot in this book to simulate the actual work being done on a host.
Now, let's execute this simple playbook without supplying a limit. For simplicity's sake, we will instruct Ansible to utilize a local connection method, which will execute locally rather than attempt to SSH to these nonexistent hosts. Run the following command:
ansible-playbook -i mastery-hosts -c local mastery.yaml
The output should appear similar to Figure 1.6:
Figure 1.6 – Running the simple playbook on an inventory without a limit applied
As you can see, both the backend.example.name and mastery.example.name hosts were operated on. Now, let's see what happens if we supply a limit, that is, to limit our run to the frontend systems only, by running the following command:
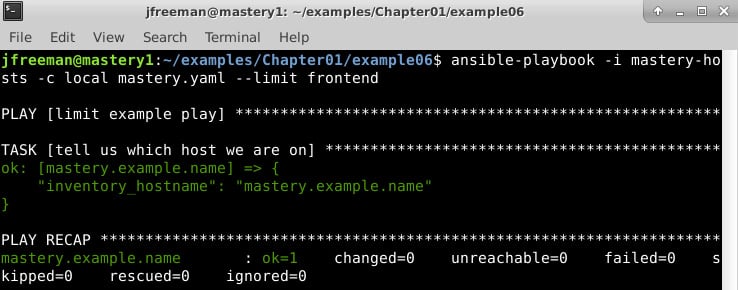
ansible-playbook -i mastery-hosts -c local mastery.yaml --limit frontend
This time around, the output should appear similar to Figure 1.7:
Figure 1.7 – Running the simple playbook on an inventory with a limit applied
Here, we can see that only mastery.example.name was operated on this time. While there are no visual clues that the entire inventory was parsed, if we dive into the Ansible code and examine the inventory object, we will indeed find all the hosts within. Additionally, we will see how the limit is applied every time the object is queried for items.
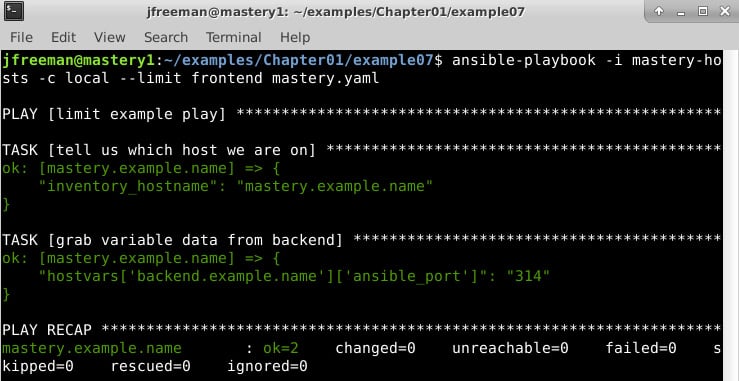
It is important to remember that regardless of the host's pattern used in a play, or the limit that is supplied at runtime, Ansible will still parse the entire inventory that is set during each run. In fact, we can prove this by attempting to access the host variable data for a system that would otherwise be masked by our limit. Let's expand our playbook slightly and attempt to access the ansible_port variable from backend.example.name:
---
- name: limit example play
  hosts: all
  gather_facts: false

  tasks:
    - name: tell us which host we are on
      ansible.builtin.debug:
        var: inventory_hostname

    - name: grab variable data from backend
      ansible.builtin.debug:
        var: hostvars['backend.example.name']['ansible_port']
We will still apply our limit by running the playbook with the same command we used in the previous run, which will restrict our operations to just mastery.example.name:
Figure 1.8 – Demonstrating that the entire inventory is parsed even with a limit applied
We have successfully accessed the host variable data (by way of group variables) for a system that was otherwise limited out. This is a key skill to understand, as it allows for more advanced scenarios, such as directing a task at a host that is otherwise limited out. Additionally, delegation can be used to manipulate a load balancer; this will put a system into maintenance mode while it is being upgraded without you having to include the load balancer system in your limit mask.


 Free Chapter