-
Book Overview & Buying
-
Table Of Contents

Microsoft 365 Security, Compliance, and Identity Administration
By :
Microsoft 365 Security, Compliance, and Identity Administration
By:
Overview of this book
The Microsoft 365 Security, Compliance, and Identity Administration is designed to help you manage, implement, and monitor security and compliance solutions for Microsoft 365 environments.
With this book, you’ll first configure, administer identity and access within Microsoft 365. You’ll learn about hybrid identity, authentication methods, and conditional access policies with Microsoft Intune. Next, you’ll discover how RBAC and Azure AD Identity Protection can be used to detect risks and secure information in your organization. You’ll also explore concepts such as Microsoft Defender for endpoint and identity, along with threat intelligence. As you progress, you’ll uncover additional tools and techniques to configure and manage Microsoft 365, including Azure Information Protection, Data Loss Prevention (DLP), and Microsoft Defender for Cloud Apps.
By the end of this book, you’ll be well-equipped to manage and implement security measures within your Microsoft 365 suite successfully.
Table of Contents (25 chapters)
Preface

Part 1: Implementing and Managing Identity and Access
 Free Chapter
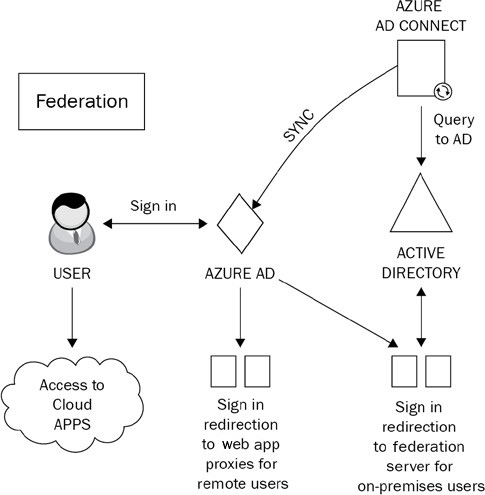
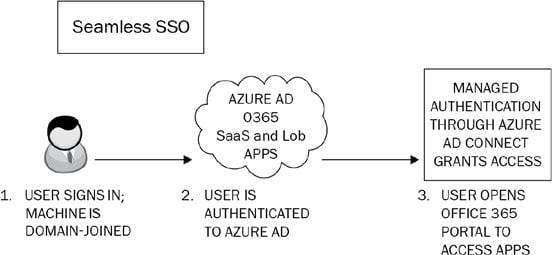
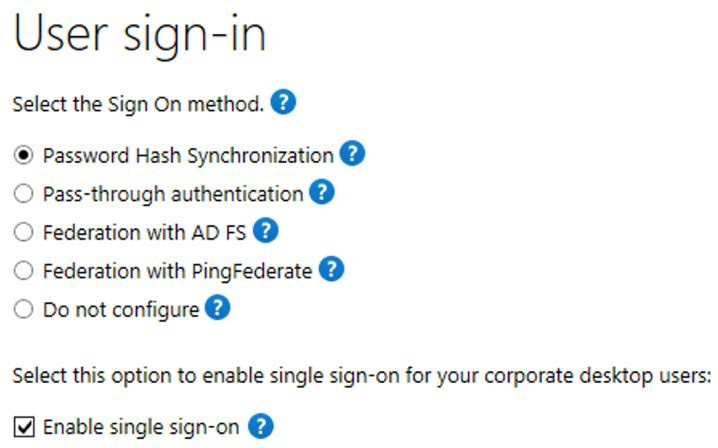
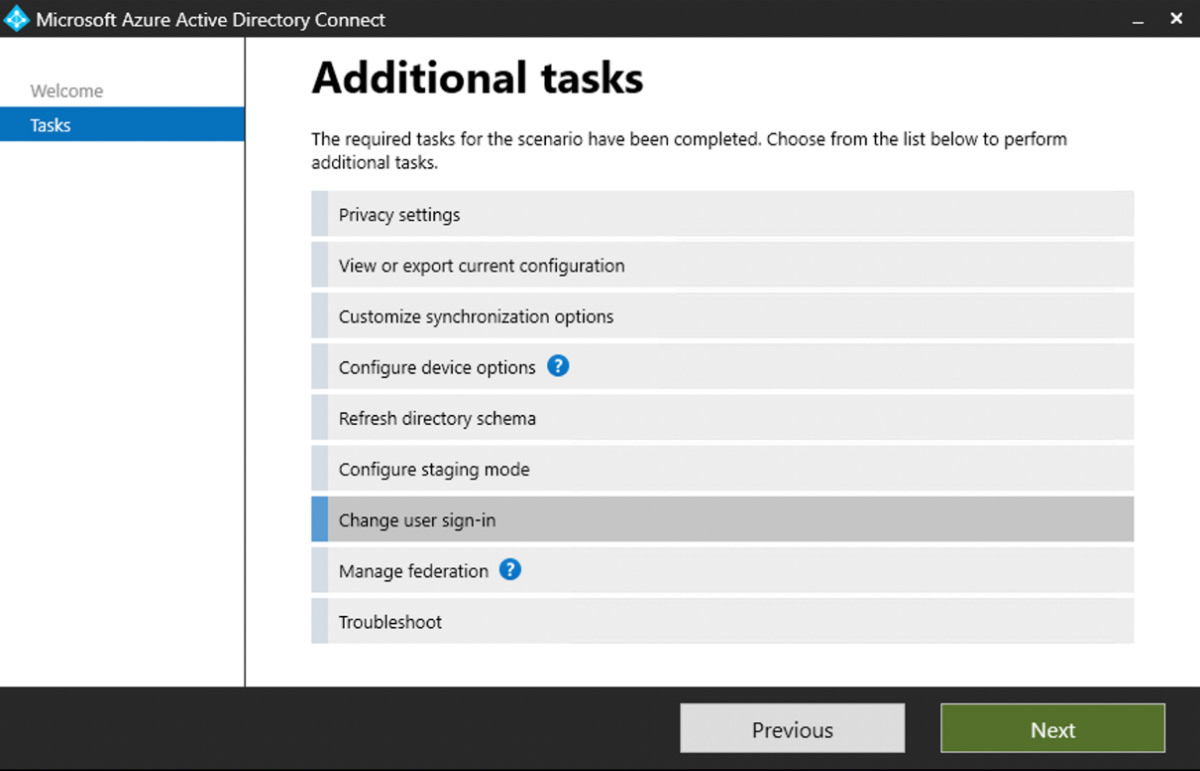
Chapter 1: Planning for Hybrid Identity
Chapter 2: Authentication and Security
Chapter 3: Implementing Conditional Access Policies
Chapter 4: Managing Roles and Identity Governance
Chapter 5: Azure AD Identity Protection
Part 2: Implementing and Managing Threat Protection
Chapter 6: Configuring a Microsoft Defender for Identity Solution
Chapter 7: Configuring Device Threat Protection with Microsoft Defender for Endpoint and Intune
Chapter 8: Configuring Microsoft Defender for Office 365
Chapter 9: Using Microsoft Sentinel to Monitor Microsoft 365 Security
Chapter 10: Configuring Microsoft Defender for Cloud Apps
Part 3: Implementing and Managing Information Protection
Chapter 11: Managing Sensitive Information
Chapter 12: Managing Microsoft Purview Data Loss Prevention
Chapter 13: Managing Microsoft Purview Data Lifecycle Management
Part 4: Managing Compliance Features in Microsoft 365
Chapter 14: Monitoring and Analyzing Audit Logs and Reports in Microsoft Purview
Chapter 15: Planning For, Conducting, and Managing eDiscovery Cases
Chapter 16: Managing Regulatory and Privacy Requirements
Chapter 17: Managing Insider Risk Solutions in Microsoft 365
Answers
Index