The only client software you need to start using Webmin is a web browser. You can connect to Webmin using your server's IP address or domain name. Webmin allows you to change which IP address, port, or domain name it will use for connections.
The first step is to check the IP address of your server. One way to do it is to run the /sbin/ifconfig command. It will give you lots of information about network interfaces configured on your system, including the IP number for each one under the heading inet addr. You will have at least two network interfaces on your system. One will be called lo or lo0, this is the local loopback interface that is used only for connections originating from the same machine. This will have the IP of 127.0.0.1. The other interface will most likely be named eth0 or en0 and this will be the primary network adapter of your machine. To connect from another computer, note this IP address. You can also set up a DNS entry for this IP, and then you'll be able to connect using a domain name.
You can connect to Webmin by performing the following steps:
Open your web browser and type in the following address, but substitute the words webmin.host with the IP address or domain name of your server: https://webmin.host:10000.
Tip
If your browser reports that it could not establish a connection to the server, then you may be running a firewall on the server, which is blocking incoming connections. On most Linux systems, the default firewall is called iptables and you can direct it to allow all incoming TCP traffic on the port 10000 by issuing the following command:
Unfortunately, the first thing you will see after connecting successfully is a warning stating something along these lines: This site's security certificate is not valid! Feel free to ignore this warning and proceed to Webmin. Take a look at the How it works... section of this recipe for more information.
Tip
If you receive an error stating that establishing a secure connection failed instead, try to connect to http://webmin.host:10000 using regular HTTP.
On the next screen, you will be asked to provide the login and password of a user with administrative privileges. This is almost always either root or a user who has ALL privileges granted through sudo. Type the username and password and hit the button to log in.
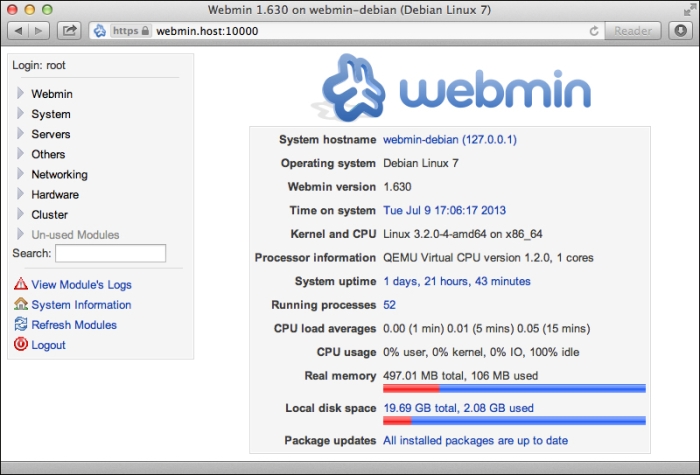
Once you log in, Webmin will greet you with a home screen displaying an overview of your system, similar to the following screenshot:
This welcome screen shows Webmin's main interface. On the left-hand side, we see a sidebar containing a hierarchical menu listing all installed modules organized into categories. To the right, we see an interface of the currently activated module (in this case, it's System Information).
Webmin runs a web server on port 10000 of your server. Since browsers connect to port 80 by default (or port 443 when using HTTPS), we need to specify the port number as part of the URL.
If the Perl module Net::SSLeay is installed on your system, all connections to Webmin are encrypted to avoid eavesdropping or man-in-the-middle attacks. In order to establish an encrypted connection, we instruct the browser to connect using the HTTPS protocol. If you try to connect over regular HTTP, Webmin will provide you with a page redirecting you to the encrypted connection similar to the following screenshot:
The error message we see when we establish an encrypted connection is caused by the fact that the certificate we're using to encrypt communication was generated by Webmin itself and wasn't signed by a commercial, trusted certificate authority. This is not a cause for worry. A self-signed certificate has one important advantage: it's free, and it provides the same encryption as a commercial certificate.
Webmin uses port 10000 by default to host its web server and will accept connections coming in on any network interface. You can change these options if you wish.
Changing Webmin's listening port
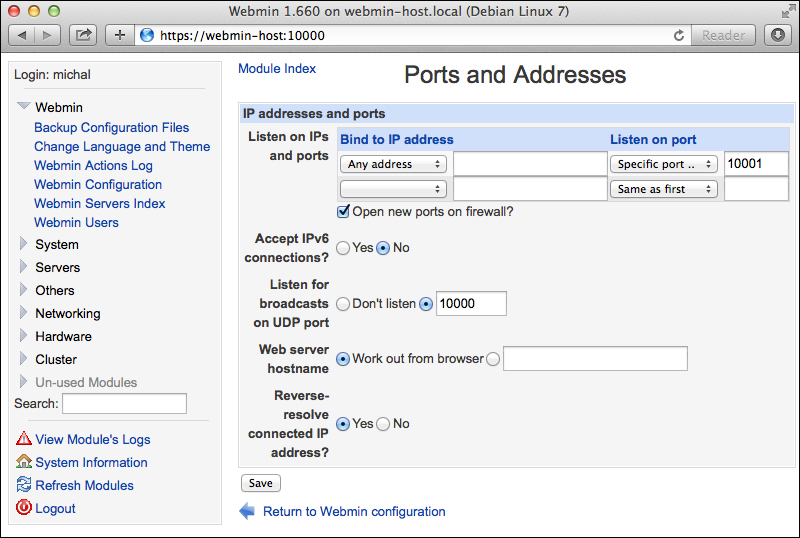
Navigate to the Ports and Addresses configuration module by selecting the following options from the menu: Webmin | Webmin Configuration. Then, click the Ports and Addresses icon. You will get the following screen. On this screen, you can change the port on which Webmin listens for connections by specifying it in Listen on port | Specific port. Leave the value of the Bind to IP address field as Any address for now. Consider the following screenshot:
Change the port to 10001 or any unused port number you prefer and click Save.
Tip
You can get a list of used ports by issuing the netstat command. Daemons on your server use some ports to listen for incoming connections. You won't be able to use any of these for Webmin. On Linux, you can use the following command to get a list of listening ports:
On BSD-based systems, use this instead:
Webmin will change its port and redirect you to the new address.
Specifying the IP address on which Webmin listens
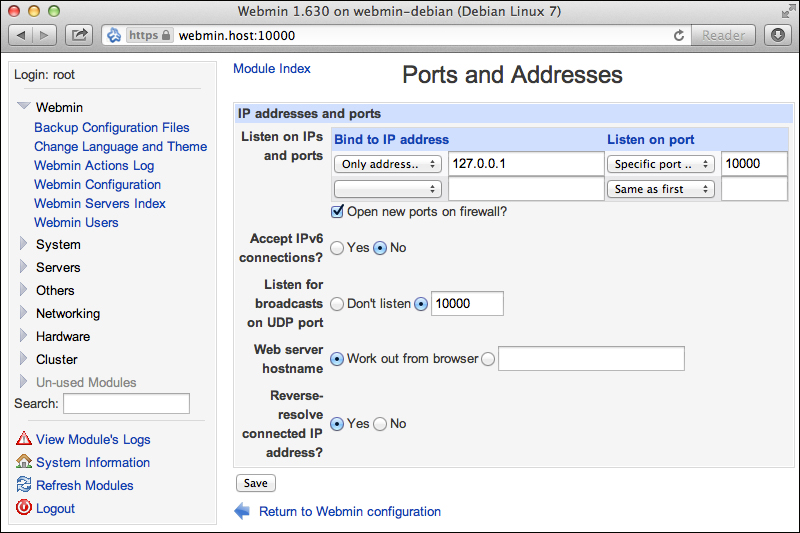
You can use the Ports and Addresses screen to select on which IP address Webmin will be listening. This is useful if you have more than one network interface installed on your machine (for instance, one for accessing the Internet and one on a local network). You can also use this option to select the loopback interface and allow only connections originating from the same machine or coming in over an SSH tunnel (refer to the Connecting to Webmin securely over an SSH tunnel recipe in Chapter 3, Securing Your System). To restrict connections only to local traffic, select Bind to IP address | Only address... and enter 127.0.0.1 as shown in the following screenshot:


 Free Chapter


