

Before we wrap up this chapter, I am sure some of the readers would like to create their own virtual machine or even boot from a DVD. This section has been included for them. I am also one of those who would choose to create their own virtual machine rather than download a prebuilt one. As you will discover, when you take this route, it works well until you attempt to install tools within the virtual machine. As of this writing, there is no easy procedure for this, and it takes quite a lot of time to accomplish it using the current methods that are available.
To get started, the first thing we have to do is to create a virtual machine. For this, we use the virtual machine wizard within VMware Workstation by navigating to File | New Virtual Machine. This will start the virtual machine wizard; leave the default setting of Typical, and click on Next. On the next window, we want to direct the wizard to our ISO image. So, click on the Installer disc image file (the ISO file), and then browse to the location and select the ISO image you downloaded for BackTrack, as shown in the following screenshot:
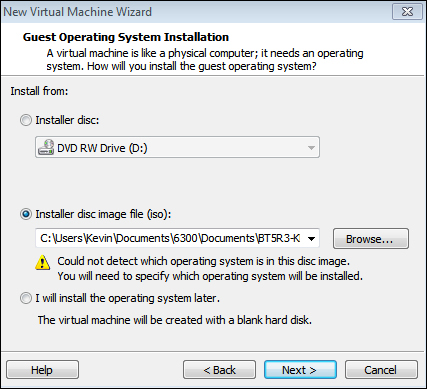
Once you have selected the ISO image, you will notice that the wizard cannot detect the operating system; we will have to specify it. This is normal behavior and nothing to be alarmed about; after reading the message, click on Next.
The operating system selection should be set to Linux by default. You just need to select the type of Linux operating system by clicking on the drop-down arrow and selecting the Ubuntu option since this is what the Black Hat distribution is based. Once you click on Next, you will have the option to name your virtual machine and the location to store it in. If you would like to change the name, this is the place to do that. Once you have set the name and location you want to use, click on Next. Leave the size and other settings at their default values, and click on Next. On the next screen, you have a chance to review your hardware settings, and if need be, to customize them. If you are comfortable with the default RAM of 1 GB, click on Finish. The following screenshot shows what your hardware should look like:
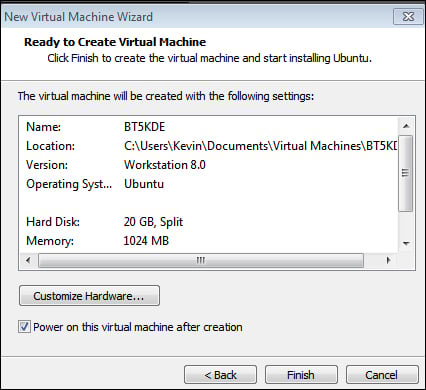
Once you click on
Finish, the wizard will boot the virtual machine. Since we have configured it to use the ISO image, it will boot from there. At the prompt, click anywhere on the black area and then press Enter to boot BackTrack. Once the OS has booted, you will be automatically logged in; for reference, remember that the username is root and the password is toor, and you should change it after installation.
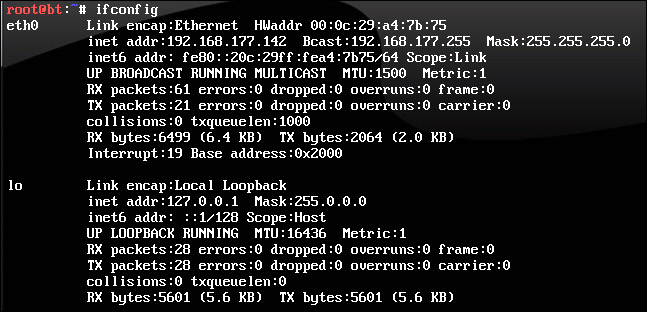
If you want to verify your network settings, enter ifconfig; as you will see, the interface is properly set at eth0 since we booted this from the ISO image and did not copy it. This is reflected in the following screenshot:
In the command prompt, enter startx to launch the desktop and window environment.
root@bt:~# startx
Once the desktop has started, you will notice that you now have an icon on the desktop for installing the OS to the hard disk. If you are in a virtual environment, that is the recommended next step.
To install BackTrack to the hard disk, there is a series of steps to be followed:
Click on the Install BackTrack icon, and start the installation process.
When a window comes up, select the language for the install, and click on Forward.
If you are happy with what the installation wizard finds for the time zone and the current time, click on Forward.
Select your preferred keyboard layout, and click on Forward.

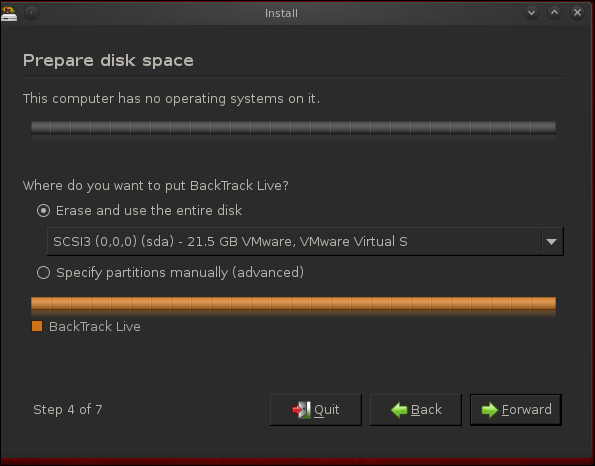
At this point, you are at the "prepare the hard disk for installation" stage; make sure you are in a virtual machine and not a bootable DVD, because this will erase the hard drive! If you are not sure, do not proceed until you are. If you want to make sure, refer to the next screenshot and notice that the message This computer has no operating systems on it. is identified:
Now that we have covered that and you have verified that you are not going to destroy your system, click on Forward.
The installation is now ready to start; this is your last chance to ensure you do not erase your hard drive. If you are comfortable with this, click on Install. After some time, the installation will successfully complete (hopefully), and you will see a message like the one in the following screenshot:

After the installation is complete, you will notice that you cannot adjust the display by selecting the Fit Guest Now option because it is grayed out; this is because you do not have the VMware tools installed. You can manually install the tools, but it is not a simple and straightforward procedure. Those who want to try it can access the step-by-step instructions at http://www.BackTrack-linux.org/wiki/index.php/VMware_Tools. Again, this process requires updating the kernel and then rebuilding it. The procedure does work, but it is a time-consuming process; only attempt it if you want to go through a challenging process and have a couple of hours to spare. The majority of you will prefer to download the virtual machine that is preconfigured and offered on the BackTrack distribution site.
Tip
Downloading the example code
You can download the example code files for all Packt books you have purchased from your account at http://www.packtpub.com. If you purchased this book elsewhere, you can visit http://www.packtpub.com/support and register to have the files e-mailed directly to you.