

Let us put things into action and use the deployment created earlier to address a real-world multichannel sales scenario.
A trader, Northwind, manages an e-commerce website for online customer purchases. They also receive bulk orders from event firms and corporates for their goods. Northwind needs to develop a solution to validate an order and route the request to the right inventory location for delivery of the goods. The incoming request is an XML file with the order details. The request from event firms and corporates is over FTP, while e-commerce website requests are over HTTP. Post processing of the order, if the customer location is inside the US, then the request are forwarded to a relay service at a US address. For all other locations, the order needs to go to the central site and is sent to a Service Bus Queue at IntlAddress with the location as a promoted property.
Before we start, we need to set up the client machine to connect to the deployment created earlier by performing the following steps:
Install the certificate downloaded from the deployment on your client box to the trusted root store. This authenticates any SSL traffic that is between your client and the integration solution on Azure.
Download and install the BizTalk Services SDK (https://go.microsoft.com/fwLink/?LinkID=313230) so the developer project experience lights up in Visual Studio 2012.
Download the BizTalk Services EAI tools' Message Sender and Message Receiver samples from the MSDN Code Gallery available at http://code.msdn.microsoft.com/windowsazure.
We will break down the implementation details into defining the incoming format and creating the bridge, including transports to process incoming messages and the creation of the target endpoints, relay, and Service Bus Queue.
You can create a new BizTalk Services project in Visual Studio 2012.
BizTalk Services project in Visual Studio
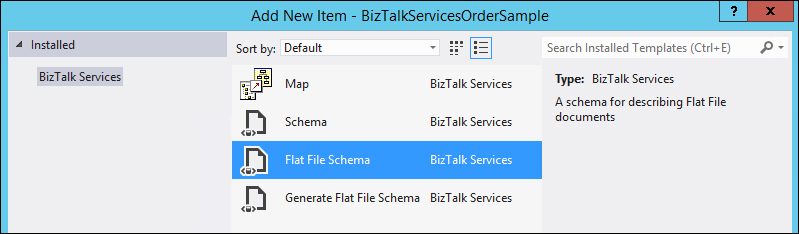
From within your project, right-click on the project name, click on Add | New Item, and add a new Flat File Schema.
Add Flat File Schema into BizTalk Services project
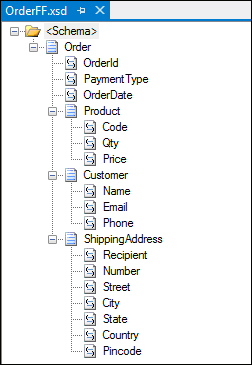
Add the following nodes to the schema so that the structure looks as follows:
Flat File Schema structure
For each of the records in the XSD file, make sure that the delimiters are added correctly:
<b:recordInfo structure="delimited" child_delimiter_type="char" child_delimiter="," child_order="postfix" preserve_delimiter_for_empty_data="true" suppress_trailing_delimiters="false" sequence_number="4" />
You can validate the schema by running it with an instance file. The Validate Instance command is available by right-clicking on the created schema file in the Solution Explorer. Add the following flat file and XML instances in two separate files, use the Validate Instance command, and verify that the schema validates those instances. For each command run, ensure that the schema properties window has the right Validate Instance Input Type (XML in this case):
OrderId|PaymentType|OrderDate|Code,Qty,Price,|Name,Email,Phone,|Recipient,Number,Street,City,State,Country,Pincode,|

<ns0:Order xmlns:ns0="http://BizTalkServicesOrderSample.OrderFF">
  <OrderId>MyOrder</OrderId>
  <PaymentType>CreditCard</PaymentType>
  <OrderDate>09-08-2013 22:50:00</OrderDate>
  <Product>
    <Code>100</Code>
    <Qty>1</Qty>
    <Price>500</Price>
  </Product>
  <Customer>
    <Name>Karthik</Name>
    <Email>[email protected]</Email>
    <Phone>1-111-1111</Phone>
  </Customer>
  <ShippingAddress>
    <Recipient>Jon</Recipient>
    <Number>Building 1</Number>
    <Street>One Redmond Way</Street>
    <City>Redmond</City>
    <State>Washington</State>
    <Country>US</Country>
    <Pincode>98052</Pincode>
  </ShippingAddress>
</ns0:Order>
Tip
Downloading the example code
You can download the example code files for all Packt books you have purchased from your account at http://www.packtpub.com. If you purchased this book elsewhere, you can visit http://www.packtpub.com/support and register to have the files e-mailed directly to you.
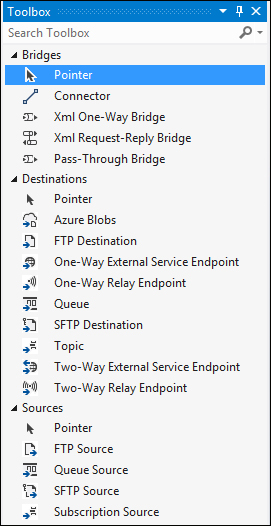
Open the bridge configuration surface (usually the MessageFlowItinerary.bcs file). The Visual Studio Toolbox should show the following entities:
Visual Studio Toolbox for BizTalk Services project
Use the VS toolbox to drag-and-drop FTP Source, Xml One-Way Bridge, One-Way Relay Endpoint, and Queue and connect them using the Connector, as shown in the following figure:
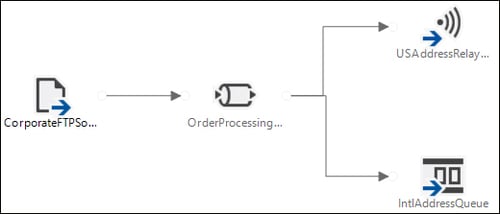
Bridge message flow in BizTalk Services project
Configure the following in the message flow:
Select the FTP server and configure the address, username, and password correctly.
Double-click on the bridge to open the Xml One-Way Bridge configuration:
In the Message Types block, add the
OrderFF.xsdinstance created earlier.
Bridge configuration
In the first Enrich stage, add an XPath Type property reading from
/*[local-name()='Order' and namespace-uri()='http://BizTalkServicesOrderSample.OrderFF']/*[local-name()='ShippingAddress' and namespace-uri()='']/*[local-name()='Country' and namespace-uri()='']and writing to the location as a string. The XPath value can be obtained by opening the schema in VS, clicking on the relevant record, and copying the XPath value from the record properties window.

Promote property configuration in the Enrich stage of the bridge
In the parent
MessageFlowitinerary.bcsview, click on the route link from OrderProcessingBridge to USAddressRelay and set the filter condition as location='US'; for the other link, set the location toUS.
Route properties for the message flow
Edit the Queue
.configfile underMessageFlowitinerary.bcsand update the<tokenProvider>and the<endpoint>details with the Service Bus information.Edit the Relay Service
.configfile underMessageFlowitinerary.bcsand update the<endpoint>details with the Service Bus relay information.Build and deploy the solution.
If the deployment was successful, point your browser to
https://<yourdeployment>/default/OrderProcessingBridge; you should see a 401 HTTP Error code stating a manage claim is required for this operation.