
In this recipe, we will learn how to configure a cluster with a live and a backup HornetQ server.
HornetQ cluster environment can be achieved by using a shared store (live and backup servers share the same and the entire data directory) as per the previous recipe, or via message replication which happens at the network layer—message replication mode can be achieved using the following setting:
<shared-store>false</shared-store>
Our final configuration should provide the following architecture:
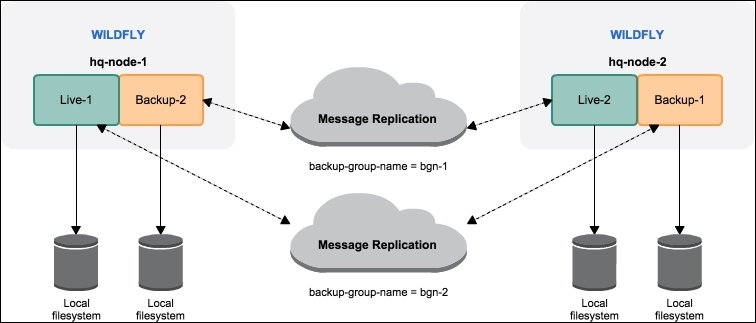
Message replication configuration
To get started, let's first create an adhoc folder to run our WildFly.
In a terminal window, enter the following commands:
$ cd $WILDFLY_HOME
$ cp -a standalone hq-node-1
$ cp -a standalone hq-node-2
Provide the application user for both the servers to send and receive messages, as follows:
$ cd $WILDFLY_HOME
$ ./bin/add-user.sh --silent -a -u jmsuser -p jmsuser.2015 -g guest -sc hq-node-1/configuration
...