
Finally, we take a look at the --gui command-line option. With this option, we start a graphical shell for our Gradle builds. Until now, we used the command line to start a task. With the Gradle GUI, we have a graphical overview of the tasks in a project and we can execute them by simply clicking on the mouse.
To start the GUI, we invoke the following command:
$ gradle --gui
A window is opened with a graphical overview of our task tree. We only have one task that one is shown in the task tree, as we can seen in the following screenshot:
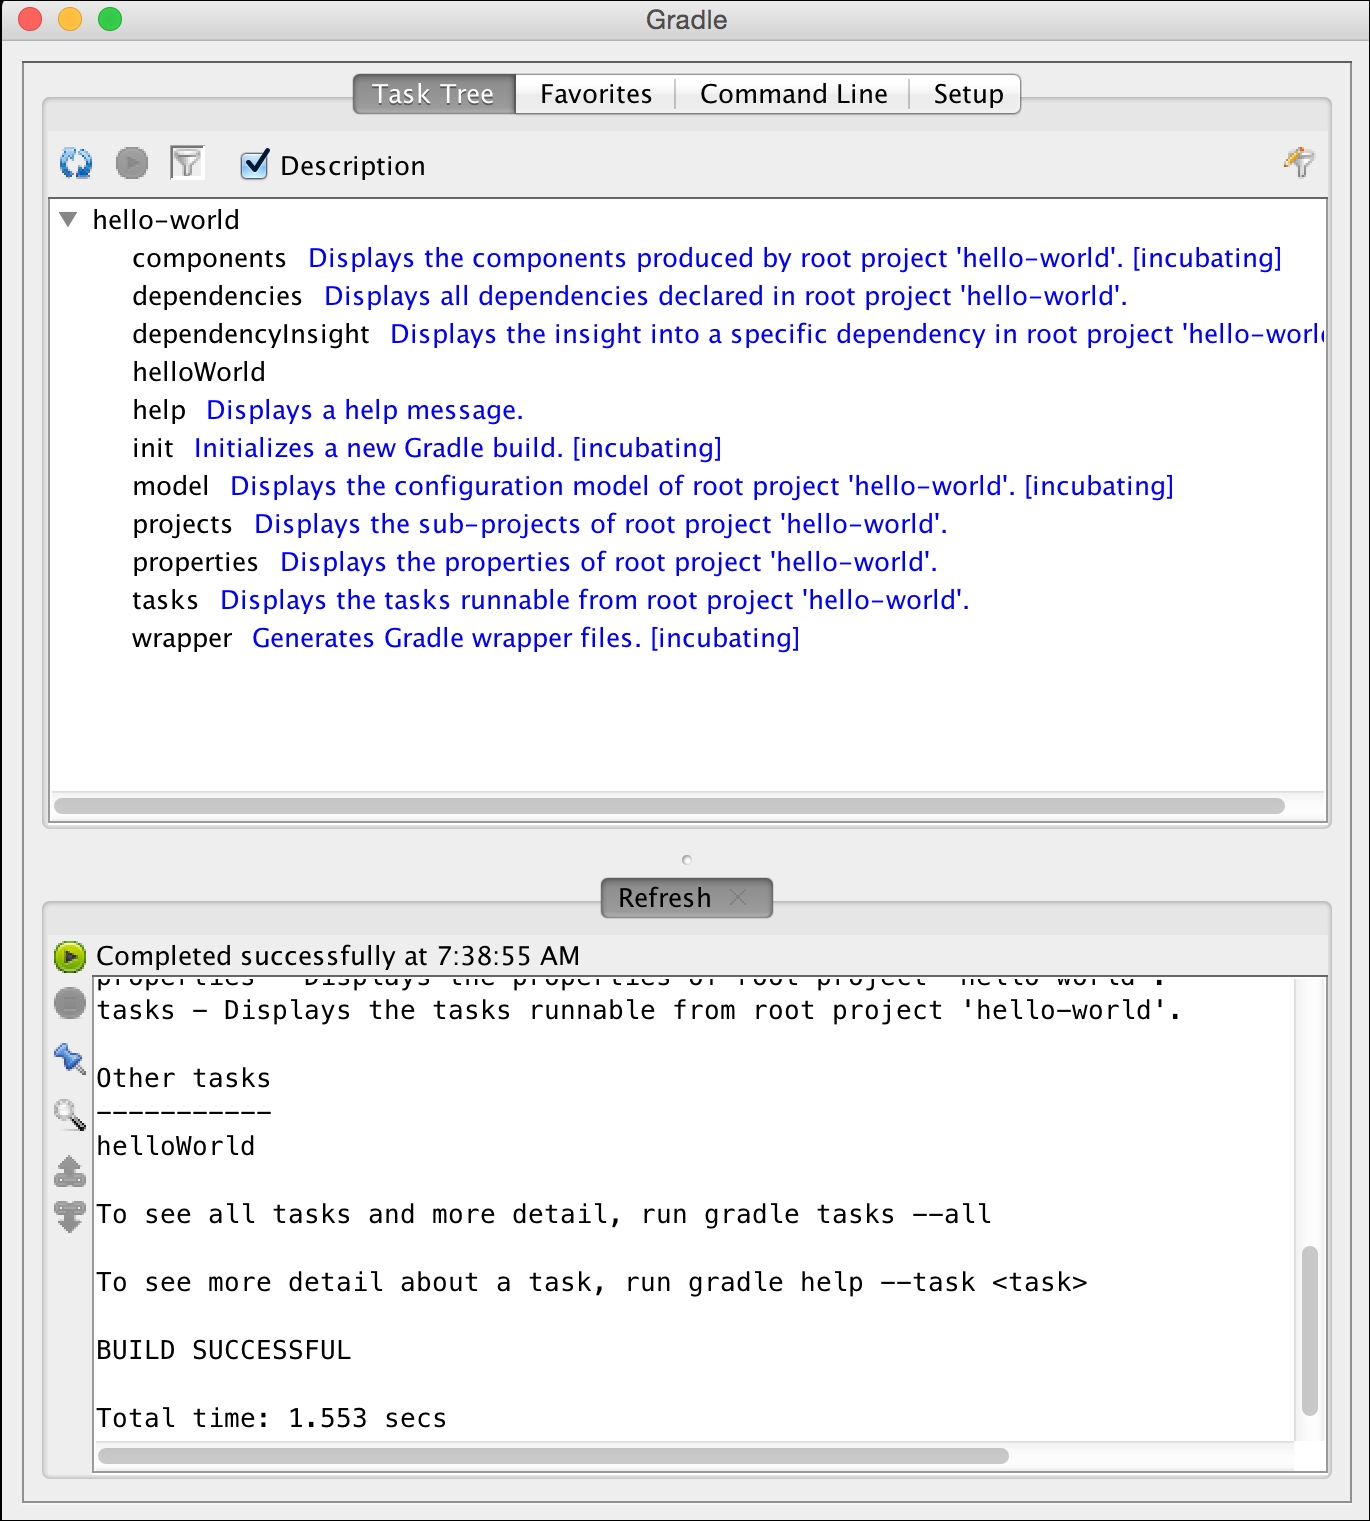
Overview of tasks in the Gradle GUI
The output of running a task is shown at the bottom of the window. When we start the GUI for the first time, the tasks task is executed and we see the output in the window.
The Task Tree tab shows projects and tasks found in our build project. We can execute a task by double-clicking on the task name.
By default, all the tasks are shown, but we can apply a filter to show or hide certain projects and tasks. The Edit filter button opens a new dialog window where we can define the tasks and properties that are a part of the filter. The Toggle filter button makes the filter active or inactive.
We can also right-click on the project and task names. This opens a context menu where we can choose to execute the task, add it to the favorites, hide it (adds it to the filter), or edit the build file. If we have associated the .gradle extension to a text editor in our operating system, then the editor is opened with the content of the build script. These options can be seen in the following screenshot:
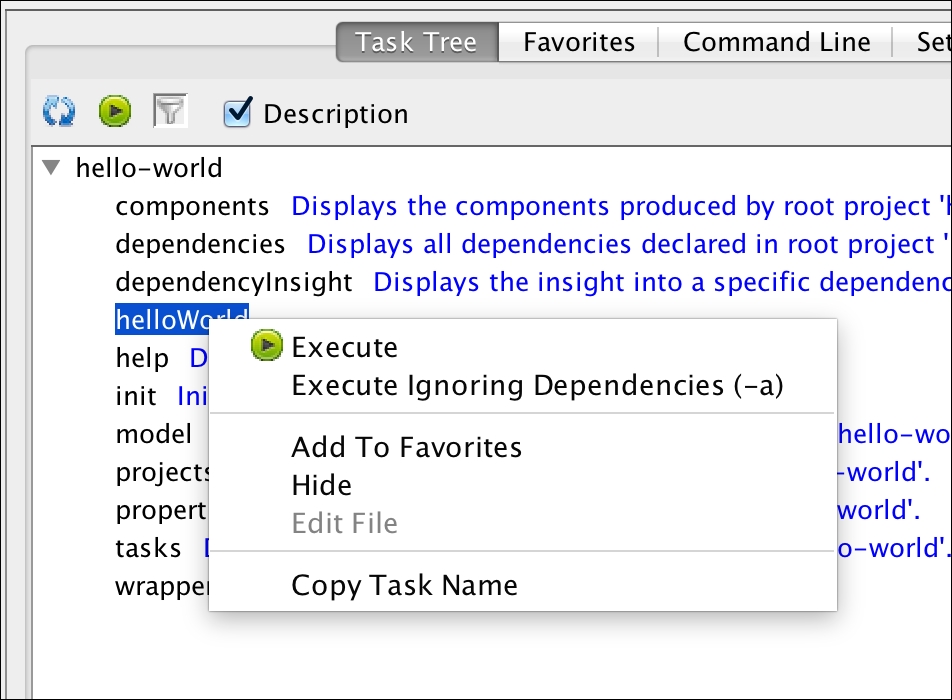
Available actions for a task in the Gradle GUI
The Favorites tab stores tasks we want to execute regularly. We can add a task by right-clicking on the task in the Task Tree tab and selecting the Add To Favorites menu option, or if we have opened the Favorites tab, we can select the Add button and manually enter the project and task name that we want to add to our favorites list. We can see the Add Favorite dialog window in the following screenshot:
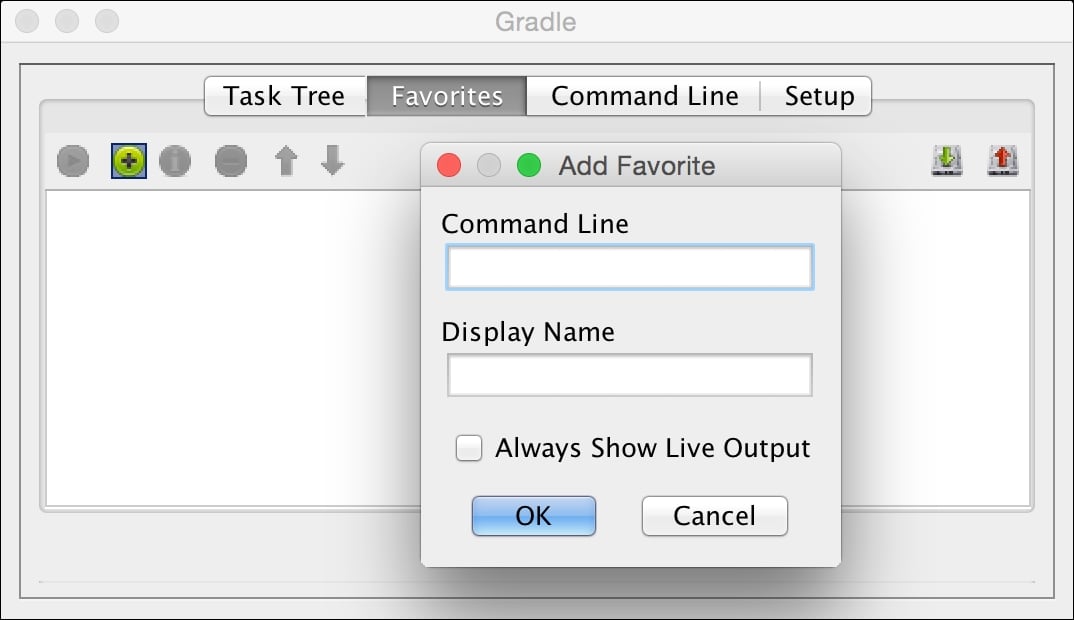
Add favorites in the Gradle GUI
On the Command Line tab, we can enter any Gradle command that we normally would enter on the command prompt. The command can be added to Favorites as well. We see the Command Line tab contents in the following image:
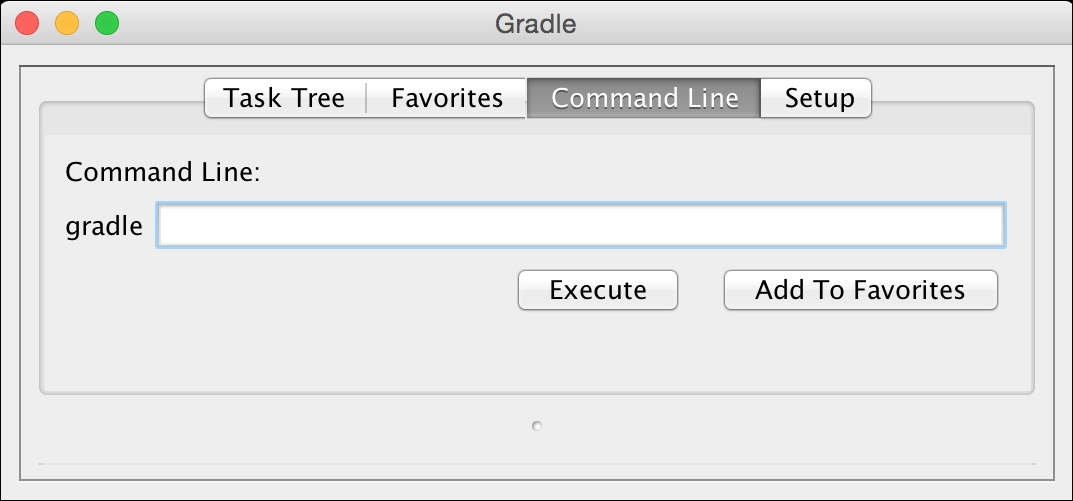
Execute task with command-line optins
The last tab is the Setup tab. Here, we can change the project directory, which is set to the current directory by default.
We discussed about the different logging levels as command-line options previously in this chapter. With the GUI, we can select the logging level from the Log Level select box with the different log levels. We can choose debug, info, Lifecycle, and error as log levels. The error log level only shows errors and is the least verbose, while debug is the most verbose log level. The lifecycle log level is the default log level.
Here, we also can set how detailed the exeption stack trace information should be. In the Stack Trace Output section, we can choose from the following three options:
Exceptions Only: This is for only showing the exceptions when they occur, which is the default value
Standard Stack Trace (-s): This is for showing more stack trace information for the exceptions
-S): This is for the most verbose stack trace information for exceptions
If we enable the Only Show Output When Error Occurs option, then we only get output from the build process if the build fails. Otherwise, we don't get any output.
Finally, we can define a different way to start Gradle for the build with the Use Custom Gradle Executor option. For example, we can define a different batch or script file with extra setup information to run the build process. The following screenshot shows the Setup tab page and all the options that we can set:
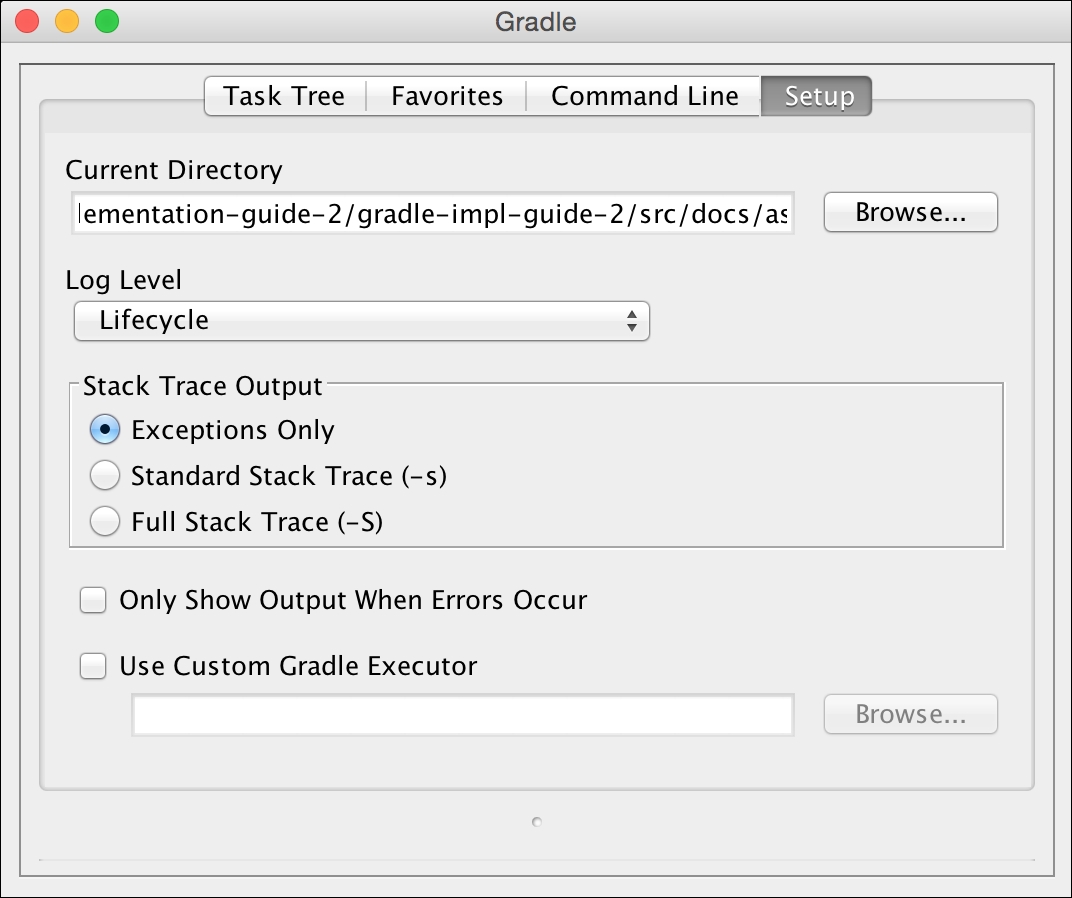
Setup Gradle options in the Gradle GUI