
The Raspberry Pi is a credit card-sized computer designed and manufactured in the UK with the initial intention of providing a cheap computing device for education. Since its release, however, it has grown far beyond the sphere of academia.
Its origins can be found in the University of Cambridge's Computer Laboratory in 2006. Computer scientist Eben Upton, along with Rob Mullins, Jack Lang and Alan Mycroft, were concerned that incoming computing undergraduate students had grown divorced from the technical aspects of computing. This was largely due to school syllabuses that placed an emphasis on using computers rather than understanding them.
Off the back of this initial concern, the Raspberry Pi foundation was formed. Over the next six years the team worked on developing a cheap and accessible device that would help schools to teach concepts such as programming, thus bringing students closer to understanding how computing works.
The Raspberry Pi's initial commercial release was in February 2012. Since then, the board has gone through a number of revisions and has been available in two models, those being Model A and Model B.
The Model A device is the cheaper and simpler of the two computers and the Model B the more powerful, including support for Ethernet connectivity.
In February 2015, the Raspberry Pi 2 Model B was released, and this is the device discussed in this book.
The new Raspberry Pi 2 is significantly more powerful than previous versions, opening us up to many new possibilities.
We will now look at the hardware of the device to get a basic understanding of what it is capable of doing. Future chapters will build upon the basics presented here.
The new Raspberry Pi is built on the back of the Broadcom BCM2836. The BCM2836 is a system-on-a-chip processor containing four ARM cores and Broadcom's VideoCore® IV graphics stack.
In contrast to this, previous Raspberry Pi A and B models only contained a single core.
On top of this, several other components make up the device, including USB, RCA, and microSD card storage. The previous Raspberry Pi Model B only contained two USB drives and a microUSB compared to the four USB drives and microUSB of the second version.
You can read a good breakdown of how the two boards standup to each other by visiting the following website: http://www.alphr.com/raspberry-pi-2/1000353/raspberry-pi-2-vs-raspberry-pi-b-a-raspberry-pi-comparison.
So, compared to earlier models, version 2 is a far more capable computer, yet still remains at the same price. The added benefit of having multiple cores allows us to explore different programming techniques for utilizing them.
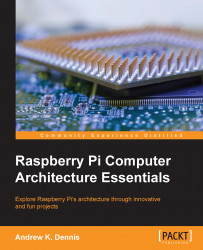
Next, we shall cover the core components of the Raspberry Pi board in more detail. The following is an image of the board with a description of each component:

Image courtesy of Wikipedia
The Raspberry Pi 2 is a small machine measuring only 85.60 mm x 56 mm x 21 mm and weighing approximately 45g. This small size makes it suitable for embedded projects, home automation devices, arcade machines, or building small multi-device clusters.
The System on Chip (SoC) architecture that the Raspberry Pi 2 implements is the Broadcom BCM2836, which we touched upon earlier in this chapter. This contains a CPU, GPU, SDRAM, and single USB port. Each of these items is discussed in more detail under the appropriate heading.
A central processing unit is the brain of your Raspberry Pi. It is responsible for processing machine instructions, which are the result of your compiled programs.
The BCM2836 implements a 900 MHz quad-core ARM Cortex-A7 processor. This runs on the ARMv7 instruction set.
The ARM architecture reference manual can be downloaded from ARM's website at http://infocenter.arm.com/help/topic/com.arm.doc.ddi0406c/index.html.
The graphics processing unit (GPU) is a specialist chip designed to handle the complex mathematics required to render graphics.
The Broadcom VideoCore Iv 250 MHz supports OpenGL ES 2.0 (24 GFLOPS) Mpeg-2 and VC-1 (with license). It also includes a 1080p30 H.264/MPEG-4 AVC decoded/encoder.
The documentation for the GPU can be found on Broadcom's website at https://www.broadcom.com/docs/support/videocore/VideoCoreIV-AG100-R.pdf.
The previous version of the Raspberry Pi Model B contained only a single microUSB port and a two standard USB ports. The Raspberry Pi 2 has been expanded to include an onboard 5-port USB hub.
This allows you to connect four standard USB cables to the device and a single microUSB cable. The micro USB port can be used to power your Raspberry Pi 2.
The microSD card is the main boot and storage mechanism of the Raspberry Pi. It is upon the microSD card that you will load your operating system and store data. Later in this book we will look at using the microSD purely for booting the Raspberry Pi, and then using a USB hard drive as a storage mechanism. In this chapter, we will delve into how we can setup the SD card with the Raspbian operating system.
One of the benefits of the Raspberry Pi 2 Model B is that it contains an Ethernet port. Many Raspberry Pi packages available on Amazon and similar stores include a wireless USB dongle; however, this results in you having to use up a USB port. If you plan to place your Raspberry Pi near a router or switch or have enough Ethernet cable, then you can connect your Raspberry Pi directly with the Ethernet jack.
The Raspberry Pi 2 supports 10/100 Mbps Ethernet, and the USB adapter in the third/fourth port of USB hub can also be used for Ethernet via a USB to Ethernet adapter.
Ethernet to USB adapters can be purchased from most good electronics stores and you can read more about the technology at https://en.wikipedia.org/wiki/Ethernet_over_USB.
The Raspberry Pi 2 implements the Inter-IC Sound (I2S) serial bus for audio input and output. This allows the device to connect multiple digital audio devices together. A 3.5mm TRRS jack is available and shared with the analog video output. The HDMI component also provides digital audio output.
Further information on configuring the audio output of the Raspberry Pi can be found on the official Raspberry Pi website: https://www.raspberrypi.org/documentation/configuration/audio-config.md.
The main method for interacting with electronic components and expansion boards is through the general purpose input/output (GPIO) pins on the Raspberry Pi.
The Raspberry Pi 2 Model B contains 40 pins in total. Future chapters will also look at how we can program these to control electronic devices.
As the acronym suggests the GPIO pins can accept both input and output commands and can be controlled by programs in a variety of languages running on the Raspberry Pi.
The input for example could be readings from a temperature sensor, and the output a command to another device to switch an LED on or off.
The Raspberry Pinout project provides an interactive guide to each GPIO pin and can be found at http://pinout.xyz/.
As well as providing a digital method for hooking up to a TV or monitor, the Raspberry Pi 2 also comes with analog support. The method of connection is commonly known as a composite or RCA port and earlier models of the Raspberry Pi came specifically with an RCA jack. RCA cables typically come with three connectors, two for audio and one (often yellow) for video.
With the release of the Raspberry Pi 2 the composite video (RCA) and 3.5 mm audio jacks functionality has been merged into a single TRRS hardware component. Therefore, if you wish to use video through this port, you may need to get a 3.5mm Mini AV TRRS to RCA cable instead. These can be found at any good electronics stores or on Amazon.
The Raspberry Pi 2 supports both PAL and NTSC standards.
Also included is a High-Definition Multimedia Interface (HDMI) port. This allows the Raspberry Pi 2 to be hooked up to high definition devices such as televisions and monitors. This port provides a digital alternative to the TRRS jack.
The HDMI port is ideal for streaming video and audio to your TV or monitor.