
In order to control the disk space used in the Linux filesystem, we must use quota, which enables us to control the disk space and thus helps us resolve low disk space issues to a great extent. For this, we have to enable user and group quotas on the Linux system.
In CentOS 7, the user and group quotas are not enabled by default so we have to enable them first.
To check whether quota is enabled or not, we issue the following command:
mount | grep ' / '
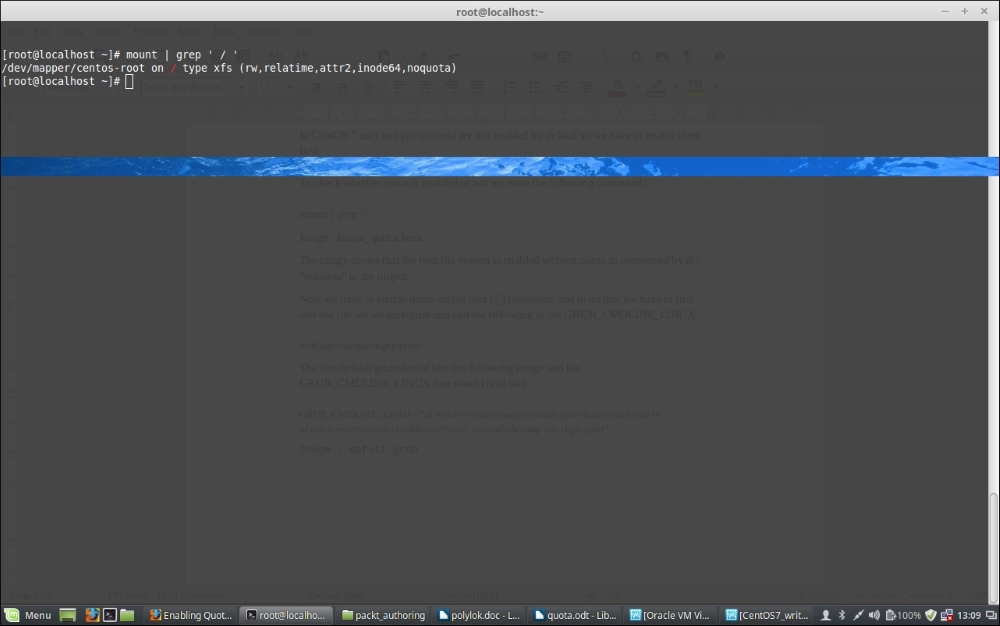
The image shows that the root filesystem is enabled without quota as mentioned by the noquota in the output.
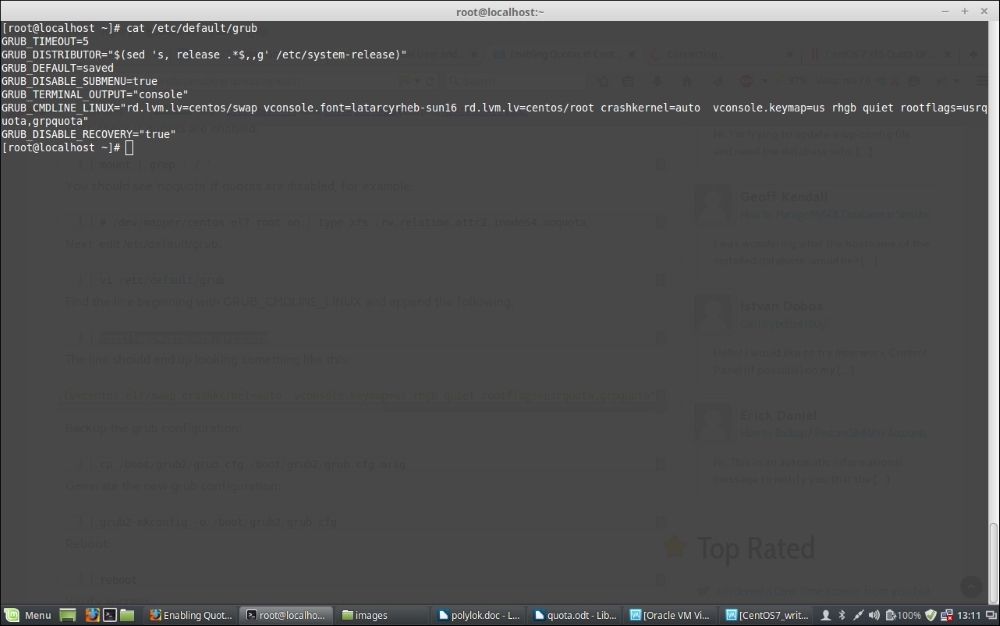
Now, we have to enable quota on the root (/) filesystem, and to do that, we have to first edit the file /etc/default/grub and add the following to GRUB_CMDLINE_LINUX:
rootflags=usrquota,grpquota
In file GRUB_CMDLINE_LINUX line should read as follows:
GRUB_CMDLINE_LINUX="rd.lvm.lv=centos/swap vconsole.font=latarcyrheb-sun16 rd.lvm.lv=centos/root crashkernel=auto vconsole.keymap=us rhgb quiet rootflags=usrquota,grpquota"
The output of cat /etc/default/grub command should look like the following screenshot:
Since we have to reflect the changes we just made, we should backup the grub configuration using the following command:
cp /boot/grub2/grub.cfg /boot/grub2/grub.cfg.original
Now, we have to rebuild the grub with the changes we just made using the command:
grub2-mkconfig -o /boot/grub2/grub.cfg
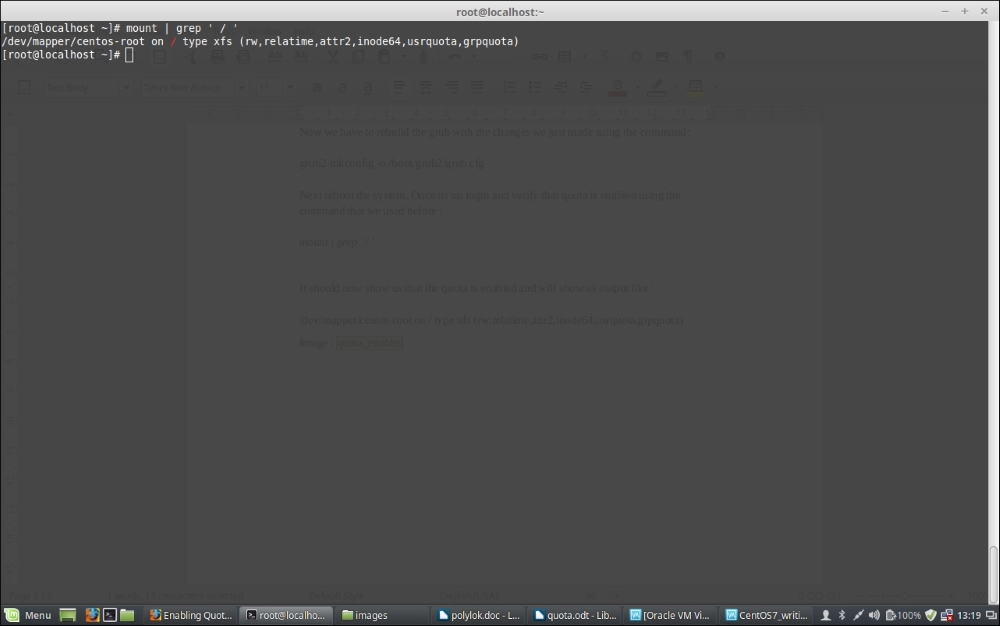
Next, reboot the system. Once it's up, log in and verify that the quota is enabled using the command we used before:
mount | grep ' / '
It should now show us that the quota is enabled and will show us an output as follows:
/dev/mapper/centos-root on / type xfs (rw,relatime,attr2,inode64,usrquota,grpquota)
Add the following lead-in before image and apply CIT style to mount | grep ' / '
Now, since quota is enabled, we will further install quota using the following to operate quota for different users and groups, and so on:
yum -y install quota
Once quota is installed, we check the current quota for users using the following command:
repquota -as
The preceding command will report user quotas in a human-readable format.
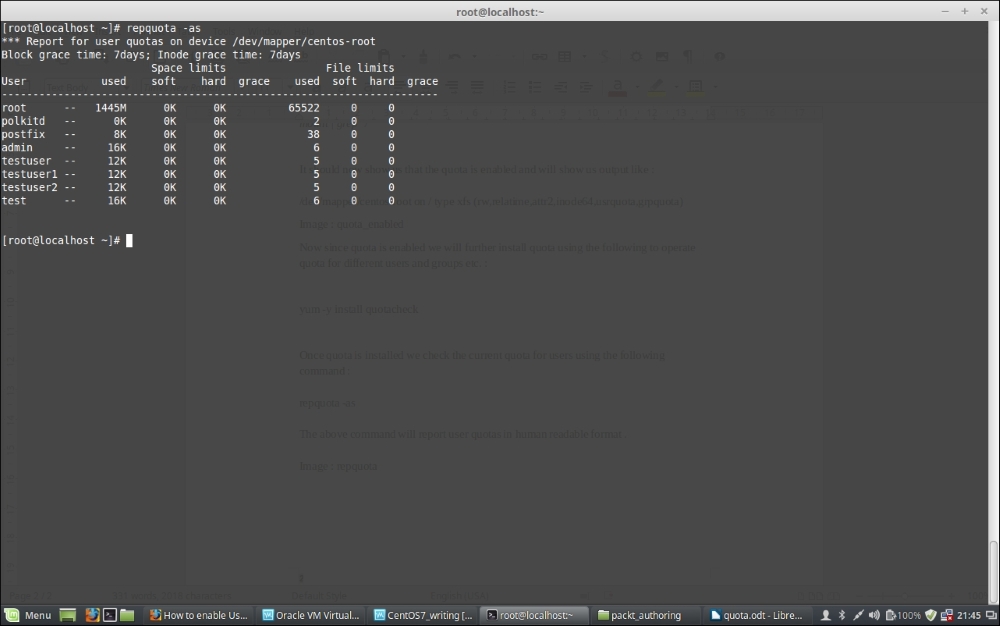
From the preceding screenshot, there are two ways we can limit quota for users and groups; one is setting soft and hard limits for the size of disk space used, and another is limiting the user or group by limiting the number of files they can create. In both cases, soft and hard limits are used. A soft limit is something that warns the user when the soft limit is reached, and the hard limit is the limit that they cannot bypass.
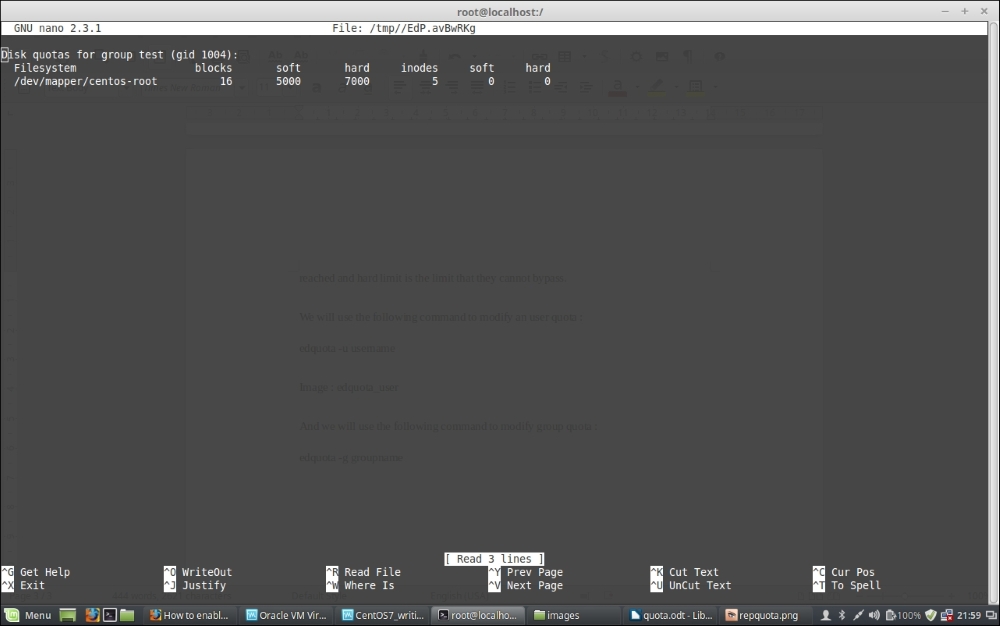
We will use the following command to modify a user quota:
edquota -u username
The preceding command output shall look like the following screenshot:

Now, we will use the following command to modify the group quota:
edquota -g groupname
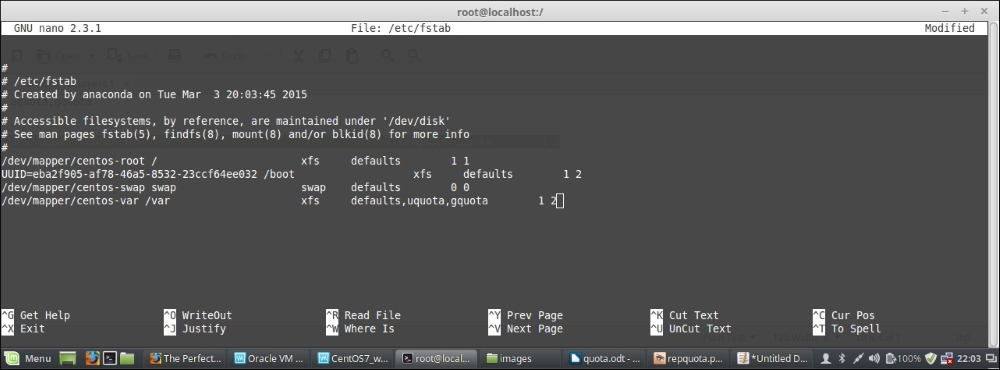
If you have other partitions mounted separately, you have to modify the /etc/fstab file command to enable quota on the filesystem by adding usrquota and grpquota after the defaults for that specific partition as in the following screenshot, where we have enabled the quota for the /var partition:
Once you are finished enabling quota, remount the filesystem and run the following commands:
To remount /var :
mount -o remount /var
To enable quota :
quotacheck -avugm
quotaon -avug
Quota is something all system admins use to handle disk space consumed on a server by users or groups and limit over usage of the space. It thus helps them manage the disk space usage on the system. In this regard, it should be noted that you plan before your installation and create partitions accordingly as well so that the disk space is used properly. Multiple separate partitions such as /var and /home etc are always suggested, as generally these are the partitions which consume most space on a Linux system. So, if we keep them on a separate partition, it will not eat up the root (/) filesystem space and will be more failsafe than using an entire filesystem mounted as only root.