

It is a good policy to have password aging so that the users are forced to change their passwords at a certain interval. This, in turn, helps to keep the security of the system as well.
We can use chage to configure the password to expire the first time the user logs in to the system.
This method of using chage will ensure that the user is forced to change the password right away.
Tip
If we use only chage <username>, it will display the current password aging value for the specified user and will allow them to be changed interactively.
The following steps need to be performed to accomplish password aging:
Lock the user. If the user doesn't exist, we will use the
useraddcommand to create the user. However, we will not assign any password to the user so that it remains locked. But, if the user already exists on the system, we will use theusermodcommand to lock the user:Usermod -L <username>Force immediate password change using the following command:
chage -d 0 <username>Unlock the account. This can be achieved in two ways. One is to assign an initial password and the other is to assign a null password. We will take the first approach as the second one, though possible, is not good practice in terms of security. Therefore, here is what we do to assign an initial password:
Use the Python command to start the command-line Python interpreter:
import crypt; print
crypt.crypt("Q!W@E#R$","Bing0000/")
Here, we have used the
Q!W@E#R$password with a salt combination of the alphanumeric character:Bing0000followed by a/character. The output is the encrypted password, similar toBiagqBsi6gl1o.Press Ctrl + D to exit the Python interpreter.
At the shell, enter the following command with the encrypted output of the Python interpreter:
usermod -p "<encrypted-password>" <username>So, here, in our case, if the username is
testuser, and the encrypted output is" BiagqBsi6gl1o"we will do:usermod -p "BiagqBsi6gl1o" testuser
Now, upon initial login using the Q!W@E#R$ password, the user will be prompted for a new password.
This is a set of rules defined in some files, which have to be followed when a system user is setting up. It's an important factor in security because one of the many security breach histories was started with hacking user passwords. This is the reason why most organizations set a password policy for their users. All users and passwords must comply with this.
A password policy usually is defined by the following:
Password aging
Password length
Password complexity
Limit login failures
Limit prior password reuse
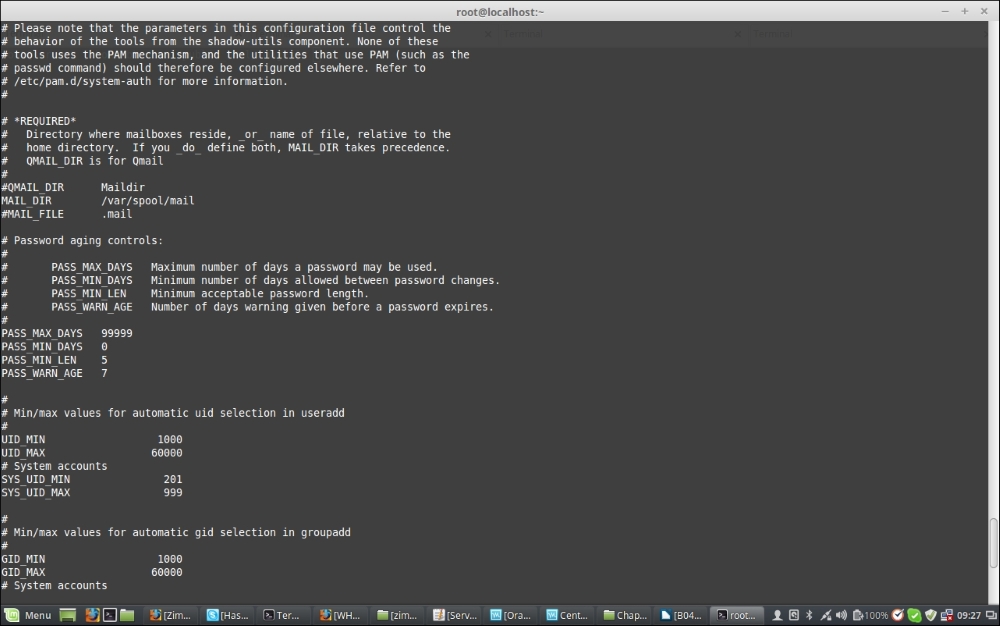
Password aging and password length are defined in /etc/login.defs. Aging basically means the maximum number of days a password might be used, minimum number of days allowed between password changes, and number of warnings before the password expires. Length refers to the number of characters required for creating the password. To configure password aging and length, we should edit the /etc/login.defs file and set different PASS values according to the policy set by the organization.
Note
Note: The password aging controls defined here do not affect existing users; it only affects the newly created users. So, we must set these policies when setting up the system or the server at the beginning. The values we modify are:
Let's take a look at a sample configuration of the login.defs file:
By editing the /etc/pam.d/system-auth file, we can configure the password complexity and the number of reused passwords to be denied. Password complexity refers to the complexity of the characters used in the password, and the reused password deny refers to denying the desired number of passwords the user used in the past. By setting the complexity, we force the usage of the desired number of capital characters, lowercase characters, numbers, and symbols in a password. The password will be denied by the system until and unless the complexity set by the rules is met. We do this using the following terms:
Force capital characters in passwords:
ucredit=-X, whereXis the number of capital characters required in the password.Force lower case characters in passwords:
lcredit=-X, whereXis the number of lowercase characters required in the password.Force numbers in passwords:
dcredit=-X, whereXis the number of numbers required in the password.Force the use of symbols in passwords:
ocredit=-X, whereXis the number of symbols required in the password. For example:password requisite pam_cracklib.so try_first_pass retry=3 type= ucredit=-2 lcredit=-2 dcredit=-2 ocredit=-2Deny reused passwords:
remember=X, whereXis the number of past passwords to be denied. For example:password sufficient pam_unix.so sha512 shadow nullok try_first_pass use_authtok remember=5
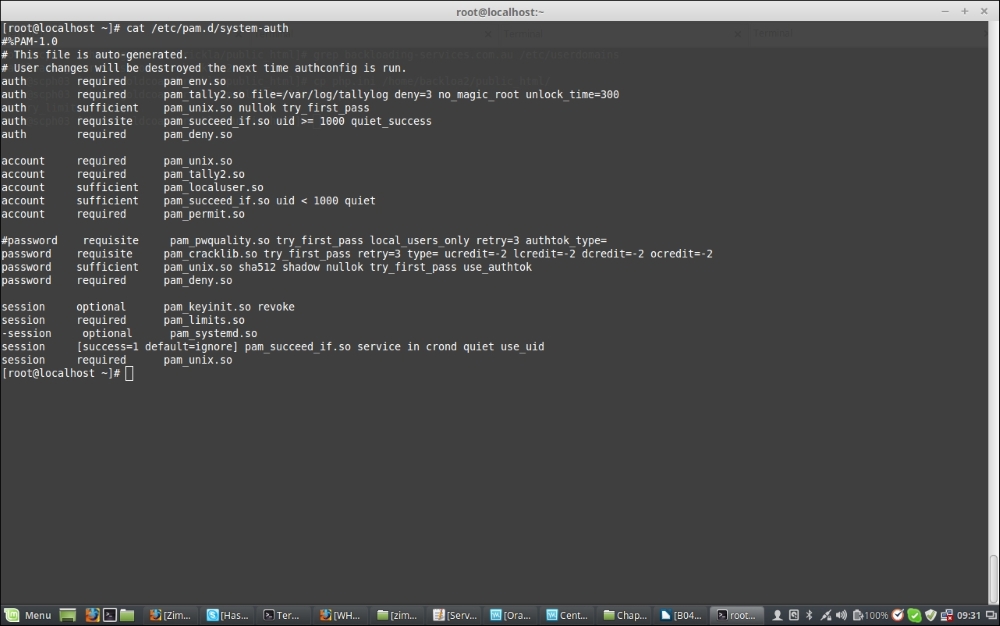
Let's now take a look at a sample configuration of /etc/pam.d/system-auth:

We set the number of login failures allowed by a user in the /etc/pam.d/password-auth, /etc/pam.d/system-auth, and /etc/pam.d/login files. When a user's failed login attempts are higher than the number defined here, the account is locked and only a system administrator can unlock the account. To configure this, make the following additions to the files. The following deny=X parameter configures this, where X is the number of failed login attempts allowed.
Add these two lines to the /etc/pam.d/password-auth and /etc/pam.d/system-auth files and only the first line to the /etc/pam.d/login file:
auth        required    pam_tally2.so file=/var/log/tallylog deny=3 no_magic_root unlock_time=300
account     required    pam_tally2.so
The following screenshot is a sample /etc/pam.d/system-auth file:
The following is a sample /etc/pam.d/login file:

To see failures, use the following command:
pam_tally2 –user=<User Name>
To reset the failure attempts and to enable the user to log in again, use the following command:
pam_tally2 –user=<User Name> --reset