

Number sequences in Dynamics 365 for Finance and Operations are used to generate specifically formatted numbers for record identification. These number sequences can be anything from voucher numbers or transaction identification numbers to customer or vendor accounts.
When developing custom functionality, often one of the tasks is to add a new number sequence to the system in order to support newly created tables. Adding a number sequence to the system is a two-step process. First, we create the number sequence itself; second, we start using it in some particular form or from the code.
D365 contains a list of NumberSeqApplicationModule derivative classes, which hold the number sequence's setup data for the specific module. These classes are read by the number sequence wizard, which detects existing number sequences and proposes to create the missing ones or newly added ones. The wizard is normally run as a part of the application initialization. It can also be rerun any time later when expanding the D365 functionality used, where a setup of additional number sequences is required. The wizard also has to be rerun if new custom number sequences are added to the system.
In this recipe, we will do the first step, that is, add a new number sequence to the system. In a standard application, the customer group number is not driven by any number sequence, so we will enhance this by creating it. The second step is explained later in the Using a number sequence handler recipe in Chapter 3, Working with Data in Forms.
Carry out the following steps in order to complete this recipe:
- Create a new
NumberSeqModuleCustomer_packtclass in the D365 Project that extends theNumberSeqModuleCustomerclass in the Application and add the following code snippet at the bottom of theloadModule_Extension()method:
        class NumberSeqModuleCustomer_packt extends
         NumberSeqModuleCustomer
       {
         public void loadModule_Extension()
        {
          NumberSeqDatatype datatype = NumberSeqDatatype::construct();

          datatype.parmDatatypeId(extendedTypeNum(CustGroupId));
          datatype.parmReferenceHelp("Customer group ID");
          datatype.parmWizardIsContinuous(false);
          datatype.parmWizardIsManual(NoYes::No);
          datatype.parmWizardIsChangeDownAllowed(NoYes::Yes);
          datatype.parmWizardIsChangeUpAllowed(NoYes::Yes);
          datatype.parmWizardHighest(999);
          datatype.parmSortField(20);
          datatype.addParameterType(
          NumberSeqParameterType::DataArea, true, false);

          this.create(datatype);
        }
       }
Note
Downloading the example code You can download the example code files for all Packt books you have purchased from your account at http://www.packtpub.com. If you purchased this book elsewhere, you can visit http://www.packtpub.com/support and register to have the files emailed directly to you.
- Create a new runnable class (Job) with the following lines of code, build the solution and run it:
         class loadNumSeqCustPackt
        {
          /// <summary>
          /// Runs the class with the specified arguments.
          /// </summary>
          /// <param name = "_args">The specified arguments.</param>
           public static void Main(Args args)
          {
            //define the class variable
            NumberSeqModuleCustomer_packt nymberSeqMod = new
             NumberSeqModuleCustomer_packt();

            //load the number sequences
             nymberSeqMod.loadModule_Extension();
          }
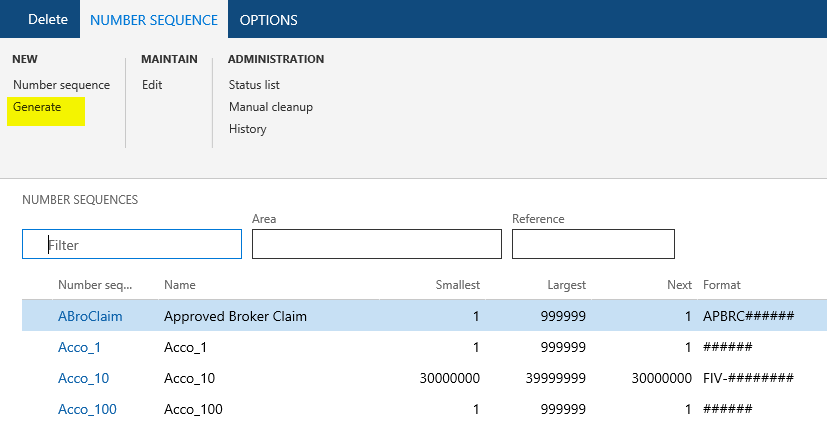
} - Run the number sequence wizard by clicking on the
Generatebutton underNumber sequenceby going toOrganization administration|Common|Number sequenceand then click on theNextbutton, as shown in the following screenshot:
- Click on
Detailsto view more information. Delete everything apart from the rows whereAreaisAccounts receivableandReferenceisCustomer group. Note the number sequence codes and click on theNextbutton, as shown here:
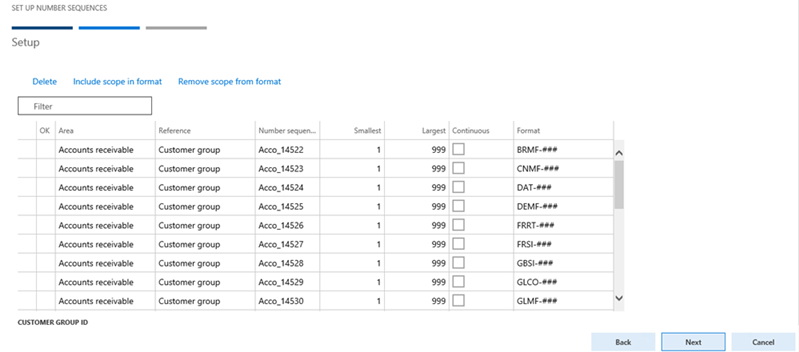
- On the last page, click on the
Finishbutton to complete the setup, as shown in the following screenshot:

- The newly created number sequences now can be found in the
Number sequenceform, as shown in the following screenshot:

- Navigate to
Organization administration|Number sequences|Segment configurationand notice the newCustomer groupreference under theAccounts receivablearea:

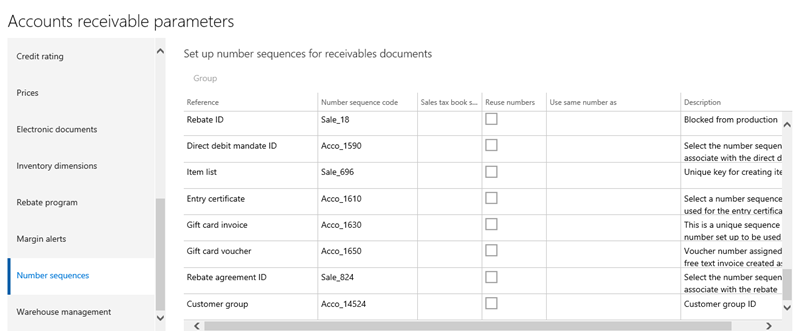
- Navigate to
Accounts receivable|Setup|Accounts receivable parametersand select theNumber sequencestab. Here, you should see the new number sequence code:
- The last thing to be done is to create a helper method for this number sequence. Create a new extension class
CustParameters_Extensionfor theCustParameterstable and add it to the Dynamics 365 Project and then create the following method and build the solution:
        [ExtensionOf(tableStr(CustParameters))]
        final  class CustParameters_Extension
        {
          /// <summary>
          /// Gets the number reference customer group id.
          /// </summary>
          /// <returns>
          /// An instance of the <c>NumberSequenceReference</c> class.
          /// </returns>
          client server static NumberSequenceReference
           numRefCustGroupId()
          {
            NumberSequenceReference NumberSeqReference;

            NumberSeqReference = NumberSeqReference::findReference
            (extendedTypeNum(CustGroupId));
             return NumberSeqReference;
          }
} We start the recipe by adding a number sequence initialization code into the NumberSeqModuleCustomer_packt class. As understood from its name, the number sequence initialization code holds the initialization of the number sequences that belong to the Accounts receivable module.
The code in the loadModule_Extension() method defines the default number sequence settings to be used in the wizard, such as the data type, description, and highest possible number. Additional options such as the starting sequence number, number format, and others can also be added here. All the mentioned options can be changed while running the wizard. The addParameterType() method is used to define the number sequence scope. In the example, we created a separate sequence for each Legal entity.
Before we start the wizard, we initialize number sequence references. This should be done as a part of the Dynamics 365 for Finance and Operations initialization checklist, but in this example, we execute it manually by calling the loadModule_Extension() method of the NumberSeqApplicationModule_packt class.
Next, we execute the wizard that will create the number sequences for us. We skip the welcome page and in the second step of the wizard, the Details button can be used to display more options. The options can also be changed later in the Number sequences form before or even after the number sequence is actually used. The last page shows an overview of what will be created. Once completed, the wizard creates new records in the Number sequences form for each company.
The newly created number sequence reference appears in the Segment configuration form. Here, we can see that the Data area checkbox is checked, which means that we will have separate number lists for each company. The number sequence setup can be normally located in the module parameter forms.
- The Using a number sequence handler recipe in Chapter 3, Working with Data in Forms