
We'll implement a Node.js application (http://keystonejs.com/) on Google Compute Engine (GCE). GCE is Google's offering for all IaaS needs. Our simple application is built on expressjs and MongoDB. expressjs is a simple web application framework for Node.js and MongoDB is a document-oriented NoSQL database. KeystoneJS also uses a templating engine along with Node.js and MongoDB.
The architecture of our recipe is depicted as follows:
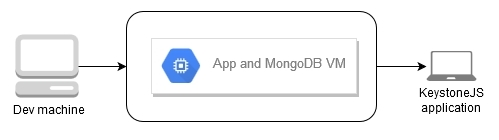
Single-tiered Node.js application on GCE
We will follow a single-tiered approach to host the application and the database on the same VM. Later in this chapter, we'll host the same Node.js application on Google App Engine and Kubernetes Engine.
Note
You'll be using the following services and others for this recipe:
- GCE
- Google Cloud logging
- Google Cloud Source Repositories
The following are the initial setup verification steps to be taken before the recipe can be executed:
- Create or select a GCP project.
- Enable billing and enable the default APIs (some APIs such as BigQuery, storage, monitoring, and a few others are enabled automatically).
- Install Google Cloud SDK on your development machine. Please follow the steps from https://cloud.google.com/sdk/docs/.
- Install Node.js and MongoDB on your development machine.
We'll approach this recipe in two stages. In the first stage, we'll prepare our development machine to run our sample Node.js application. Then we'll push the working application to the Compute Engine.
Follow these steps to download the source code from GitHub and configure it to work on your development machine:
- Clone the repository in your development space:
$ git clone https://github.com/legorie/gcpcookbook.git Note
You can also download the code from: https://github.com/PacktPublishing/Google-Cloud-Platform-Cookbook.
- Navigate to the directory where the
mysiteapplication is stored:
$ cd gcpcookbook/Chapter01/mysite- With your favorite editor, create a filename
.envin themysitefolder:
COOKIE_SECRET=d44d5c45e7f8149aabc068244
MONGO_URI=mongodb://localhost/mysite
- Install all the packages required for the application to work:
$ npm install- Start the
mongodservice in your development machine - Run the application:
$ node keystone.js- You'll see the following message logged on the Terminal:
------------------------------------------------
Applying update 0.0.1-admins...

------------------------------------------------
mySite: Successfully applied update 0.0.1-admins.

Successfully created:

* 1 User


------------------------------------------------
Successfully applied 1 update.
------------------------------------------------

------------------------------------------------
KeystoneJS Started:
mySite is ready on port 3000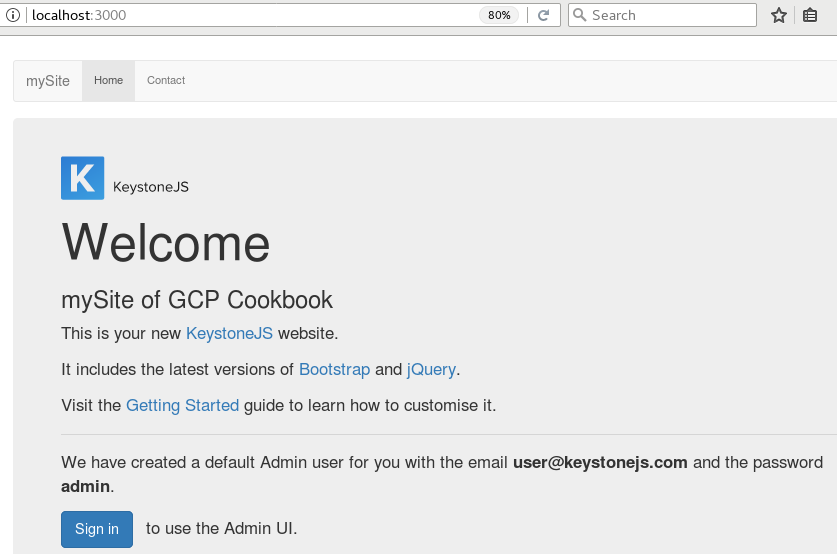
------------------------------------------------- The application is now available on
http://localhost:3000, as shown:
- You can stop the local server by pressing Ctrl + C.
To deploy the application to GCP, we'll first upload the working code from our development machine to Google Source Repositories. Then, instead of setting up the VM manually, we'll modify and use a start up script provided by Google to bootstrap the VM with the necessary packages and a runnable application. Finally, we'll create the VM with the bootstrap script and configure the firewall rules so that the application is accessible from the internet.
Each project on GCP has a Git repository which can be accessed by the GCE instances. Though we can manually move the code to an instance, moving it to Source Repositories gives the ability for the compute instances to pull the code automatically via a start up script:
- If you have made any changes to the code, you can commit the code to the local repository:
git commit -am "Ready to be committed to GCP"- Create a new repository under the project:
- Follow the steps to upload the code from the local repository to Google Source Repositories. In the following example, the project ID is
gcp-cookbookand the repository name isgcpcookbook:
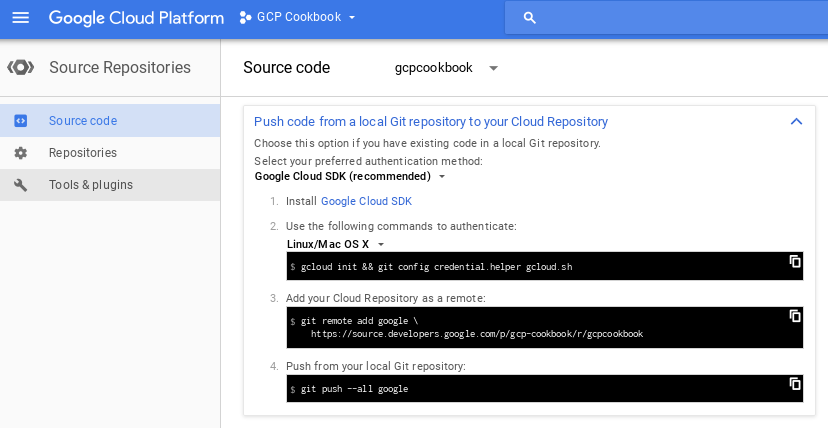
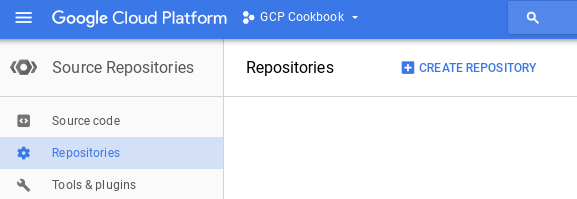
- After the
git pushcommand is successful, you'll see the repository updated in the Source Repositories:

The start up script is used to initialize the VM during a boot or a restart with the necessary software (MongoDB, Node.js, supervisor, and others) and loads the application from the source code repository. The following script can be found in the /Chapter01/ folder of the Git repository. The start up script performs the following tasks:
- Installs the logging agent which is an application based on Fluentd.
- Installs the MongoDB database to be used by the KeystoneJS application.
- Installs Node.js, Git, and supervisor. Supervisor is a process control system which is used to run our KeystoneJS application as a process.
- Clones the application code from the repository to the local folder. Update the code at
#Line 60, to reflect your repository's URL:
git clone https://source.developers.google.com/p/<PROJECT ID>/r/<REPOSITORY NAME> /opt/app #Line 60- Installs the dependencies and creates the
.envfile to hold the environment variables:
COOKIE_SECRET=<Long Random String>
- The application is configured to run under the supervisor:
#! /bin/bash
# Source url: https://github.com/GoogleCloudPlatform/nodejs-getting-started/blob/master/7-gce/gce/startup-script.sh
# The startup-script is modified to suit the Chapter 01-Recipe 01 of our book
#  Copyright 2017, Google, Inc.
# Licensed under the Apache License, Version 2.0 (the "License");
# you may not use this file except in compliance with the License.
# You may obtain a copy of the License at
#
#    http://www.apache.org/licenses/LICENSE-2.0
#
# Unless required by applicable law or agreed to in writing, software
# distributed under the License is distributed on an "AS IS" BASIS,
# WITHOUT WARRANTIES OR CONDITIONS OF ANY KIND, either express or implied.
# See the License for the specific language governing permissions and
# limitations under the License.

# [START startup]
set -v
- Talks to the metadata server to get the project ID:
PROJECTID=$(curl -s "http://metadata.google.internal/computeMetadata/v1/project/project-id" -H "Metadata-Flavor: Google")
# Install logging monitor. The monitor will automatically pick up logs sent to
# syslog.
# [START logging]
curl -s "https://storage.googleapis.com/signals-agents/logging/google-fluentd-install.sh" | bash
service google-fluentd restart &
# [END logging]
- Installs MongoDB:
apt-key adv --keyserver hkp://keyserver.ubuntu.com:80 --recv EA312927
echo "deb http://repo.mongodb.org/apt/ubuntu xenial/mongodb-org/3.2 multiverse" | sudo tee /etc/apt/sources.list.d/mongodb-org-3.2.list
apt-get update
apt-get install -y mongodb-org
cat > /etc/systemd/system/mongodb.service << EOF
[Unit]
Description=High-performance, schema-free document-oriented database
After=network.target
[Service]
User=mongodb
ExecStart=/usr/bin/mongod --quiet --config /etc/mongod.conf
[Install]
WantedBy=multi-user.target
EOF
systemctl start mongodb
systemctl enable mongodb
- Installs dependencies from
apt:
apt-get install -yq ca-certificates git nodejs build-essential supervisor- Installs Node.js:
mkdir /opt/nodejs
curl https://nodejs.org/dist/v4.2.2/node-v4.2.2-linux-x64.tar.gz | tar xvzf - -C /opt/nodejs --strip-components=1
ln -s /opt/nodejs/bin/node /usr/bin/node
ln -s /opt/nodejs/bin/npm /usr/bin/npm
# git requires $HOME and it's not set during the startup script.
export HOME=/root
git config --global credential.helper gcloud.sh
git clone https://source.developers.google.com/p/<Project ID>/r/gcpcookbook  /opt/app
- Installs the app dependencies:
cd /opt/app/Chapter01/mysite
npm install
cat >./.env << EOF
COOKIE_SECRET=d44d5c45e7f8149aabc06a830dba5716b4bd952a639c82499954
MONGODB_URI=mongodb://localhost:27017
EOF
- Creates a
nodeappuser. The application will run as this user:
useradd -m -d /home/nodeapp nodeapp
chown -R nodeapp:nodeapp /opt/app
- Configures the supervisor to run the
nodeapp:
cat >/etc/supervisor/conf.d/node-app.conf << EOF
[program:nodeapp]
directory=/opt/app/Chapter01/mysite
command=npm start
autostart=true
autorestart=true
user=nodeapp
environment=HOME="/home/nodeapp",USER="nodeapp",NODE_ENV="production"
stdout_logfile=syslog
stderr_logfile=syslog
EOF
supervisorctl reread
supervisorctl update
# Application should now be running under supervisor
# [END startup]
After creating the start up script, follow these steps:
- With the start up script ready, we can create an instance using the
gcloudcommand:
$ gcloud compute instances create mysite-instance \--image-family=debian-8 \--image-project=debian-cloud \--machine-type=g1-small \--scopes userinfo-email,cloud-platform \--metadata-from-file startup-script=./startup-script.sh \--zone us-east1-c \--tags mysite-server
- You can check the progress of the instance creation using the following command:
$ gcloud compute instances get-serial-port-output \
mysite-instance --zone us-east1-c
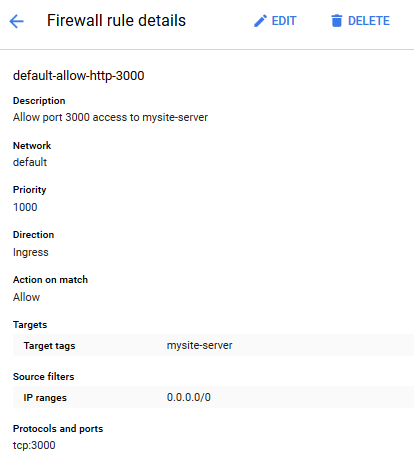
- Create a firewall rule to allow access to port
3000to the instance:
$ gcloud compute firewall-rules create default-allow-http-3000 \--allow tcp:3000 \--source-ranges 0.0.0.0/0 \--target-tags mysite-server \--description "Allow port 3000 access to mysite-server"
The following screenshot shows the details of the firewall rule:
- Get the public IP of the instance from the Google Cloud Console or by using the following command:
$ gcloud compute instances list- Navigate to
http://<public IP of the instance>:3000to see the application running.