

We will use the Azure serverless architecture to build a Web API using HTTP triggers. These HTTP triggers can be consumed by any frontend application that is capable of making HTTP calls.
Building a backend Web API using HTTP triggers
Getting ready
Let's start our journey of understanding Azure serverless computing using Azure Functions by creating a basic backend Web API that responds to HTTP requests:
- Refer to https://azure.microsoft.com/en-in/free/?&wt.mc_id=AID607363_SEM_8y6Q27AS for creating a free Azure Account.
- Visit https://docs.microsoft.com/en-us/azure/azure-functions/functions-create-function-app-portal to understand the step-by-step process of creating a function app, and https://docs.microsoft.com/en-us/azure/azure-functions/functions-create-first-azure-function to create a function. While creating a function, a Storage Account is also created for storing all the files. Remember the name of the Storage Account, as it will be used later in other chapters.
- Once you have created the Function App, please go through the basic concepts of Triggers and Bindings, which are the core concepts of how Azure Functions work. I highly recommend that you to go through the https://docs.microsoft.com/en-us/azure/azure-functions/functions-triggers-bindings article before you proceed.
We will be using C# as the programming language throughout this book. Most of these functions are developed using the Azure Functions V2 runtime. However, there are a few recipes that are not yet supported in V2 runtime, which is mentioned in the respective recipes. Hopefully, by the time you read this book, Microsoft will have made those features available for V2 runtime as well.
How to do it...
Perform the following steps:
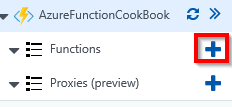
- Navigate to the Function App listing page by clicking on the Function Apps menu, which is available on the left-hand side.
- Create a new function by clicking on the + icon:
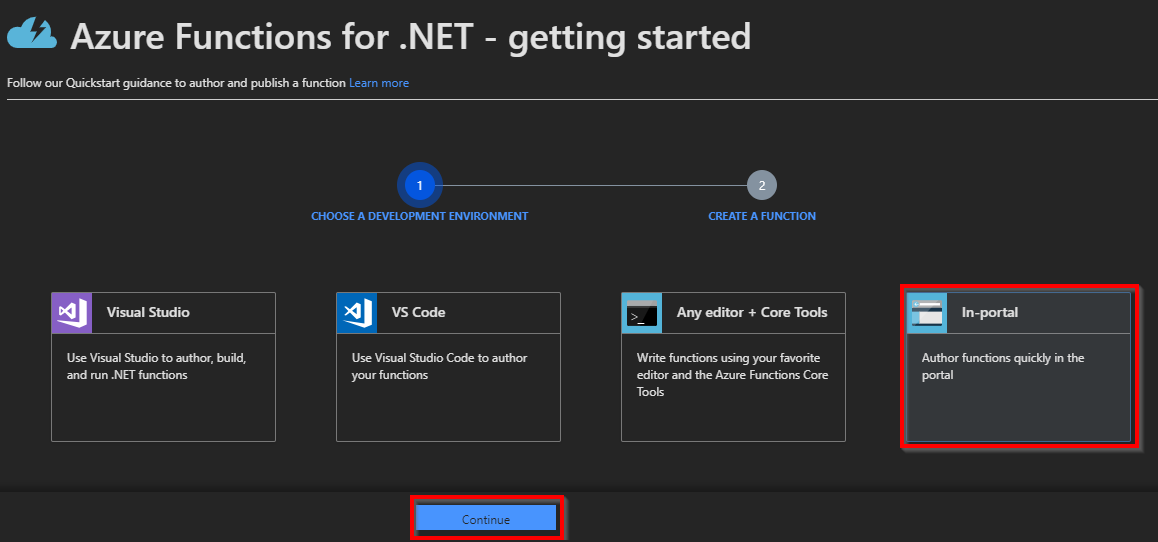
- You will see the Azure Functions for .NET - getting started page, where you will be prompted to choose the type of tools you would like to use. You can choose the one you are the most interested in. For the initial few chapters, we will use the In-portal option, where you can quickly create Azure Functions right from the portal without any tools. Later, in the following chapters, we will use Visual Studio and Azure Functions Core Tools to create our functions:
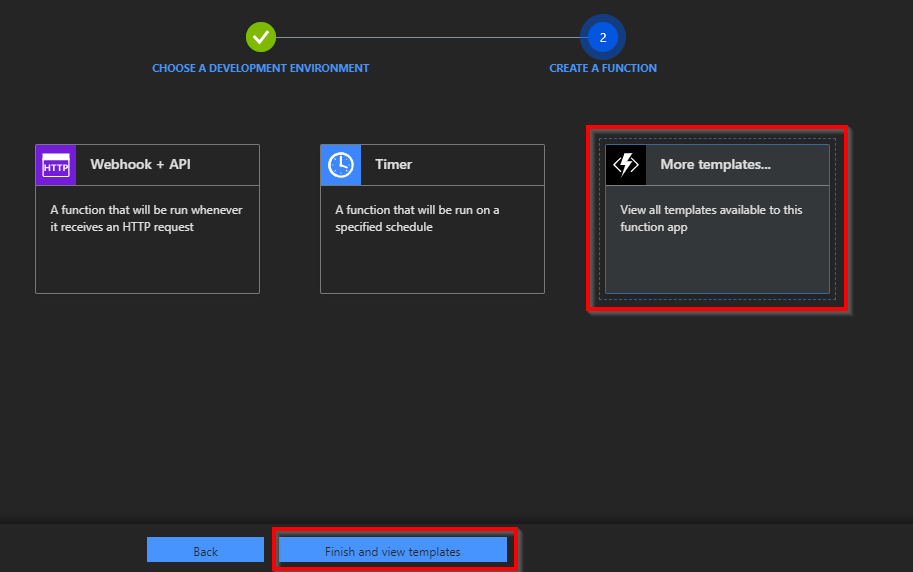
- Next select More templates and click on Finish and view templates, as shown in the following screenshot:
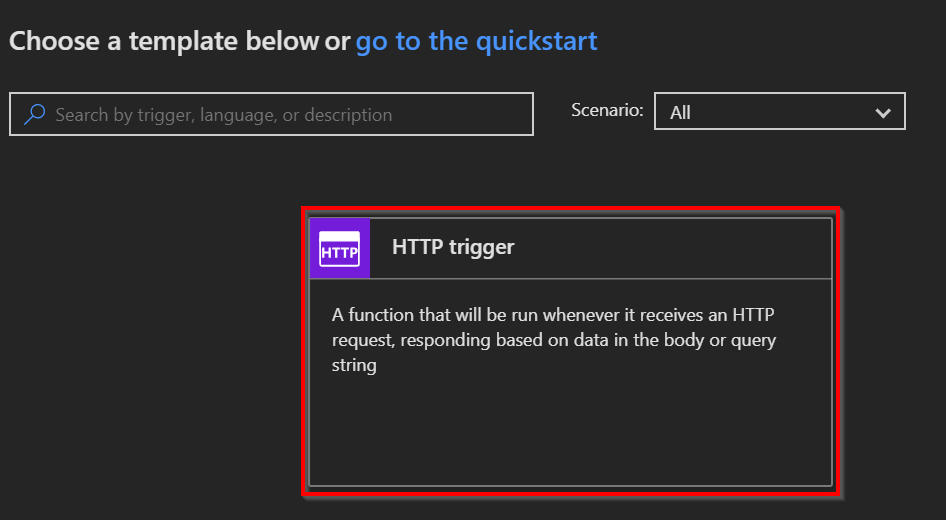
- In the Choose a template below or go to the quickstart section, choose HTTP trigger to create a new HTTP trigger function:
- Provide a meaningful name. For this example, I have used RegisterUser as the name of the Azure Function.
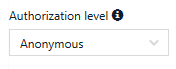
- In the Authorization level drop-down, choose the Anonymous option. We will learn more about the all authorization levels in Chapter 9, Implementing Best Practices for Azure Functions:
- Click on the Create button to create the HTTP trigger function.
- As soon as you create the function, all the required code and configuration files will be created automatically and the run.csx file will be opened for you so that you can edit the code. Remove the default code and replace it with the following code. I have added two parameters (firstname and lastname), which will be displayed in the output when the HTTP trigger is triggered:
#r "Newtonsoft.Json"

using System.Net;
using Microsoft.AspNetCore.Mvc;
using Microsoft.Extensions.Primitives;
using Newtonsoft.Json;

public static async Task<IActionResult> Run(
                    HttpRequest req,
                    ILogger log)
{
  log.LogInformation("C# HTTP trigger function processed a request.");
  string firstname=null,lastname = null;
  string requestBody = await new StreamReader(req.Body).ReadToEndAsync();

 dynamic inputJson = JsonConvert.DeserializeObject(requestBody);
 firstname = firstname ?? inputJson?.firstname;
 lastname = inputJson?.lastname;

 return (lastname + firstname) != null
 ? (ActionResult)new OkObjectResult($"Hello, {firstname + " " + lastname}")
 : new BadRequestObjectResult("Please pass a name on the query" + "string or in the request body");
}
- Save these changes by clicking on the Save button, which is available just above the code editor.
- Let's try and test the RegisterUser function using the Test console. Click on the Test tab to open the Test console:

- Enter the values for firstname and lastname in the Request body section:
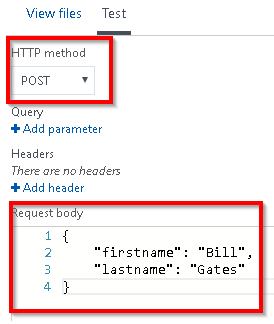
Make sure that you select POST in the HTTP method drop-down.
- Once you have reviewed the input parameters, click on the Run button, which is available at the bottom of the Test console:
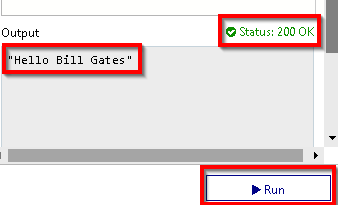
- If the input request workload is passed correctly with all the required parameters, you will see a Status 200 OK, and the output in the Output window will be like what's shown in the preceding screenshot.
How it works...
We have created the first basic Azure Function using HTTP triggers and made a few modifications to the default code. The code just accepts the firstname and lastname parameters and prints the name of the end user with a Hello {firstname} {lastname} message as a response. We also learned how to test the HTTP trigger function right from the Azure Management portal.
For the sake of simplicity, I didn't perform validations of the input parameter. Make sure that you validate all the input parameters in the applications that are running on your production environment.
See also
The Enabling authorization for function apps recipe in Chapter 9, Implementing Best Practices for Azure Functions.