Book Image

Microsoft Azure Architect Technologies: Exam Guide AZ-300

By : Sjoukje Zaal
Book Image

Microsoft Azure Architect Technologies: Exam Guide AZ-300

By: Sjoukje Zaal

Overview of this book

From designing solutions on Azure to configuring and managing virtual networks, AZ-300 certification can help you achieve all this and more. Whether you want to get certified or gain hands-on experience in administering, developing, and architecting Azure solutions, this study guide will help you get started. The book features not only the different exam objectives, but also guides you through configuring, managing, securing, and architecting Azure resources. Divided into five modules, this book will systematically take you through the different concepts and features as you advance through the sections. The first module demonstrates how to deploy and configure infrastructure. You will cover techniques related to implementing workloads and security, before learning how to create and deploy apps in the next module. To build on your knowledge, the final two modules will get you up to speed with implementing authentication, data security, and application and platform monitoring, along with covering Azure storage, alerting, and automation strategies. Finally, you’ll work through exam-based mock tests with answers to boost your confidence in passing the exam. By the end of this book, you’ll have learned the concepts and techniques you need to know in order to prepare for the AZ-300 exam, along with the skills to design effective solutions on Microsoft Azure.
Table of Contents (30 chapters)
1
Section 1: Deploying and Configuring Infrastructure
9
Section 2: Implementing Workloads and Security
16
Section 3: Creating and Deploying Apps
19
Section 4: Implementing Authentication and Secure Data
22
Section 5: Developing for the Cloud and for Azure Storage
26
Mock Questions
27
Mock Answers

Implementing managed identities for Azure resources service principal authentication

You can enable MSI for your Azure resources in the Azure portal, PowerShell, or the CLI and by using ARM templates. In this demonstration, we are going to enable this in the Azure portal for the Azure web app that we created earlier in this chapter:

  1. Navigate to the Azure portal by opening https://portal.azure.com.
  2. Go to PacktWebApp that we created earlier.
  3. From the overview blade of the web app, in the left menu under Settings, click Identity.
  4. In the next blade, you can create a system-assigned or user-assigned managed identity. We are going to create a System assigned identity for this demo. Change the status to On and click Save:
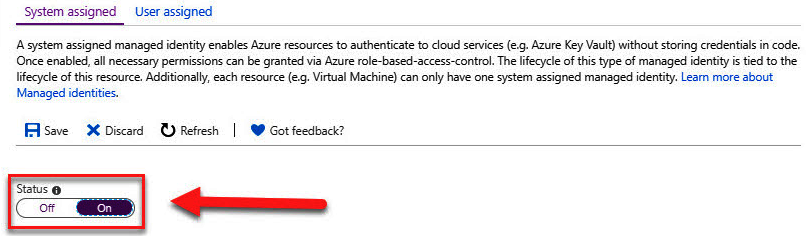
Managed identity settings
  1. When the managed identity is created, we can assign permissions to it to access the Key Vault. Therefore, we first need to create the Key Vault. We will add the Key Vault to the same resource group that the web app is in. We will do this using...