Book Image

Cloud Native Python

By : Manish Sethi
Book Image

Cloud Native Python

By: Manish Sethi

Overview of this book

Businesses today are evolving so rapidly that having their own infrastructure to support their expansion is not feasible. As a result, they have been resorting to the elasticity of the cloud to provide a platform to build and deploy their highly scalable applications. This book will be the one stop for you to learn all about building cloud-native architectures in Python. It will begin by introducing you to cloud-native architecture and will help break it down for you. Then you’ll learn how to build microservices in Python using REST APIs in an event driven approach and you will build the web layer. Next, you’ll learn about Interacting data services and building Web views with React, after which we will take a detailed look at application security and performance. Then, you’ll also learn how to Dockerize your services. And finally, you’ll learn how to deploy the application on the AWS and Azure platforms. We will end the book by discussing some concepts and techniques around troubleshooting problems that might occur with your applications after you’ve deployed them. This book will teach you how to craft applications that are built as small standard units, using all the proven best practices and avoiding the usual traps. It's a practical book: we're going to build everything using Python 3 and its amazing tooling ecosystem. The book will take you on a journey, the destination of which, is the creation of a complete Python application based on microservices over the cloud platform
Table of Contents (14 chapters)
6
Creating UIs to Scale with Flux

CI/CD pipeline using Jenkins with Azure

Firstly, we need to navigate to the active directory service, which you can see in the following screenshot:

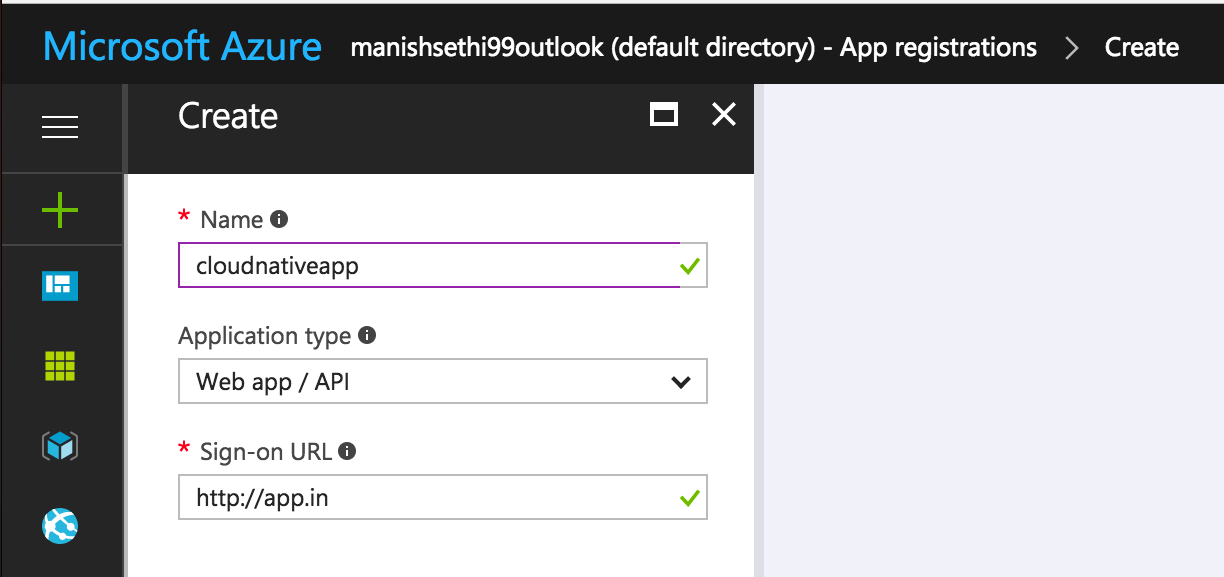
Now we need to register our application, so, select the App registrations link in the left pane. You will see a screen similar to the next one, where you need to provide your application details:

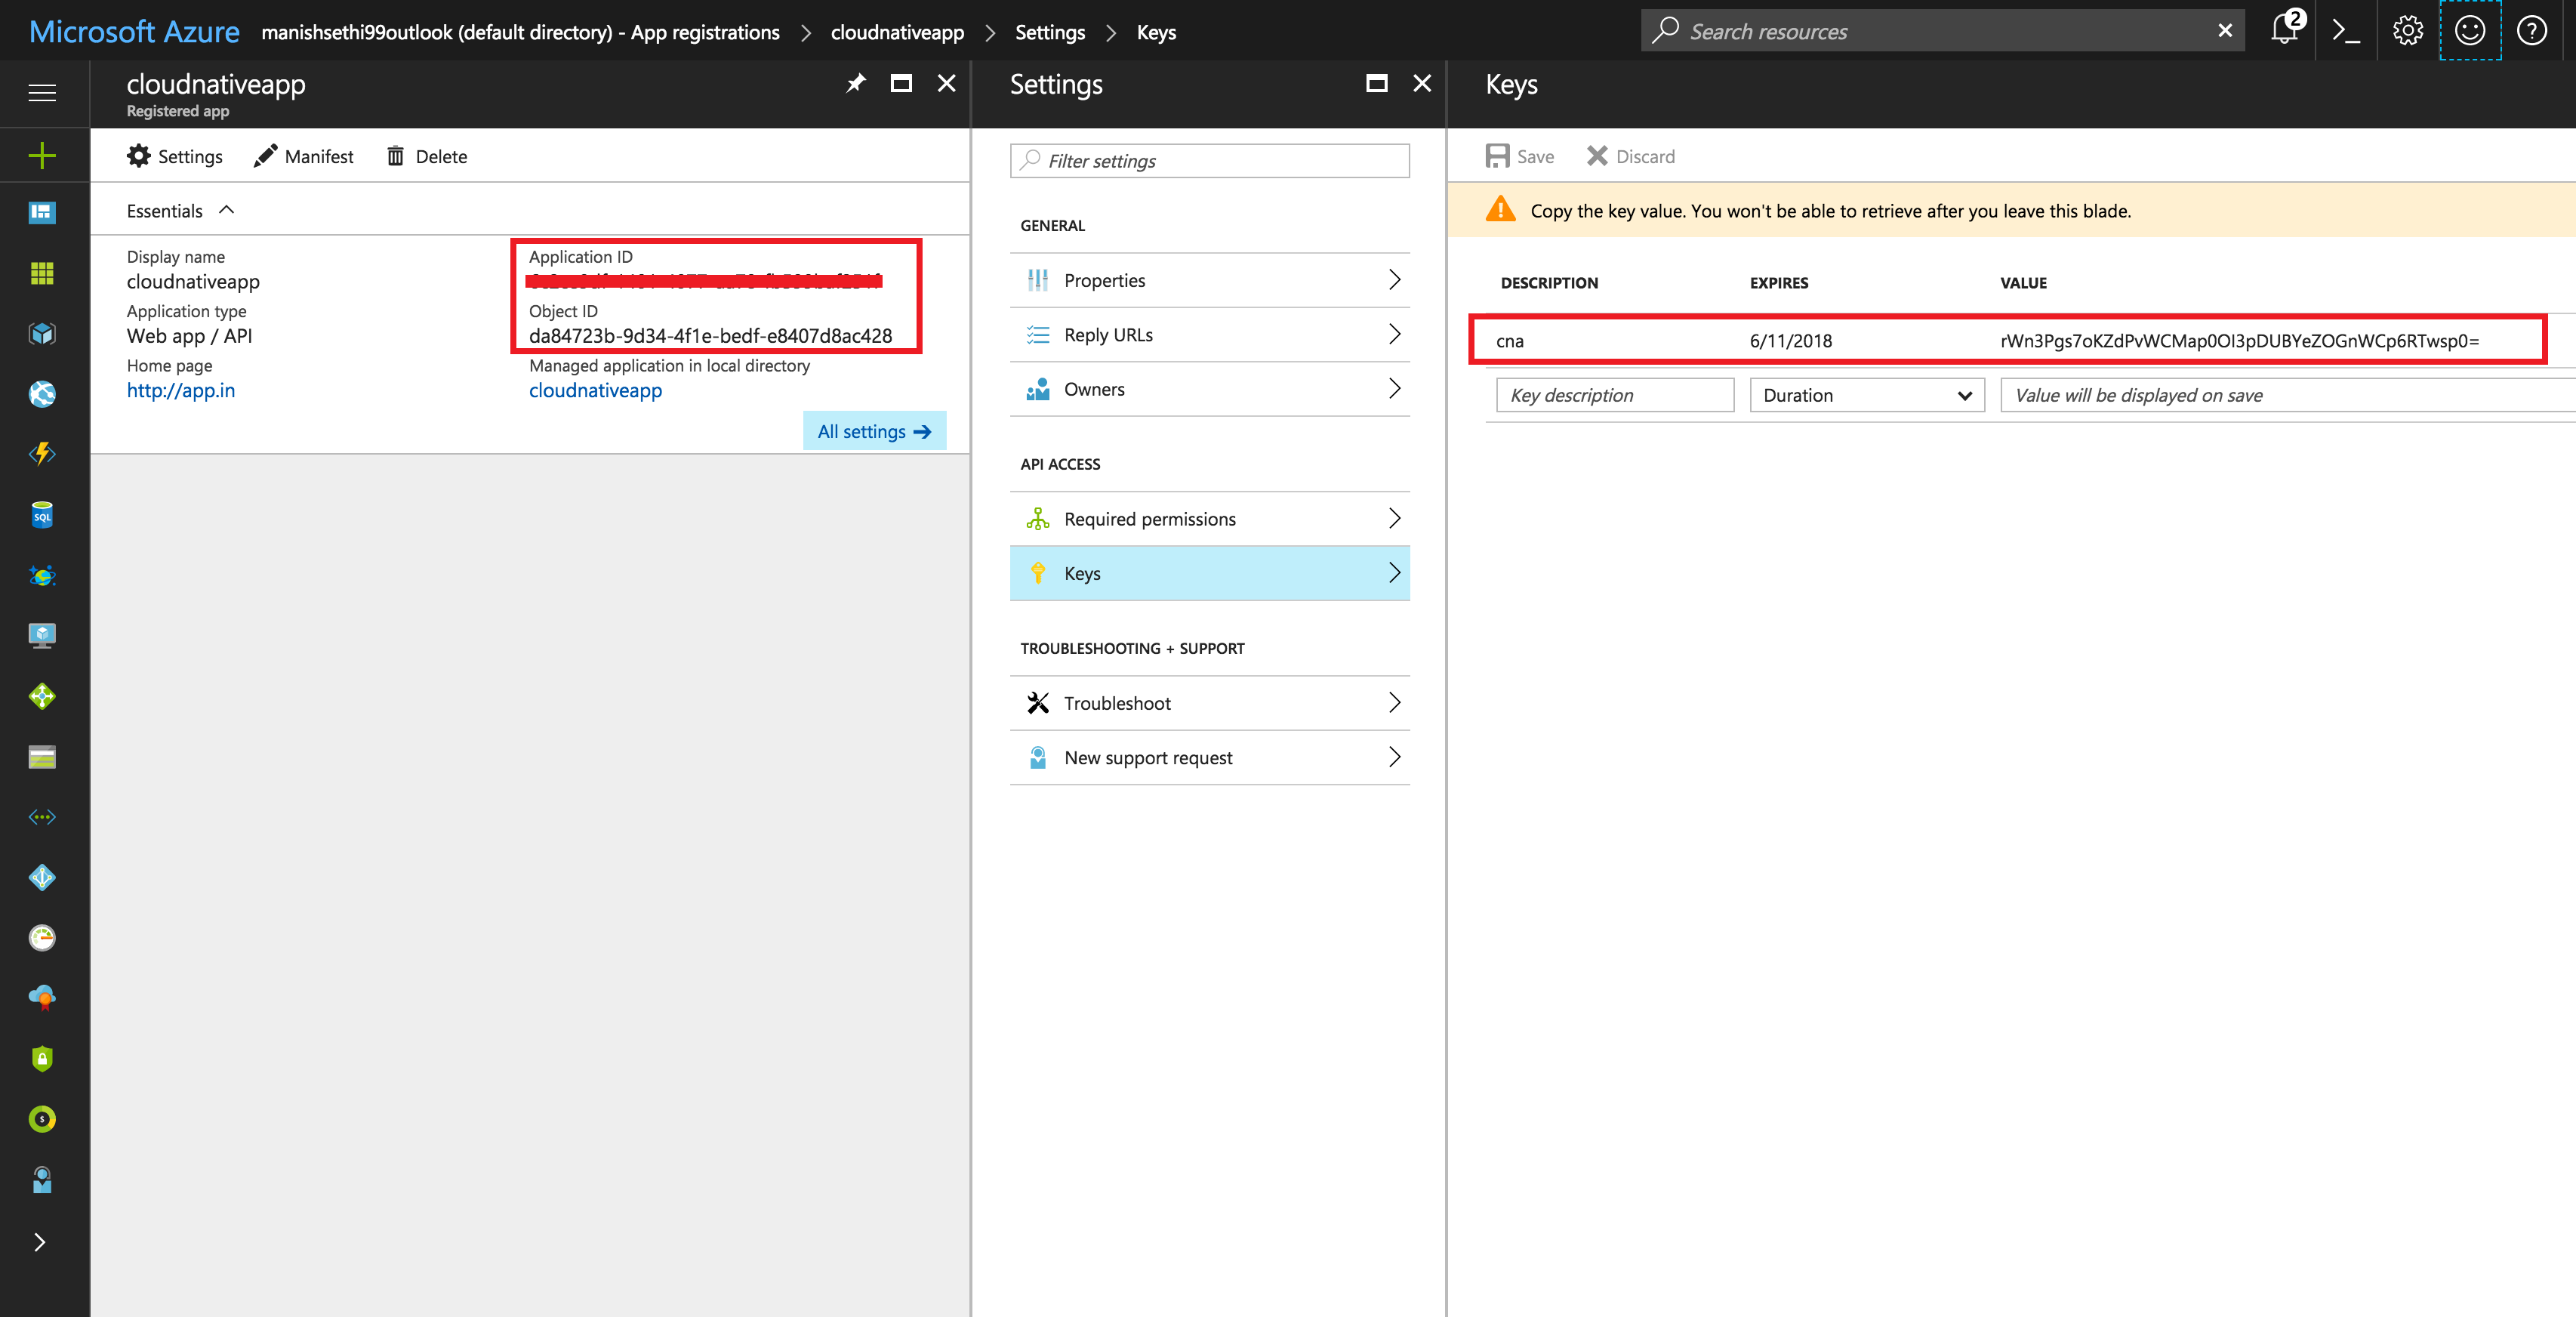
  1. After this, you will be able to generate the key which will be needed to access your Jenkins job.
  2. You will see the following screen, which has the secret key's details, and you will also find other details such as the Object ID and Application ID on the same page:

Now we have the required information to configure the job in Jenkins. So, navigate to the Jenkins console, go to manage plugins in the Manage Jenkins section, and install the plugin, Azure VM agents.

Once the plugin is installed, go to Manage Jenkins, and click on Configure...