

Now that we have our installed VM, we're going to log in and have a quick poke around.
Accessing and updating our VM
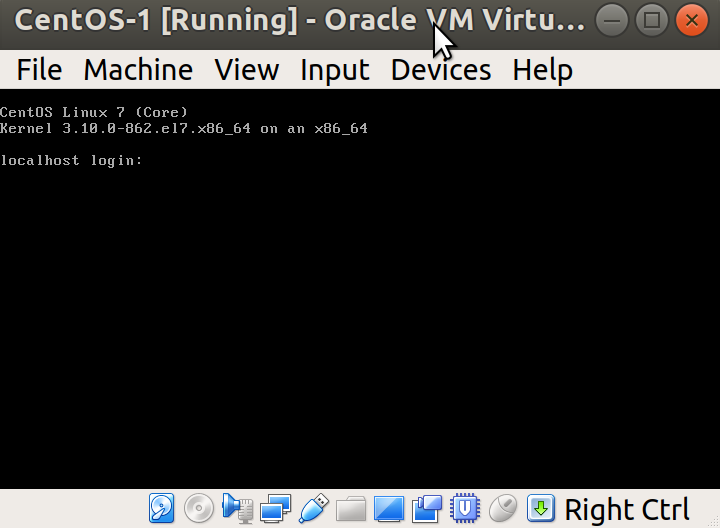
Logging in from the VirtualBox window
Clicking into our VM, as we did during installation, will allow us to type at the login prompt:
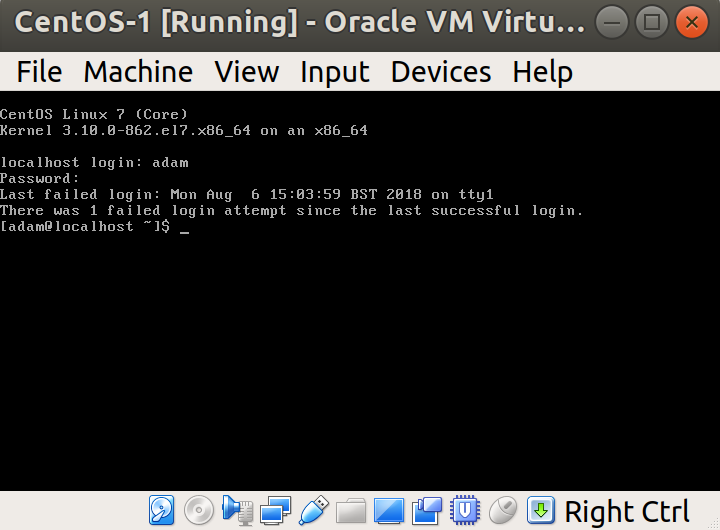
We're going to use the user we created at installation time, rather than root.
Note that you also get a bit of information on login attempts since your last login. In this case, I failed my first attempt at logging in, and it tells me this:
Congratulations – you've installed CentOS!
It's very rare to find a Linux server with a graphical user interface (GUI) installed, though it does happen. Of the thousands of servers I've worked with, I can count the number of times I've come across a GUI on one hand. It's usually cause for momentary confusion and distress, before concluding that someone had to have installed the GUI by accident – there can be no other explanation.
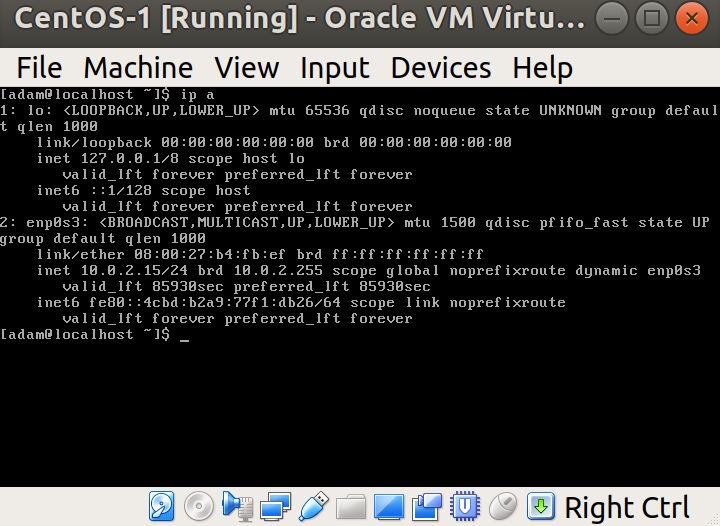
Before we go further, we're going to run a quick command to find the IP address of our machine:
$ ip a
ip a is a shorthand way of typing ip address which we will cover more later.
This gives us a lot of network information, but crucially it gives us the inet address of our network interface, 10.0.2.15:
Logging in from the host Terminal
Because using the VirtualBox interface is somewhat cumbersome (making things such as copy and paste tricky), it makes sense that there's a more elegant way to connect and interact with our machine.
Secure Shell (SSH) is the tool we're going to use for this, as it provides a fast and secure way of connecting to remote machines.
Native SSH clients are available for macOS and all Linux distributions. Windows has made some progress in the area too, though I'm to understand that the easiest way of using SSH on Windows is still to download a program called PuTTY.
Think of SSH as a Windows Remote Desktop Protocol. If you're new to this world, only it's generally faster to use, owing to the fact it's not got to stream a graphical connection at you. SSH is entirely text-based.
Using our IP address from a moment ago, we're going to try and SSH to our VM, from our host (the machine you're running VirtualBox on:)
$ ssh [email protected]
ssh: connect to host 10.0.2.15 port 22: Connection refused
Oh no! Something is off!
We haven't connected, and the connection was apparently refused!
Making sure sshd is running
First, we're going to make sure that the server component of sshd is running by logging onto our VM in VirtualBox and running the following:
$ sudo systemctl enable sshd
$ sudo systemctl start sshd
You should be prompted (at least once) for your user password that we set earlier.
What we're doing is enabling the sshd service to start when the server is booted with the first command, and starting it right now with the second (so that we don't have to reboot the VM).
Making sure that VirtualBox lets us through
Just starting sshd isn't enough to get us connecting to the VM from the host – we also have to set up some Port Forwarding for the VirtualBox NAT network.
Port Forwarding is the method of manually specifying how traffic is to traverse a NAT'd network. If you were playing Diablo 2 or Warcraft III in the mid-2000s, you may have had great fun trying to get Port Forwarding working with your home router.
From the main VirtualBox window, highlight your VM and click Settings at the top. Head to the Network section and click the arrow by Advanced to drop down a larger section. Click Port Forwarding:
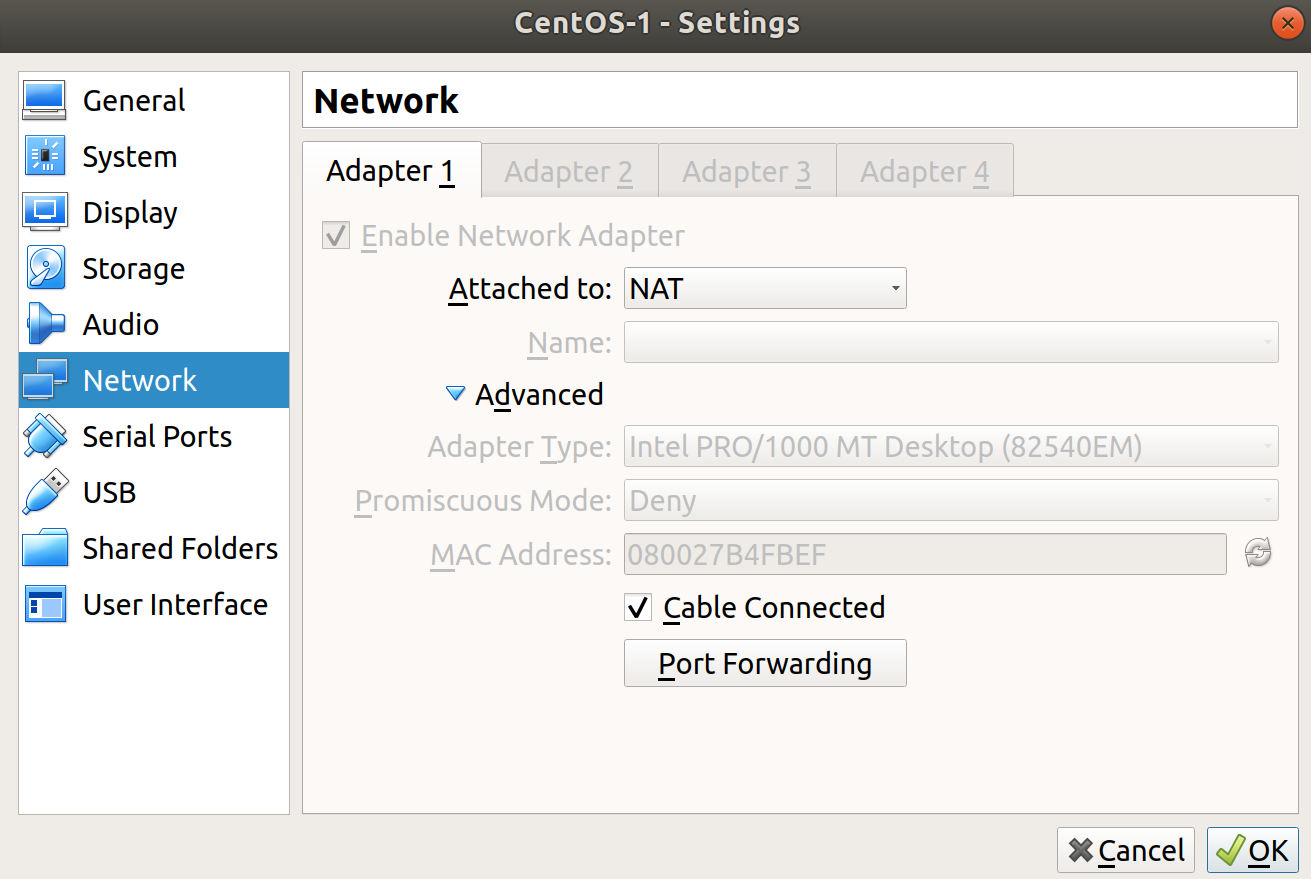
In the new window that's popped up, click to add a new rule on the right, and populate it with the settings from the following screenshot, substituting your Guest IP if it differs:
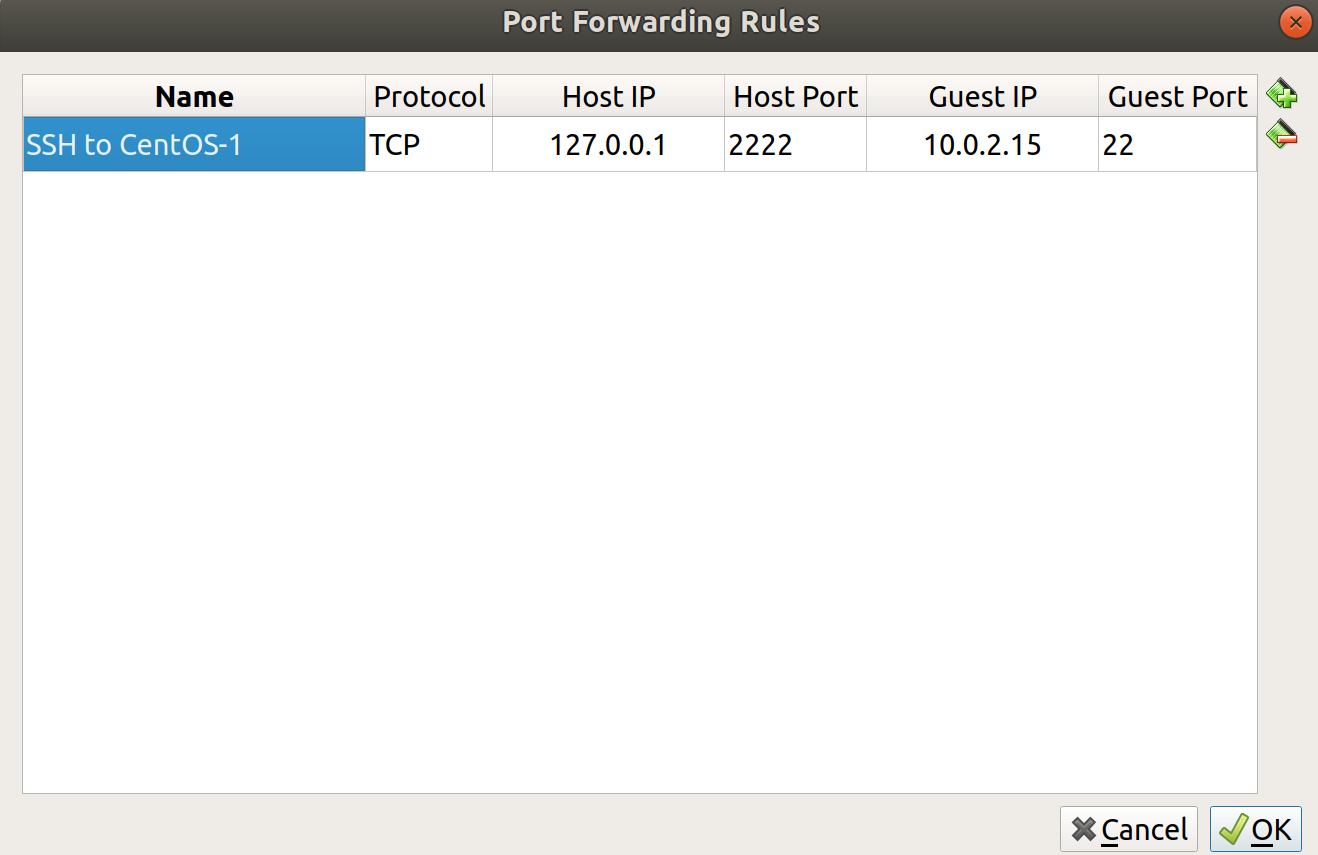
Notice that we're effectively mapping 127.0.0.1:2222 on our host to 10.0.2.15:22 on our guest. We've set it up so that any connection attempt made to the localhost address of our host machine, on port 2222, gets forwarded to the VM on port 22.
2222 in the example given is entirely random – it could be 8222, 5123, 2020, and so on. I chose 2222 for convenience. You shouldn't attempt to use ports lower than 1024 for this sort of thing, as these are restricted to root-only access.
We can now try our SSH command again, tweaked for what we've just set up:
$ ssh [email protected] -p2222
The authenticity of host '[127.0.0.1]:2222 ([127.0.0.1]:2222)' can't be established.
ECDSA key fingerprint is SHA256:M2mQKN54oJg3B1lsjJGmbfF/G69MN/Jz/koKHSaWAuU.
Are you sure you want to continue connecting (yes/no)? yes
Warning: Permanently added '[127.0.0.1]:2222' (ECDSA) to the list of known hosts.
[email protected]'s password:
There are some things to break down about this command.
I've specified the username by using adam@ and I've told SSH to try connecting to the localhost address 127.0.0.1, along with the port we've chosen, that is, 2222.
We're presented with the fingerprint of the host, which we'll talk more about later, and which we accept.
We're then prompted to log in, using the password we set up in the VM, for our user:
Last login: Mon Aug  6 15:04:26 2018
[adam@localhost ~]$
Success!
We can now work on our VM as if it were a real server – just be mindful to make sure that you're on your VM when running any commands.
Updating our VM
Now that we've got access to our machine, we're going to run one command to make sure that we've got the latest version of all the installed software:
$ sudo yum update
When run, you may be presented with a long list of software to update. Typing Y for confirmation and hitting Enter will work through the upgrade of this software, as well as any dependent software that's needed. You may also be prompted to accept new or updated GPG keys.
GPG is a book by itself – not an exciting book, but certainly a book.
If you've upgraded software that's constantly running, such as an Apache web server, it can be a good idea to schedule a restart of that service to make sure that the newer version is in use.
As a rule of thumb, the only things that should require a full system reboot after being updated are the kernel and the init (initialization) system. This is a stark difference to Windows, where rebooting seems to be what the OS is designed to do, and actual work is just a by-product.
In my case, my kernel got updated. I'm able to confirm this by doing the following.
First, we list the installed versions of the kernel package:
$ yum info kernel
Loaded plugins: fastestmirror
Loading mirror speeds from cached hostfile
 * base: repo.uk.bigstepcloud.com
 * extras: mirror.sov.uk.goscomb.net
 * updates: mirrors.melbourne.co.uk
Installed Packages
Name        : kernel
Arch        : x86_64
Version     : 3.10.0
Release     : 862.el7
Size        : 62 M
Repo        : installed
From repo   : anaconda
Summary     : The Linux kernel
URL         : http://www.kernel.org/
Licence     : GPLv2
Description : The kernel package contains the Linux kernel (vmlinuz), the core of any
            : Linux operating system.  The kernel handles the basic functions
            : of the operating system: memory allocation, process allocation, device
            : input and output, etc.

Name        : kernel
Arch        : x86_64
Version     : 3.10.0
Release     : 862.9.1.el7
Size        : 62 M
Repo        : installed
From repo   : updates
Summary     : The Linux kernel
URL         : http://www.kernel.org/
Licence     : GPLv2
Description : The kernel package contains the Linux kernel (vmlinuz), the core of any
            : Linux operating system.  The kernel handles the basic functions
            : of the operating system: memory allocation, process allocation, device
            : input and output, etc.
Then, we check the version of the kernel currently in use, using uname:
$ uname -a
Linux localhost.localdomain 3.10.0-862.el7.x86_64 #1 SMP Fri Apr 20 16:44:24 UTC 2018 x86_64 x86_64 x86_64 GNU/Linux
We can see from this that we're running version 3.10.0-862.el7, but we have 3.10.0-862.9.1.el7 too.
Rebooting the system causes the newer kernel to be selected at boot time, and running uname again shows a different result:
$ uname -a
Linux localhost.localdomain 3.10.0-862.9.1.el7.x86_64 #1 SMP Mon Jul 16 16:29:36 UTC 2018 x86_64 x86_64 x86_64 GNU/Linux
Huzzah – we're running the newer kernel!