
First and foremost, you need to download the installer files for pfSense.
- To download pfSense, navigate to https://www.pfsense.org/download/:
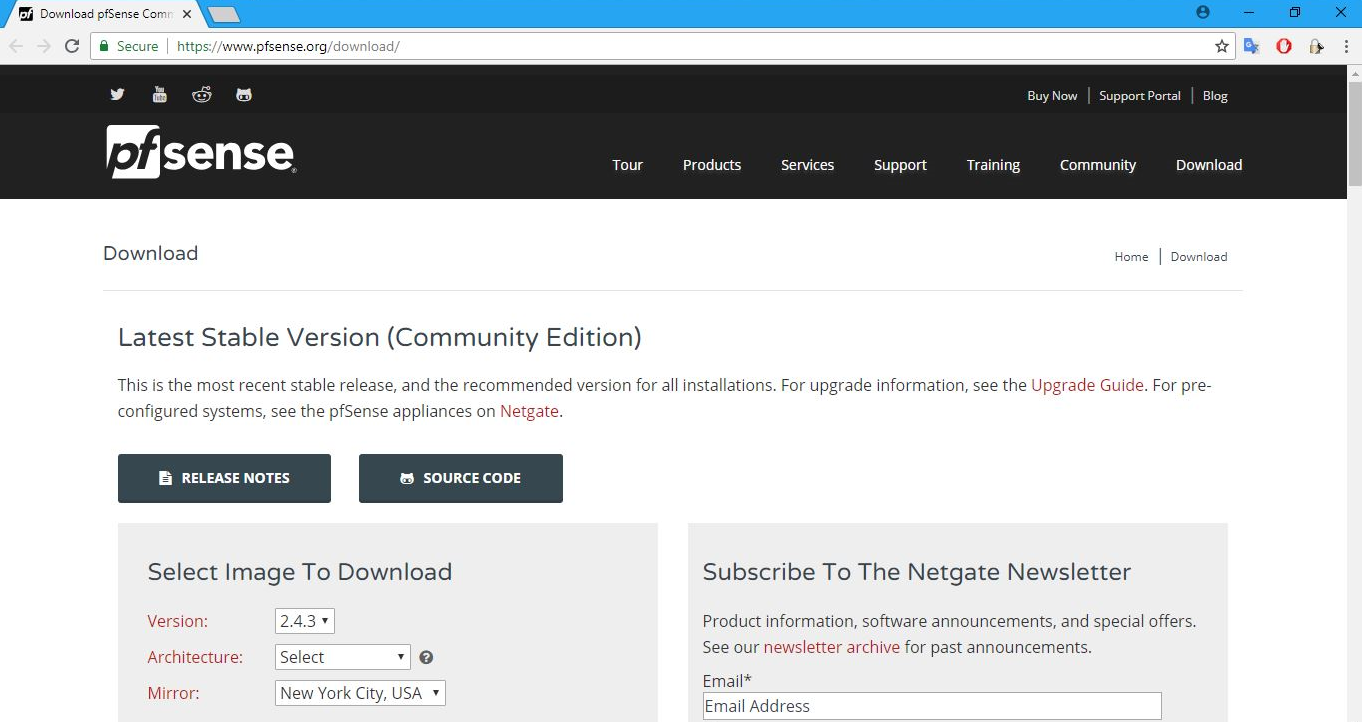
pfSense supports multiple platforms and flavors. It also has various editions and versions available. For the best results, always use the stable version. And, of course, unless you intend to purchase the supported version, opt for the free Community Edition. That is exactly what we'll do here as well.
- From the Version drop-down list choose 2.4.3, which is the stable version we are using. The Architecture specifies the target CPU architecture you intend to use. Select the option depending on your computer. If your system has a 64-bit capable Intel or AMD CPU, use the 64-bit version. The 32-bit version should only be used with 32-bit CPUs. In this case, we will pick AMD64(64-bit). pfSense also supports multiple types of Installer options:
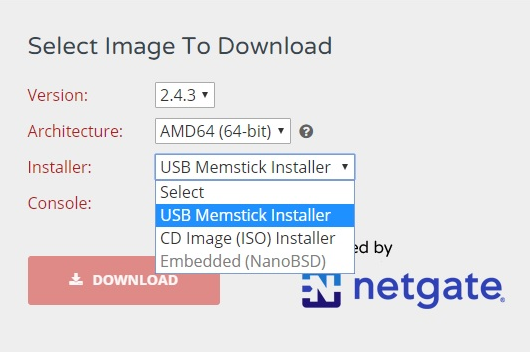
You can download the Installer as a USB Memstick Installer, ISO CD image, or as an Embedded (NanoBSD) image. The USB memory stick image is meant to be written to the hard disk of your target system. Installing pfSense on the hard drive is the preferred method of running pfSense software. In this case, the entire hard drive is overwritten. Note that dual booting with another OS is not supported. The CD Image (ISO) Installer is used to create a CD or DVD version that's used to install on virtual machines or systems with a CD or DVD drive. The Embedded version of pfSense is meant to be written to system hard disk before use, and it is specifically tailored for use with any hardware using flash memory, mostly compact flash, rather than the system's hard drive. As you may be aware, flash memory can only handle a limited number of writes, so the embedded version runs read-only from flash with read/write file systems as RAM disks. The NanoBSD platform has two OS slices and a config slice. One OS slice is used to boot from, the other is used for upgrades. The config slice is where the configuration resides. There are two variations of the NanoBSD platform, namely, the default version, which uses a serial console, and another that supports using a VGA console. Each of these variations also come sized for different sizes of storage media. For this instance, in the Installer drop-down list, select CD Image (ISO) Installer.
- In the Mirror dropdown, select the nearest location to you, and then click on the DOWNLOAD button. Mirror sites are useful when the original site generates too much traffic for a single server to support. Mirror sites also increase the speed with which files or websites can be accessed. Users can download files more quickly from a server that is geographically closer to them.
- After selecting these options, let's click on the DOWNLOAD button to get the required installer files. After the download is complete, once you go to the download folder, you will be able to locate the pfSense installer file. As you will see, the installer file is in a zipped compressed format. You can unarchive this file using any usual compression utility such as WinZip, or WinRAR on Windows, and other similar programs on other platforms.
- Once the ISO file has been extracted, you can burn the ISO to a CD, which will be a bootable CD, and use it to then install the software on your PC, that is, if you are using a physical hardware device. Alternatively, you can use the ISO file to create a virtual machine. You can also run pfSense in live CD mode, where you can just run the pfSense software from the CD without installing anything on your system's hard drive. The benefit here is that you can test drive pfSense without changing any configuration on your system. However the drawback is that you will lose all your configuration once your system restarts. So, for now, we will stick with permanent installation of pfSense on a virtual machine.
Let's go ahead and launch a new virtual machine for pfSense.