

The VM is now created, but you still have some network configuration to do. pfSense is all about networking and security. And, so far, you have not allocated any network interface cards to this virtual machine. So, let's go ahead and proceed with the network configuration. After that, you need to finish the installation for pfSense.
Typically, pfSense isolates the network traffic for internal and external networks using different network interface cards. Consider a scenario where you have one network device that is connected directly to the internet, and the second network device is connected to the internal network. That is precisely how most pfSense installations are configured.
- From the Settings menu in VirtualBox, go to Network settings. Currently only one network adapter will be enabled, Adapter 1, which will be the WAN network.
- Now, we will add one more internal network adapter by clicking on Adapter 2 and enabling it by checking the Enable Network Adapter check box:
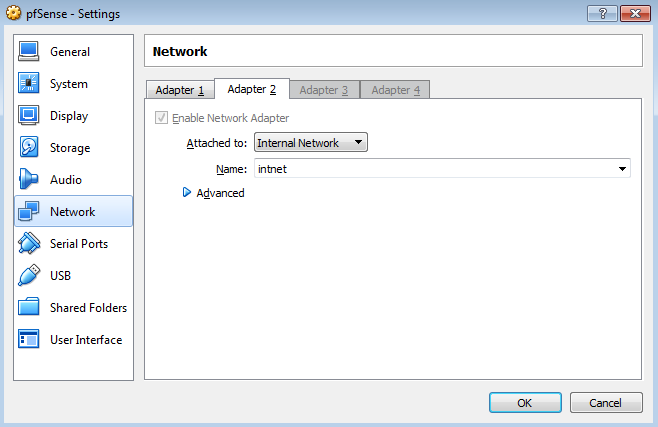
- From the Attached to drop-down menu, select Internal Network. Within the context of VirtualBox, an Internal Network segment is a private network that is shared by other virtual machines. This LAN segment can be useful for multi-tier testing, network performance analysis, and situations where virtual machine isolation is important. After taking care of the internal network adapter, let's also mount the ISO image for pfSense software.
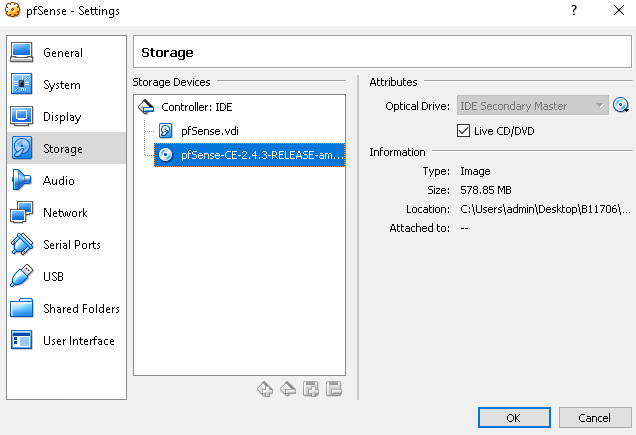
- Go to the Storage settings from the Settings menu and select the Live CD/DVD check box.
- Mount the pfSense ISO image to the CD-ROM by clicking on the Optical Drive drop-down menu:
- Click the OK button, which will save the settings. Now that the virtual machine has been configured properly, we can start the VM.
Now, VirtualBox will launch this virtual machine. And since you have already mounted the bootable CD ISO image, it will boot into pfSense installer.
- In the home screen of pfSense installer, you are given a few choices on how you want to install pfSense. The first and default option is Boot Multi User. This will continue the FreeBSD boot process. So, just proceed with the default options and press Enter to boot into the FreeBSD installer. The kernel will start to load and display the boot output. After a minute, a text prompt will appear to install or enter recovery mode.
- Press I to launch the installer. The installer will start now and it will give us the opportunity to change the display and other system settings.
- Let's accept all the default settings:

Then, it offers the choice of a Quick/Easy Install, Custom Install, and several other options. Select Quick/Easy Install and press Enter. This easy install will take care of a lot of things such as disk partitions. Select OK and the installer will begin. pfSense will be installed on the first available disk in the system. It will take a few minutes to copy all of the files to the target disk, so allow it some time to finish. When the files have finished being copied, the installer will prompt to select either the Embedded kernel or Standard Kernel; select Standard Kernel:
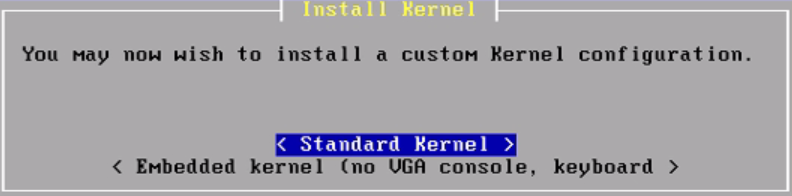
Basically, this setting controls whether you get a VGA terminal or a serial-based console. If this were an embedded device with no video card, then we would have picked the Embedded kernel option. The installation continues.
- Once the installation is complete, pfSense needs to reboot. So, press Enter to reboot. While rebooting, make sure you unmount the CD so that the virtual machine boots from its hard drive and not from the CD-ROM again.
- Click on the Remove Disk from Virtual Drive from where we mounted the ISO image earlier. You can ignore any warning dialog which may pop up.
- Now, let's get back to the virtual machine. The machine has rebooted, and this is the boot screen for pfSense:
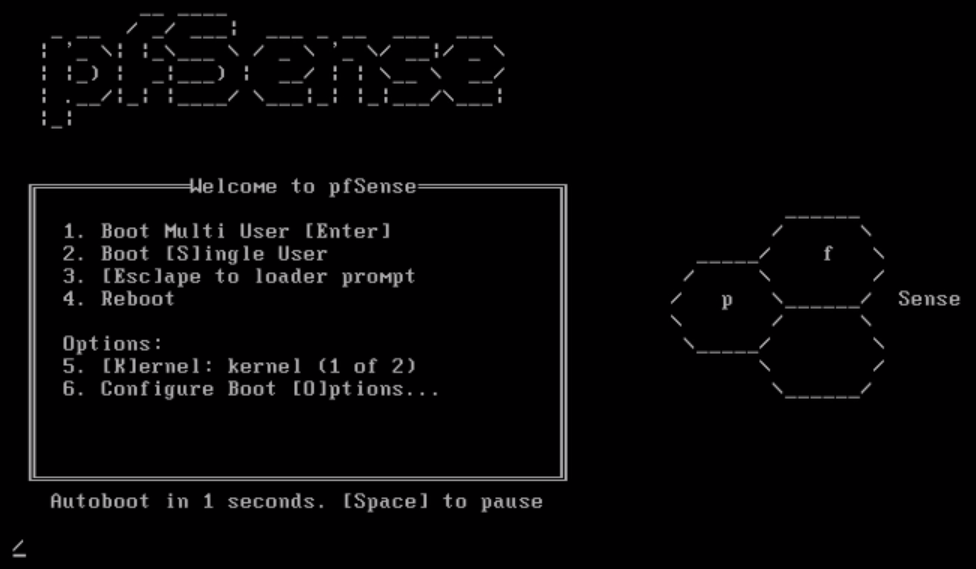
- Let's press F1 to continue booting pfSense. Note that this time, it is booting from pfSense, which has been installed on the hard drive of this system. Once the installation part is complete, we will get a screen like the following:
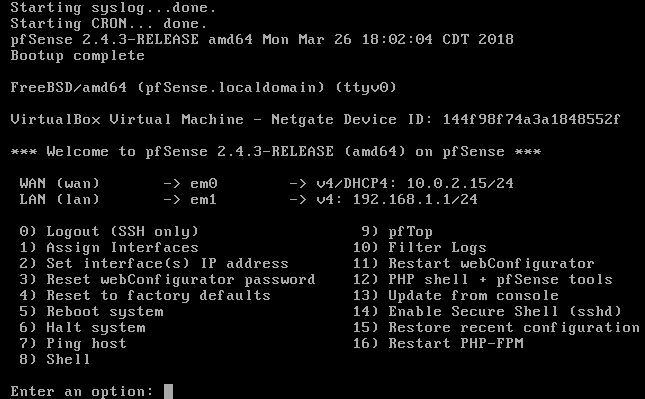
Here, you can see that one of the IP addresses and networking interfaces has been assigned to WAN's network connection. This is the em0 network interface. em1 has been assigned to the internal LAN network. The WAN network interface has been assigned a dynamic IP address. This is typical for general-purpose-based internet connections such as cable, ADSL, or fiber optic ISP connections. You may also be allocated a fixed IP from your ISP. These settings can easily be changed within the pfSense admin console, or right here on the admin console.
- If you want to change the IP address, you can change it by selecting the second option: Set interface(s) IP address, to whatever you need to change it to. We will visit these shortly. The DHCP IP address assigned to the WAN connection is 10.0.2.15/24, while the LAN, or em1, has taken the network address 192.168.1.1/24. The LAN interface will become the internet gateway for all the devices within the internal LAN network.
Once the installation is complete, you need to configure pfSense. So, let's do that now.