

You just saw the main dashboard of the pfSense WebGUI interface, but that is just us scratching the surface. Now, let's walk through the pfSense WebGUI interface and check out what else it has to offer.
Okay, now, back in the pfSense WebGUI dashboard, let's explore this:
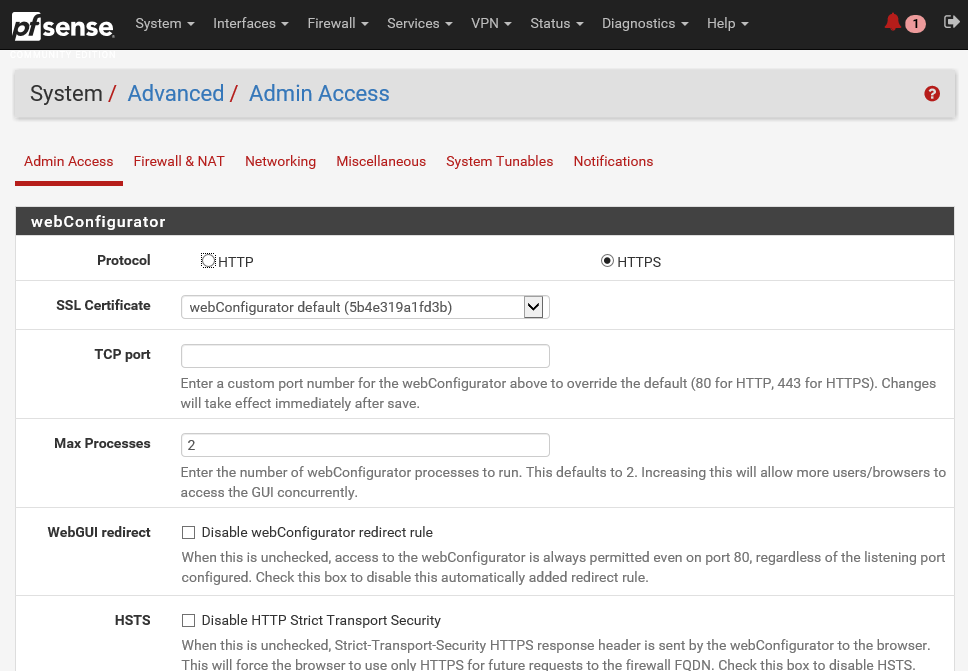
- Click on System and then on Advanced:
There are multiple tabs here with different information:
- The Admin Access tab contains settings for the WebGUI such as the Protocol (HTTP or HTTPS) and port, security settings for management, SSH daemon settings, serial console settings, and console options
- Firewall & NAT contains settings that tweak the behavior of the firewall, such as fragmentation, optimization algorithms, and state table settings
- Networking contains settings for IPv6 and various network interface settings, such as hardware, checksums, device polling, and ARP message suppression
- Miscellaneous contains settings that do not fit into the other categories
- System Tunables contains an interface to manage various FreeBSD system values that tweak different system behavior
- Notifications control how the system will notify administrators when an alert happens
The advanced settings available here do not normally need adjusting on a typical setup. These here are for additional tweaking or for those who need the functionality given. We do not need to change anything here, so let's move on.
- Click on System again and then on Cert. Manager:
pfSense includes a central certificate manager under System and Cert. Manager. This central certificate management takes the place of several other locations inside pfSense, which you can use to acquire certificates we entered directly into their configurations, such as for HTTPS SSL access to the WebGUI, OpenVPNPKI certificate management, and IPsec certificate management. Each set of certificates is bound to a certificate authority. These are managed from the Certificate Authority tab. Certificates are managed on the Certificates tab. Certificate Revocation Lists (CRLs) control which certificates are valid for a given CA. If a certificate is compromised in some way or is invalidated, it can be added to a CRL and that CRL may be selected for use by an OpenVPN server. Then, the OpenVPN client using that certificate will no longer be allowed to connect. Certificate revocation lists are managed from the Certificate Revocation tab.
- Click on System and then on General Setup:
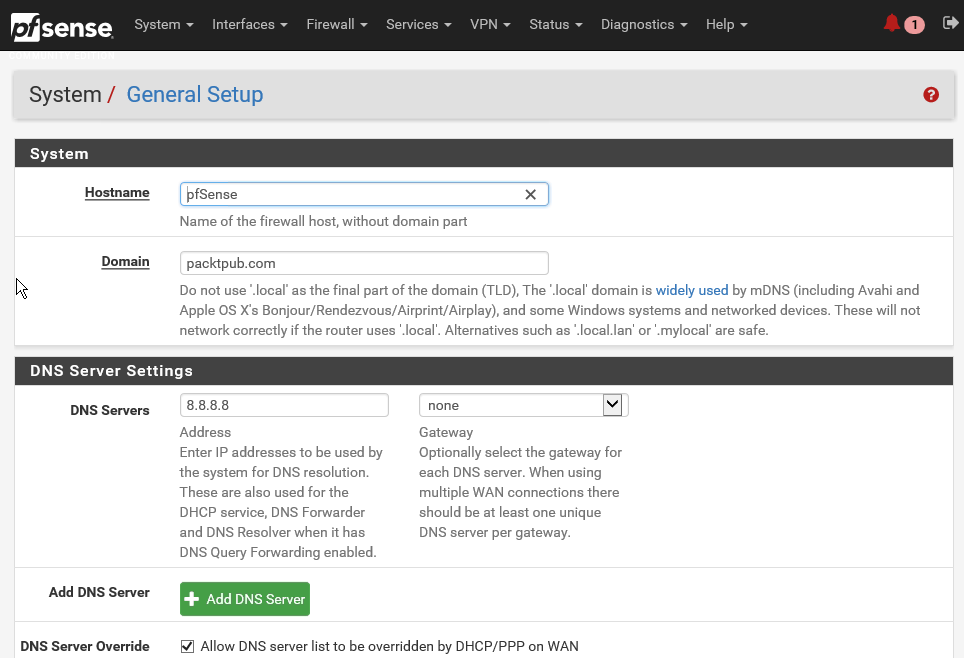
- You can scroll down and look at all the general setup settings available. These are more or less the same settings which you set while going through the configuration wizard.
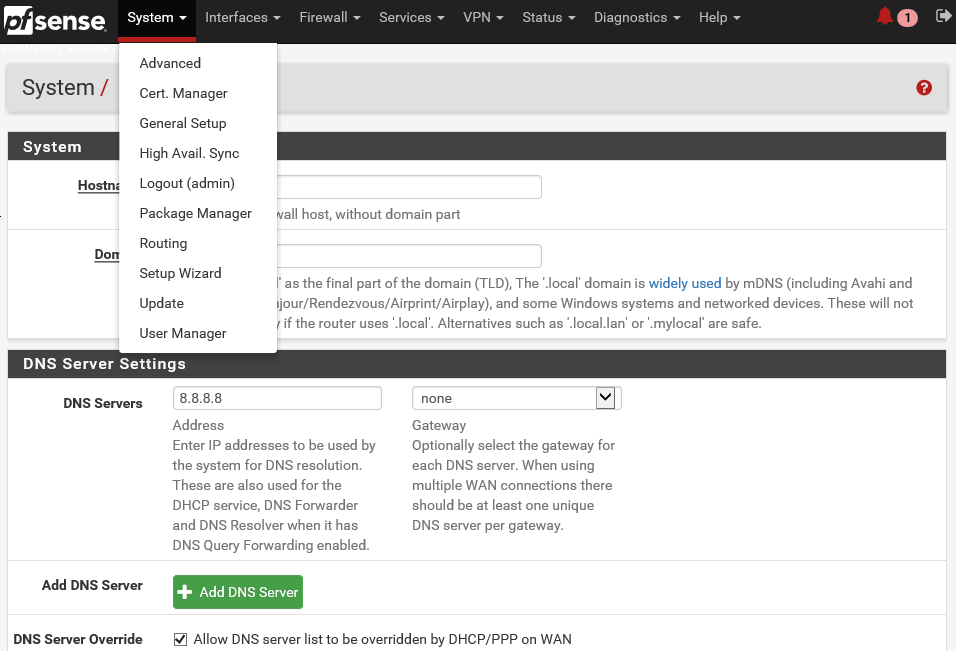
Similarly, the following are the other options available under the System menu:
- High Avail. Sync: High Avail. Sync which can enable you to deploy multiple instances of pfSense and configure them in a high availability mode. You can also log out of your active session from the WebGUI.
- Package Manager: Package Manager used to install and maintain packages on a pfSense firewall.
- Routing: Routing enables you to set up gateways and gateway groups. A gateway is a system through which pfSense can reach the internet or another network. So, if multiple LANs are in use, or if there are multiple paths to the internet via different gateways, the associated gateways must be defined. Gateways must also be assigned for networks that are reachable via static routes.
- Setup Wizard: The Setup Wizard will enable you to reset your configurations for your pfSense server.
- Update: This menu will allow you to update your pfSense server with the latest version of the software.
- User Manager: Let's click on it and explore further. In pfSense, user management has been centralized under this option.
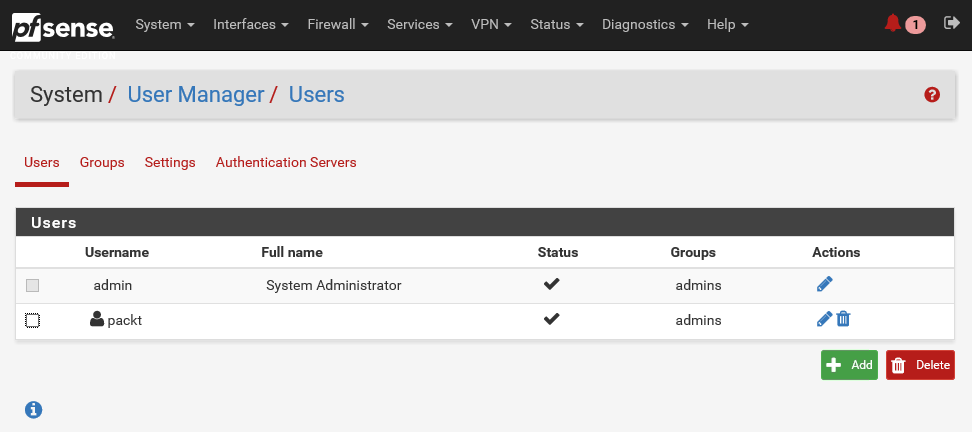
This takes the place of the individual user management and access to server settings that used to be available under various subsystems. Users are managed at the list view on the Users tab. The admin user cannot be deleted, and its username cannot be changed. You can see this admin account in the following screenshot. The standard practice is to create at least one other user. So, let's do that.
- Click on the Add button to add another user:
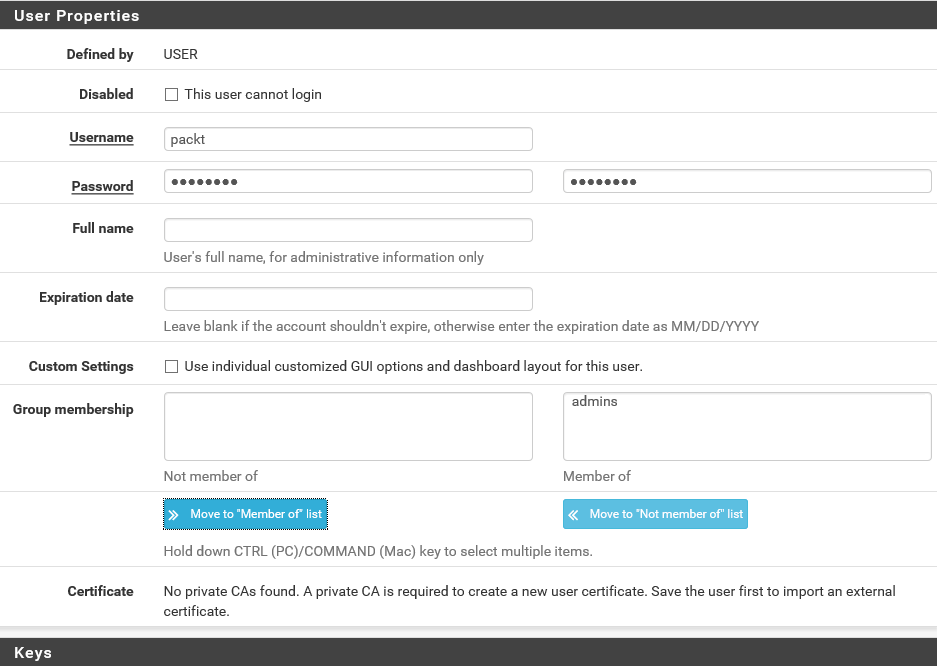
- Enter a Username and Password. Let's call this new user packt. Repeat the password to confirm.
- The next setting is Group membership. pfSense has this notion of role-based security. Users can be a member of groups or roles, which can have different access rights. By default, there are two groups, namely all users and admins. Members of the admins group have full access to the WebGUI. For now, let's assign admins group to this new user. For production environments, of course, you should consider setting up different groups with more fine-grained permissions. Click on the Move to Member of list button and then on the Save button.
You've now created a new pfSense user:
The question that comes to mind naturally is, why create a user account when you already have an admin account? Well, the answer is simple, for security purposes!
The admin account has far-reaching privileges to change the entire configuration of the pfSense server. Using an admin account makes you vulnerable to attacks. If this account is compromised in any way, then any malicious hacker can make changes to pfSense, whereas, if you are using a regular user account and a weakly privileged account is compromised in any way, you wouldn't have much to worry about. And since admin is a public account in pfSense, anyone can try a brute force dictionary attack to crack the password and gain access to your pfSense server. For that reason, the best practice is to disable the default admin account and set up other accounts for managing your pfSense server. This is called security by obscurity.
- All you need to do is select the edit icon for the admin user and select the This user cannot login checkbox:
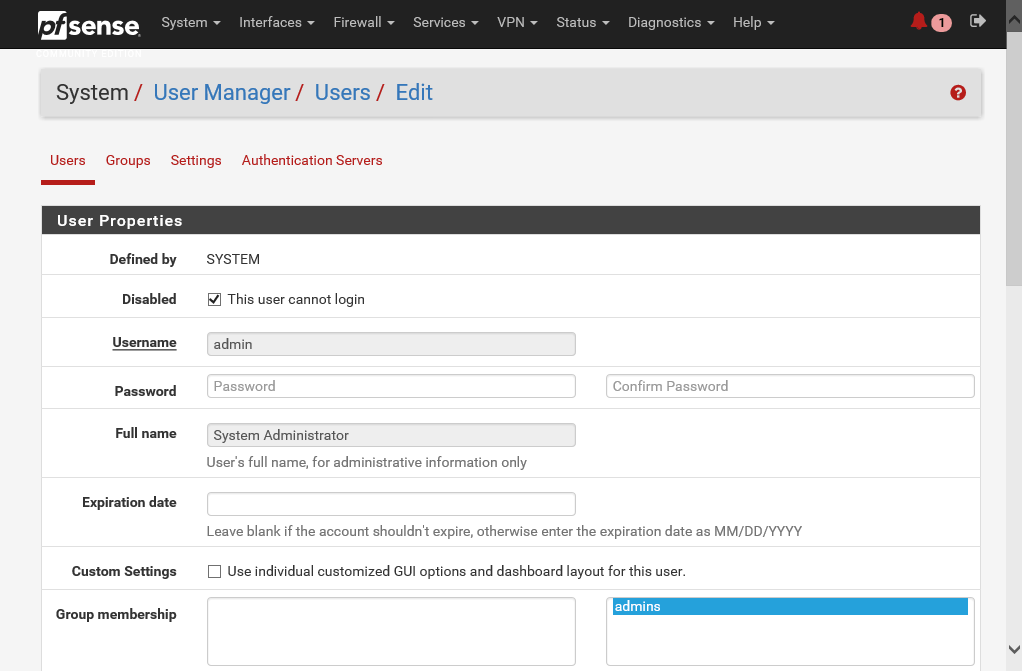
- Save the settings and log out from the account.
When you try to log in again, you will see that you do not have access to log in. So with that, effectively, you have reduced the attack surface area for hackers to try and guess the password and log in to your pfSense server. Now, let's try to log in using the new packt user account.
You can see that it works. Every time you log in to the console, pfSense automatically runs a query for an updated version of the software. If it finds an updated version, it will inform you right here.
You can just click on this version link to upgrade your pfSense server. It's easy as pie. It is recommended that you keep your pfSense software up to date, unless there is a very good reason to defer the upgrades.
- To confirm that the admin has been disabled, go to the System drop-down menu option and select User Manager:
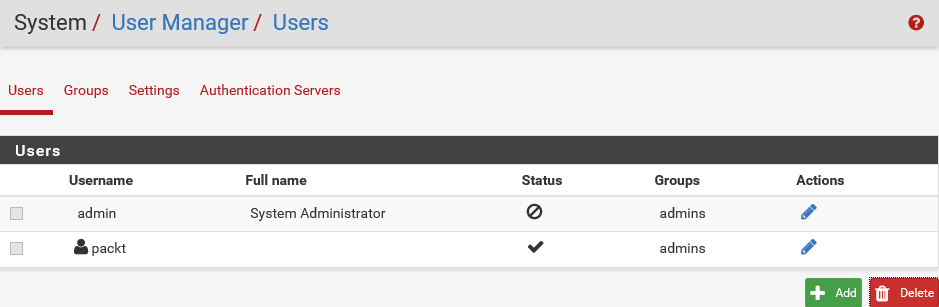
As you can see, here, admin is disabled. Instead of admin, we are using the user account packt for security purposes.
- Let's move on to the Interfaces drop-down. There are two interfaces: LAN and WAN. Select WAN and scroll down to review all the settings configured for this interface. As you can see, pfSense gives you a lot of power to tweak the settings on each interface. Let's take a quick peek at the second interface, which is the LAN interface:
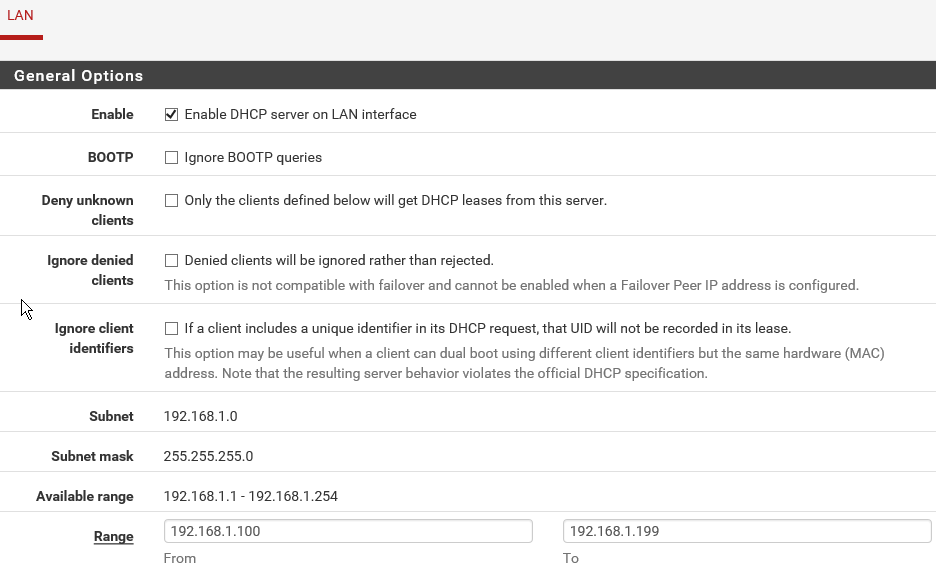
You will see information such as IP Address and Subnet mask.
- The next tab is Firewall. Click on it. You can configure NAT, Traffic Shaper, Virtual IPs, and so forth from here.
- From the Services tab, you can select all the services provided by pfSense, such as DHCP Server, DHCP Relay, DNS Resolver, and Dynamic DNS.
- Under the VPN menu, you can configure the various types of support VPN connectivity options. You have IPsec, OpenVPN, and L2TP. If you click on the Status tab, you can see a lot of other information about various services running on the pfSense server. This applies for the Diagnostics, Gold, and Help tabs.
This was a high-level overview of the pfSense WebGUI configuration console. We will visit many of these options and settings in the upcoming demos but this quick overview should give you an idea of how flexible and feature-rich pfSense really is.