
Introducing Terraform
To provision your AWS infrastructure, there are a variety of tools available, and Terraform is one of them. Terraform is an open source Infrastructure as Code (IAC) tool created by HashiCorp that enables users to provision an infrastructure or manage IAC. Terraform also supports multiple cloud providers such as AWS, Google Cloud Platform (GCP), Azure, and more, as illustrated in the following diagram:
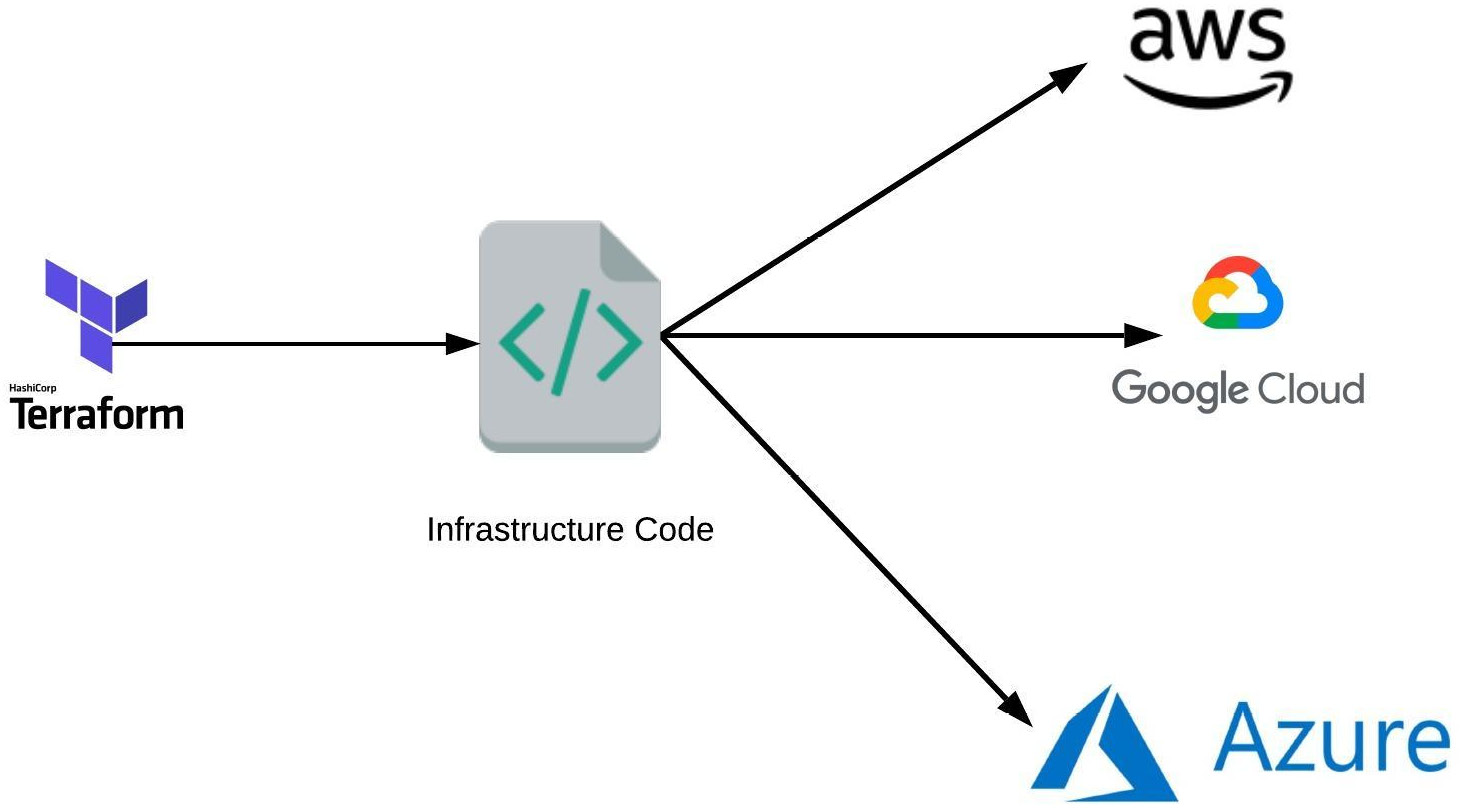
Figure 1.15 – How Terraform works
The way Terraform works is by reading the code and translating it to API calls to providers (AWS, in our case).
Here are some of the Terraform features:
- We can write Terraform code in HashiCorp Configuration Language (HCL) or, optionally, in JSON.
- All code files end with the extension of
.tf. - It is a declarative language (we need to define what infrastructure we want and Terraform will figure out how to create it).
In this section, you have learned what Terraform is and about its advantages. In the next section, we will explore how to install it and create your AWS resources using it.
Installing Terraform
To install Terraform, find the appropriate package for your system (https://www.terraform.io/downloads.html) and download the ZIP archive by following these steps:
- Download the package, like this:
wget https://releases.hashicorp.com/terraform/0.12.26/terraform_0.12.26_linux_amd64.zip
- Unzip it, like this:
unzip terraform_0.12.26_linux_amd64.zip
- Add the binary to the
PATHenvironment variable and change the permission, as follows:sudo cp terraform /usr/local/bin/ sudo chmod +x /usr/local/bin/terraform
- Log out and log back in.
- Verify the installation by running the following command:
terraform version
Terraform v0.12.26
Creating resources using Terraform
As with the AWS CLI and Boto3, for Terraform to interact with the AWS environment, it needs to know the credentials to authenticate with AWS, which we already set up as a part of the aws configure command. To create resources via Terraform, we need to define the following prerequisites:
- Resource: This defines one or more infrastructure objects such as an
ec2instance or ans3bucket. - Logical name: Then, we need to define the logical name, such as
test_instance. The name is used to refer to this resource from elsewhere in the same Terraform code/module, but has no significance outside of the scope of a module. - Instance type: The type of EC2 instance to run, as every instance type provides different capabilities (CPU, memory, I/O). For this example, I am using
t2.micro(one virtual CPU; 1 GB memory).You can verify the instance type supported in each region, as follows:
aws ec2 describe-instance-type-offerings --query InstanceTypeOfferings --output table
------------------------------------------------
|         DescribeInstanceTypeOfferings        |
+---------------+-------------+----------------+
| InstanceType  |  Location   | LocationType   |
+---------------+-------------+----------------+
|  m5dn.8xlarge |  us-west-2  |  region        |
|  m5ad.8xlarge |  us-west-2  |  region        |
|  z1d.metal    |  us-west-2  |  region        |
|  g3s.xlarge   |  us-west-2  |  region        |
|  r5dn.16xlarge|  us-west-2  |  region        |
|  m5n.large    |  us-west-2  |  region        |
|  m5.16xlarge  |  us-west-2  |  region        |
|  t2.medium    |  us-west-2  |  region        |
|  t2.micro     |  us-west-2  |  region        |
|  i3en.xlarge  |  us-west-2  |  region        |
|  c5d.12xlarge |  us-west-2  |  region        |
|  c5.12xlarge  |  us-west-2  |  region        |
- AMI: This is an operating system image used to run EC2 instances. For this example, I am using the
ami-0bc06212a56393ee1CentOS 7 image.
Creating an AWS instance using Terraform
Now that we have all the prerequisites in place, let's follow these steps to create a Terraform resource:
- First, let's create our first Terraform code with a filename ending with
.tf(for example:ec2-instance.tf), as follows:resource "aws_instance" "test_instance" { ami = "ami-0bc06212a56393ee1" instance_type = "t2.micro" } - The next step is to clone the GitHub repository, like this:
git clone https://github.com/PacktPublishing/AWS-for-System-Administrators
cd AWS-for-System-Administrators/tree/master/Chapter1/terraform
- The first command we are going to run to set up our instance is
terraform init. This downloads code for a provider (AWS) that we are going to use. The command is shown here:terraform init
Important note
It is safe to run the
terraform initcommand multiple times as it is idempotent. - The next command we are going to run is
terraform plan, which tells us what Terraform will execute (+,-, and~sign, where+means the addition of resources,-is the deletion of resources, and the ~ sign is a modification of resources) before making any changes, as follows:terraform plan
This is an effective way of making any sanity check before making actual changes to the environment.
The output of the
terraform plancommand looks like the Linuxdiffcommand, and is described here:- (
+sign): Resource going to be created- (
-sign): Resource going to be deleted- (
~sign): Resource going to be modifiedWe need to manually specify the region where we want to set up the infrastructure (for example:
us-west-2). We will discuss more about how to automate this process in future chapters.If this is the first time you are using the CentOS AMI, you might see this error:
Error launching source instance: OptInRequired
In order to use this AWS Marketplace product, you need to accept the terms and subscribe. To do so, please visit https://aws.amazon.com/marketplace/pp?sku=aw0evgkw8e5c1q413zgy5pjce. The CentOS AMI console is shown in the following screenshot:

Figure 1.16 – Centos AMI console
- To apply these changes, run the
terraform applycommand, as follows:terraform apply
Important note
You need to type
yesto accept the changes. - Go to the EC2 console and verify that it is creating an instance, as illustrated in the following screenshot:

Figure 1.17 – EC2 console
- To perform a cleanup of resources we have created so far, run the
terraform destroycommand, as follows:terraform destroy
Important note
As with
planandapply, you need to specify the region, and you need to typeyesto accept changes.
Terraform makes the life of a system administrator or DevOps engineer easy by creating an infrastructure using a few code lines. In this chapter, you have learned how to install it. In future chapters, we will create our AWS infrastructure using this tool.