
Creating an Identity and Access Management AWS role for Microsoft Defender for Cloud
To enable Microsoft Defender for Cloud to connect to and allow it to authenticate to AWS, you have two options: create an AWS user for Microsoft Defender for Cloud or create an AWS Identity and Access Management (IAM) role for Microsoft Defender for Cloud. The first option is less secure, while the second option is the most secure and preferred way to authenticate Microsoft Defender for Cloud to AWS. In this recipe, you will use the more secure option to connect an AWS account to Microsoft Defender for Cloud, you will create an IAM role.
Getting ready
Open a browser and navigate to https://console.aws.amazon.com/. Open a new tab in a web browser and navigate to https://portal.azure.com.
How to do it…
To create an Identity and Access Management (IAM) role for Microsoft Defender for Cloud, complete the following steps:
- In the Azure portal, open Defender for Cloud. From the menu, under the Management section, select Environment settings. Switch back to the classic cloud connectors experience. On the Cloud connectors blade, from the top menu, select Connect AWS account:
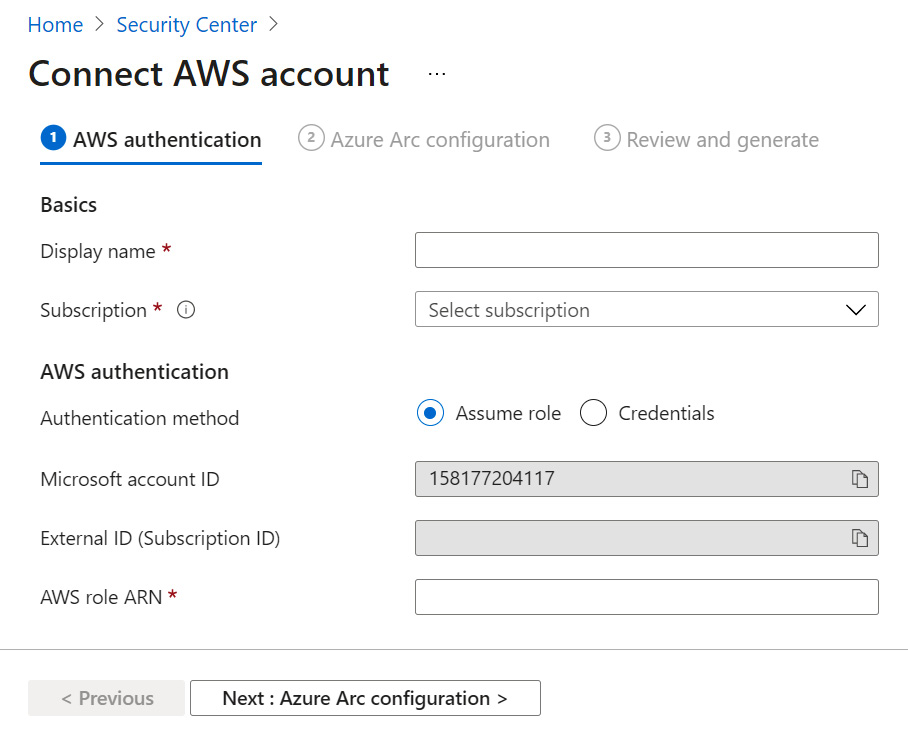
Figure 2.22 – Connect AWS account
- In the Display name field, enter a name to identify the AWS account connection in Microsoft Defender for Cloud. From the Subscription menu, choose an Azure subscription. Take note of the Microsoft account ID and External ID (Subscription ID) values as you will need them in the next steps. Leave the Azure portal browser tab open.
- Switch to the AWS Console browser tab. In the AWS Console, open IAM. You can open IAM in two ways. First, you can type IAM in a search bar and select it. Second, you can click on Services in the top-left corner and, under Security, Identity, & Compliance, select IAM.
- On the left-hand side menu, select Roles and then Create Role:
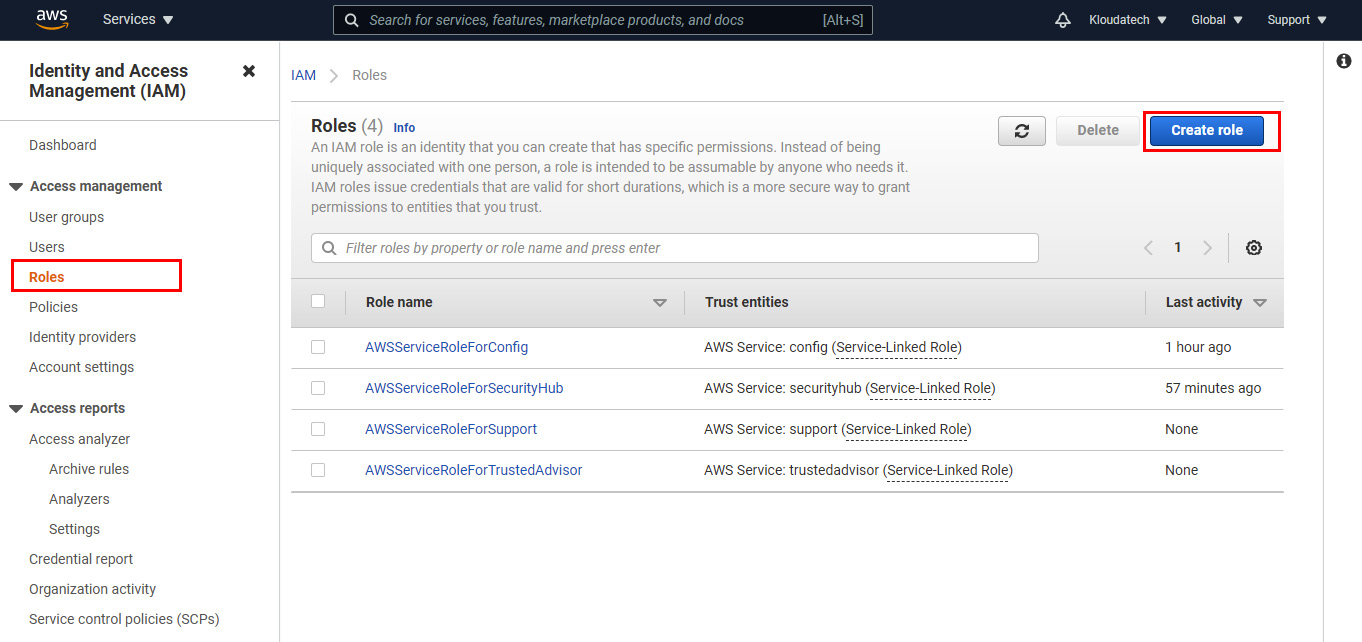
Figure 2.23 - Identity and Access Management (IAM) console
- On the Create role page, select Another AWS Account. This step requires the values that we specified in Step 2. In the Account ID field, enter
158177204117as your Microsoft Account ID. Select the Require external ID checkbox. For External ID, enter the Microsoft Azure subscription ID value. Click Next: Permissions:
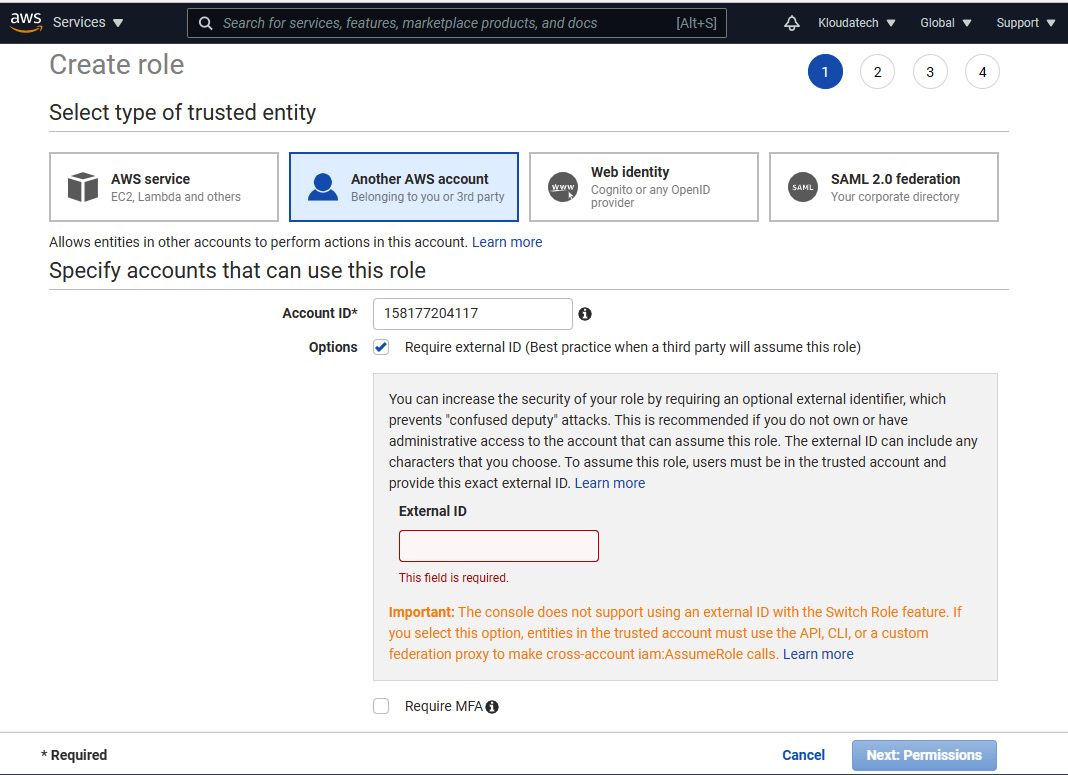
Figure 2.24 – Create role – Specify accounts that can use this role
- On the Attach permission policies page, select the SecurityAudit, AmazonSSMAutomationRole, and AWSSecurityHubReadOnlyAccess policies. Then, click Next: Tags.
- Optionally, you can add Tags. Click Next: Review.
- On the Review page, in the Role Name field, enter the name of the role you just created. Optionally, in the Role Description field, enter some text that will describe the newly created role. Click Create role to finish creating the role.
- On the Identity and Access Management (IAM) page, click on the role name you created.
- On the Summary page, copy the Role ARN value, as you will need it in the following recipe.
How it works…
To be able to connect your AWS account to Microsoft Defender for Cloud, Microsoft Defender for Cloud needs to have permission to access information about AWS resources. For this, you have created an AWS IAM role and attached the appropriate permission policies to it. The policies grant various permissions, including read-only access to AWS Security Hub, and read access to information about AWS services and AWS Systems Manager Agent automation permissions. Later, you will reference this role while connecting your AWS account to Microsoft Defender for Cloud.