

Configuring your managed nodes
Use any supported authentication mechanisms to connect from the Ansible control node to managed node, such as SSH key-based authentication, username and password-based authentication, and SSL certificate authentication, for example.
Setting up SSH key-based authentication
It is possible to automate most of the following steps using Ansible ad hoc commands, but we will be using the manual approach to understand what backend configurations are needed.
The steps to create a user (for example devops) and enable SSH key based access on node-1 are as follows:
- Create a dedicated user on the target node (e.g.: node01) as follows. (This is not mandatory, and it is possible to use any existing user accounts and configure that in Ansible.):
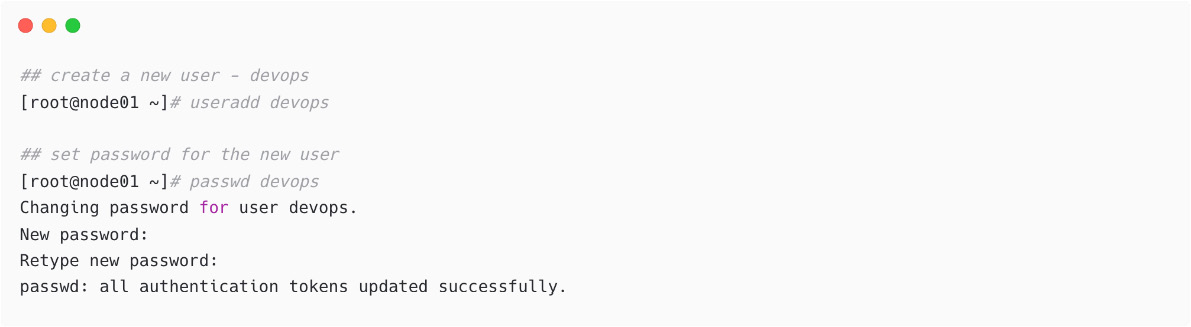
Figure 1.26 – Create new user and set password
If you do not have Domain Name System (DNS) servers in the network, then directly use the IP address with the ansible_host option, or add entries in /etc/hosts as local DNS resolution.
- Enable the
sudoaccess for the new user because, for any kind of privileged operation on the target node, you will be required to have this access:

Figure 1.27 – Enabled privileged access for the new user
- Create an
SSHkey pair on the Ansible control node. It is possible to create any supported type and size. Please note, if you have any existing key with the same name, please remember to use a different name or backup the original SSH key pairs:
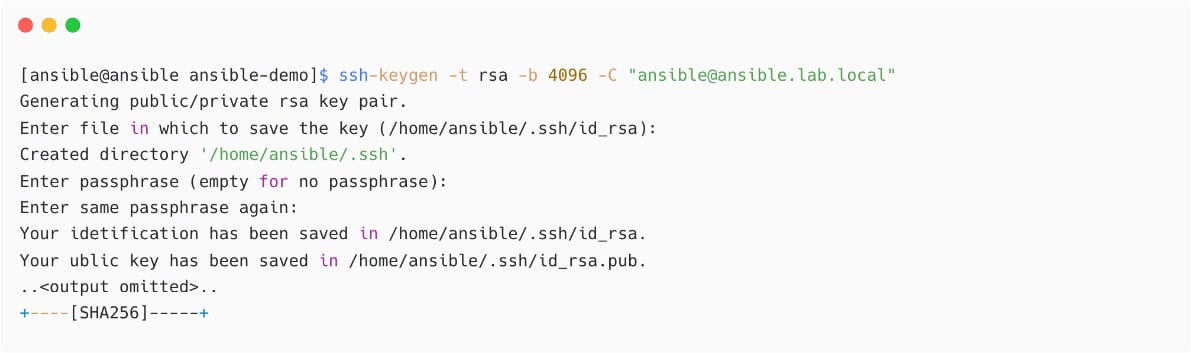
Figure 1.28 – Generating SSH key pair on Ansible control node
- Verify the SSH key permissions:
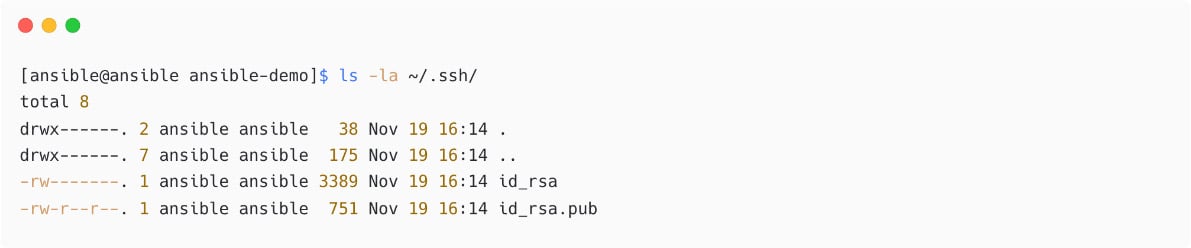
Figure 1.29 – Verify SSH key permission
- Copy the SSH public key from the Ansible control node to managed nodes under the
devopsuser using thessh-copy-idcommand:
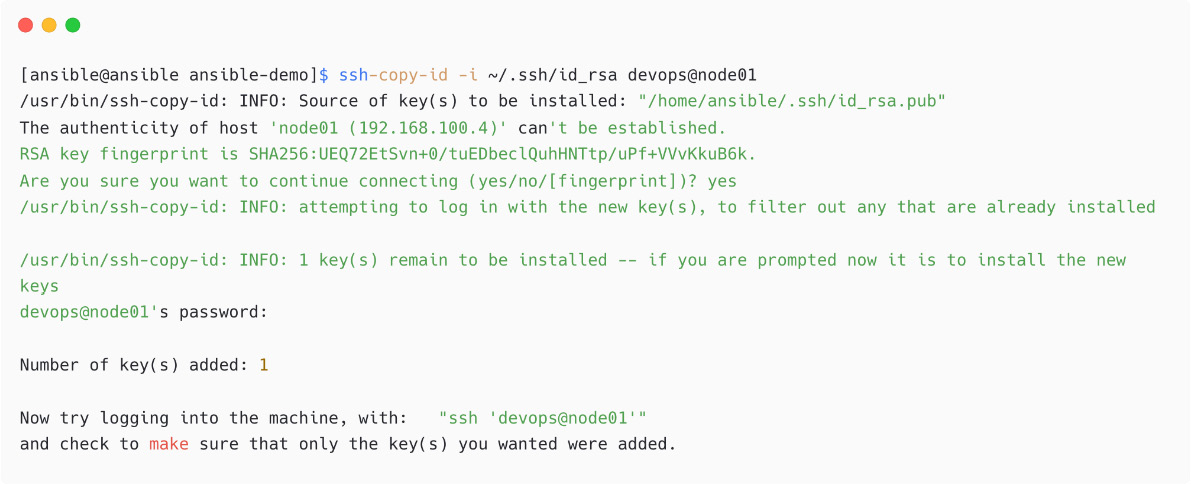
Figure 1.30 – Copy SSH public key to managed node
If you have issues with password authentication or copying, then manually copy the public key content from /home/ansible/.ssh/id_rsa.pub to the /home/devops/.ssh./authorized_keys file on the managed node.
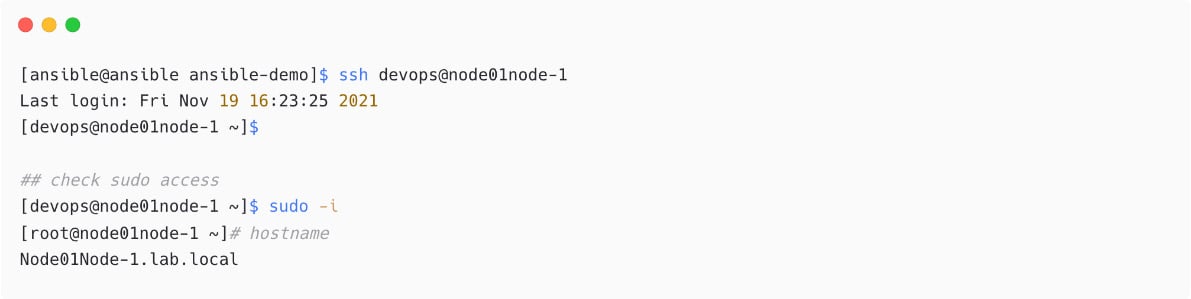
Figure 1.31 – Login to managed node without password
How to Set Up SSH Key-Based Authentication
Check out the steps on how to set up SSH key-based authentication at https://www.techbeatly.com/2018/06/how-to-setup-ssh-key-based-authentication.html.
In the next section, we will explore the option to use multiple credential for different managed nodes.
Multiple users and credentials
If you have different credentials for different managed nodes, then configure the remote username, SSH key to be used, and more in your inventory file. Let me show a sample for our node01 managed node in our inventory:
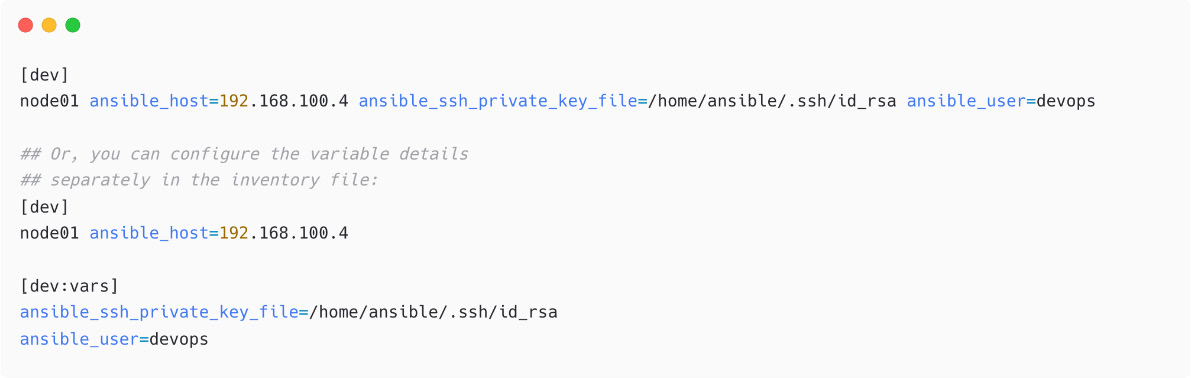
Figure 1.32 – Configuring SSH key information for managed nodes
In the latter example, we have used a variable section for the dev host group and mentioned the SSH key and remote user details.
Ansible ad hoc commands
The ansible command can be used to execute single jobs on managed nodes without a playbook; this is called an Ansible ad hoc command. It can be a simple connectivity check (ping) to the managed nodes, creating a user account, copying some files, or restarting a service, and execute these tasks without writing an Ansible playbook.
For example, it is possible to use the ping module to test the connection from Ansible to the managed node, node01, using this user and SSH key pair:
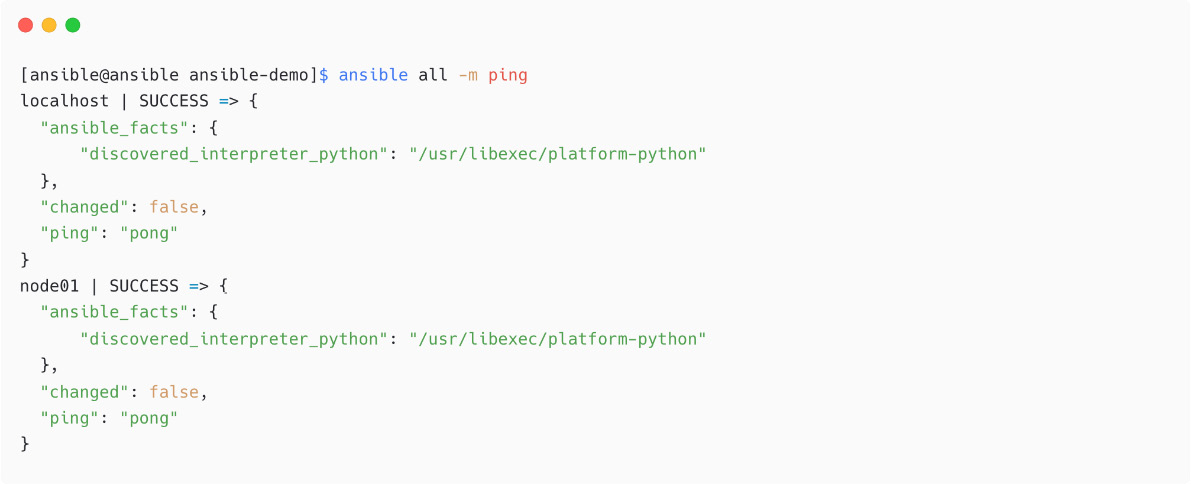
Figure 1.33 – Ansible ad hoc command using ping module
In the preceding snippet, as you have localhost also in the inventory (by implicit), the task will be executed on both localhost and node01 nodes when you mention all. The Ansible ping module is not just a regular network ping (ICMP); instead, it will log in to the managed node and return the result, pong.
Execute another Ansible ad hoc command using the shell module to check what remote user Ansible is using for connection:

Figure 1.34 – Ansible ad hoc command using shell module
From the preceding output, see that localhost is executed with the default ansible user and the dev node with the devops user.
Now, execute multiple commands using the shell module:
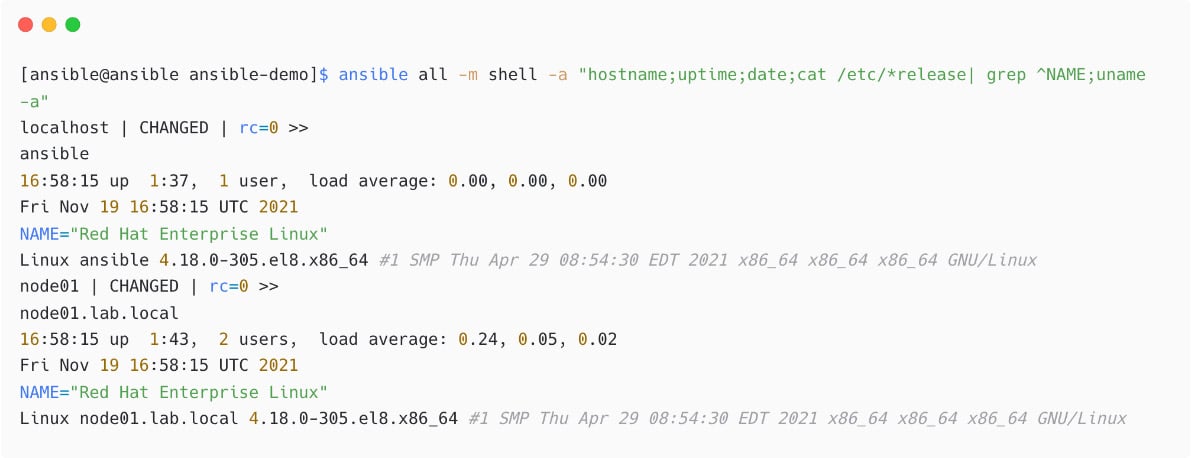
Figure 1.35 – Multiple commands in shell module
Please note that the preceding example was used to demonstrate the shell module, and similar details can be collected using ansible_facts without such tasks.

Figure 1.36 – Ansible ad hoc command using setup module
You will learn more about ansible_facts in Chapter 3, Automating Your Daily Jobs.
Installing a package using Ansible
You need to ensure that you have package repositories (yum or apt) configured and enabled on the target machine.
Install the vim package on node01:
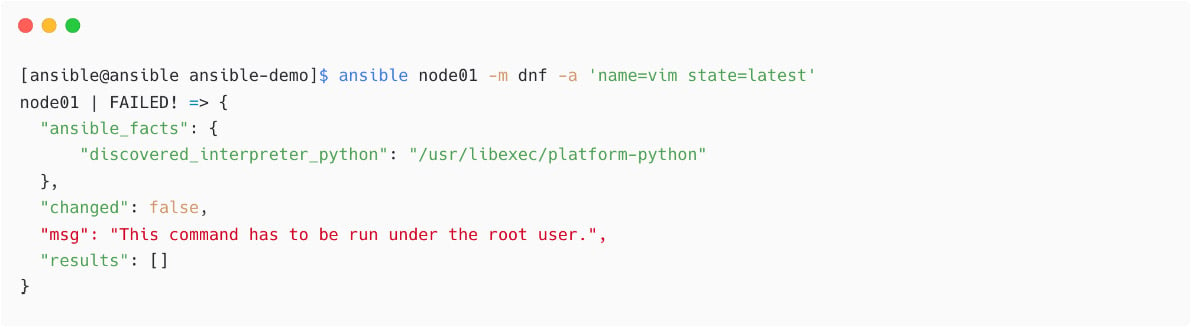
Figure 1.37 – Ansible ad hoc command using dnf module
From the preceding output, see that you are using the devops user for connecting to managed nodes, which is a normal user. You do not need to add the become details in ansible.cfg; instead, pass this become switch while executing the ansible command, which is -b. (For Ansible playbooks, you can enable or disable the privilege escalation at the play level or tasks level):
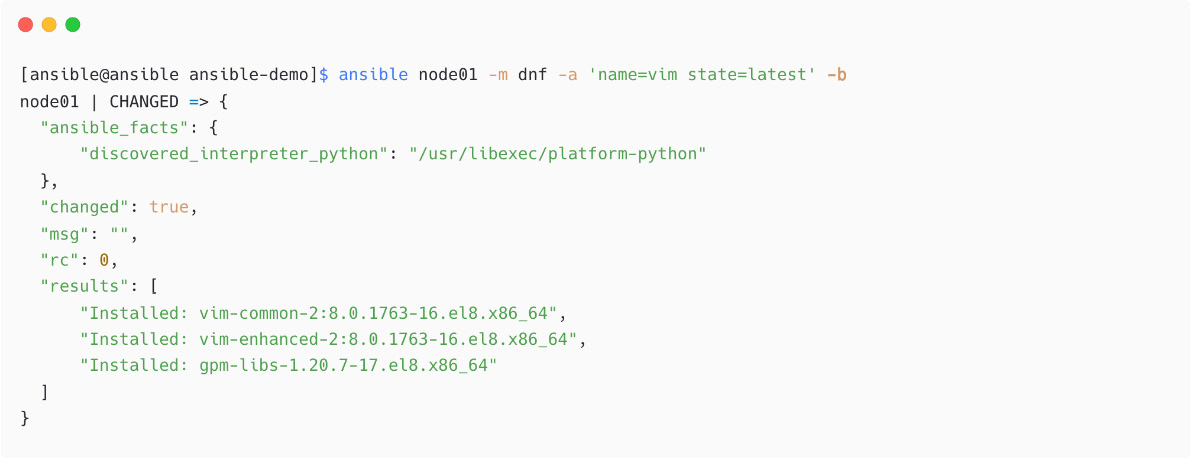
Figure 1.38 – Installing package using dnf module and privileged mode
The package installation is successful as per the output.
The preceding ad hoc execution can be written in a playbook as follows:

Figure 1.39 – Package installation using an Ansible playbook
You will learn more about writing playbooks in Chapter 2, Starting with Simple Automation.
Now, remove the same package using an Ansible ad hoc command; instead of state=latest, use state=absent:
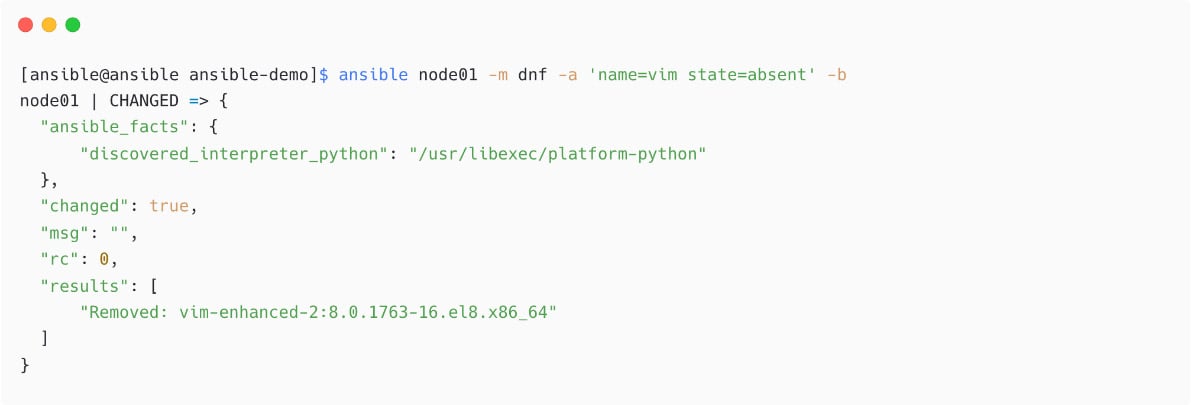
Figure 1.40 – Removing package using Ansible ad hoc command
We have now successfully installed and uninstalled a package using Ansible.