
Creating a project in AWS CodeStar
In this section of the chapter, we will understand the core components of AWS CodeStar and will create a project and replace the existing project code with our own application code.
Introduction to AWS CodeStar
AWS CodeStar is a managed service by AWS that enable developers to quickly develop, build, and deploy an application on AWS. It provides all the necessary templates and interfaces to get you started. This service basically gives you an entire CI/CD toolchain within minutes using a CloudFormation stack. This service is quite good for any start-up companies that want to focus only on business logic and do not want to spend any time on setting up an infrastructure environment. It is so cloud-centric that it is integrated with the Cloud9 editor to edit your application code and CloudShell to perform terminal/shell-related action. AWS CodeStar is a free service, but you will be paying for other resources that get provisioned with it—for example, if you use this service to deploy your application on an Elastic Compute Cloud (EC2) instance, then you will not pay to use AWS CodeStar but will pay for the EC2 instance. AWS CodeStar is tightly integrated with other AWS developer tools mentioned next.
AWS CodeCommit
AWS CodeCommit is a VCS that is managed by AWS, where we can privately store and manage code in the cloud and integrate it with AWS. It is a highly scalable and secure VCS that hosts private Git repositories and supports the standard functionality of Git, so it works very well with your existing Git-based tools.
AWS CodeBuild
When it comes to cloud-hosted and fully managed build services that compile our source code, run unit tests, and produce artifacts that are ready to deploy, then AWS CodeBuild comes into the picture.
AWS CodeDeploy
AWS CodeDeploy is a deployment service provided by AWS that automates the deployment of an application to an Amazon EC2 instance, Elastic Beanstalk, and on-premises instances. It provides the facility to deploy unlimited variants of application content such as code, configuration, scripts, executable files, multimedia, and much more. CodeDeploy can deploy application files stored in Amazon Simple Storage Service (S3) buckets, GitHub repositories, or Bitbucket repositories.
AWS CodePipeline
AWS CodePipeline comes into the picture when you want to automate all the software release process. AWS CodePipeline is a CD and release automation service that helps smoothen deployment. You can quickly configure the different stages of a software release process. AWS CodePipeline automates the steps required to release software changes continuously.
Getting ready
Before jumping into creating a project in AWS CodeStar, note the following points:
- The project template that we will be selecting is a Node.js web application.
- We will be using Elastic Beanstalk as application compute infrastructure.
- Create a Virtual Private Cloud (VPC) with a private subnet and an EC2 key pair that we will be using later.
- If you are using Elastic Beanstalk for the first time in your AWS account, make sure the
t2.microinstance type has enough Central Processing Unit (CPU) credit (see https://docs.aws.amazon.com/AWSEC2/latest/UserGuide/burstable-credits-baseline-concepts.html).
Let's get started by following these next steps:
- Log in to the AWS Management Console by going to this site: https://aws.amazon.com/console/.
- Go to the search box and search for AWS CodeStar, click on the result, and this will redirect you to AWS CodeStar intro/home page.
- Click on Create project, and you will be redirected to Choose a project template page where you will see information on how to create a service role. Click on Create service role, as illustrated in the following screenshot:
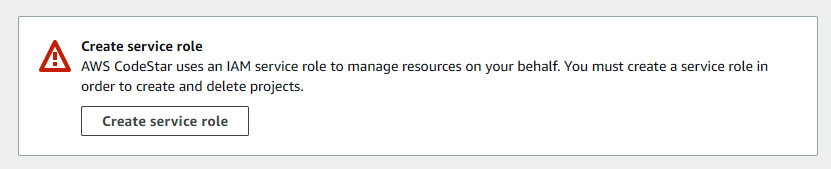
Figure 1.15 – Service role prompt

Figure 1.16 – Service role creation success message
- Click on the dropdown of the Templates search box, then click AWS Elastic Beanstalk under AWS service, Web application under Application type, and Node.js under Programming language, as illustrated in the following screenshot:
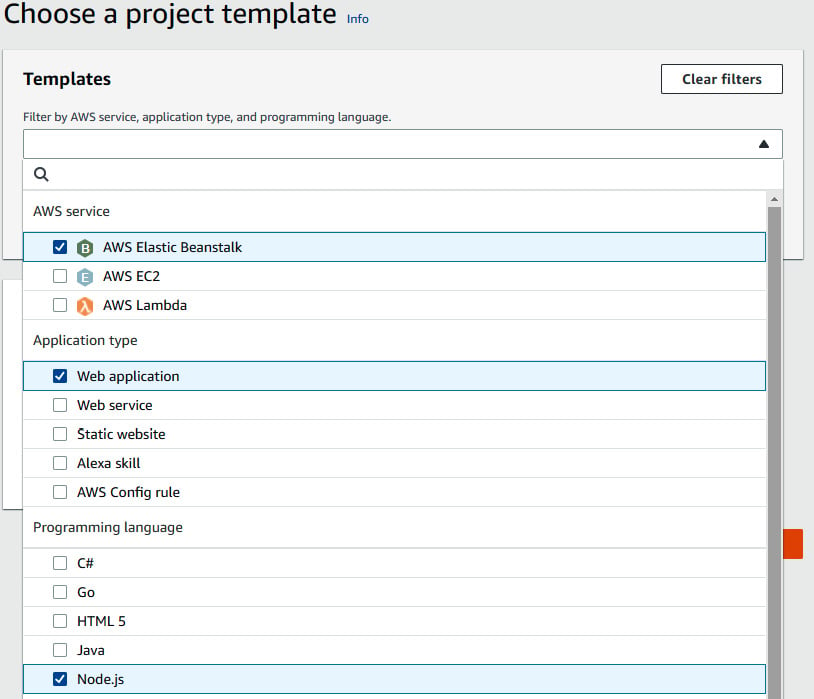
Figure 1.17 – Selecting service, application type, and programing language
- You will see two search results, Node.js and Express.js. We will go ahead with Node.js by clicking on the radio button and then on Next, as illustrated in the following screenshot:
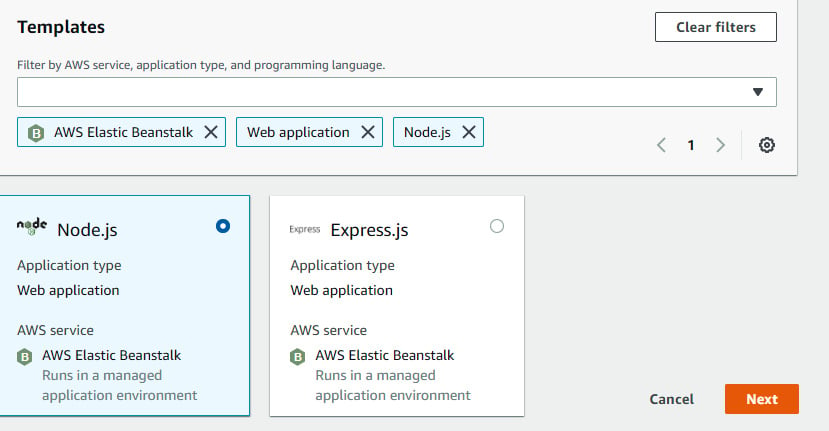
Figure 1.18 – Selecting Node.js web application template
- We will be redirected to another page called Set up your project, where we will be entering
northstarin the Project name field. This will auto-populate the Project ID and Repository name fields. We will be using CodeCommit for the code repository. In EC2 Configuration, we will be going ahead witht2.microand will select the available VPC and subnet. After that, we will select an existing key pair that we should already have access to and then click Next, as illustrated in the following screenshot:
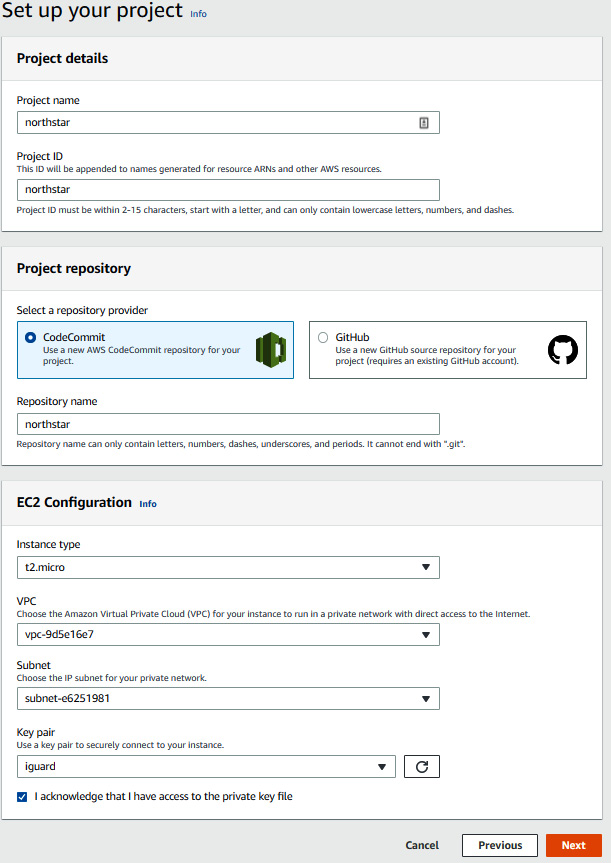
Figure 1.19 – CodeStar project setup details
- Post that, we will be reviewing all the information related to the project and will proceed to click Create project. This process will take almost 10-15 minutes to set up the CI/CD toolchain and Elastic Beanstalk and deploy the sample Node.js application in Elastic Beanstalk. During this process, we can go to CloudFormation, search for the
awscodestar-northstarstack, and see all the resources that are getting provisioned, as illustrated in the following screenshot:
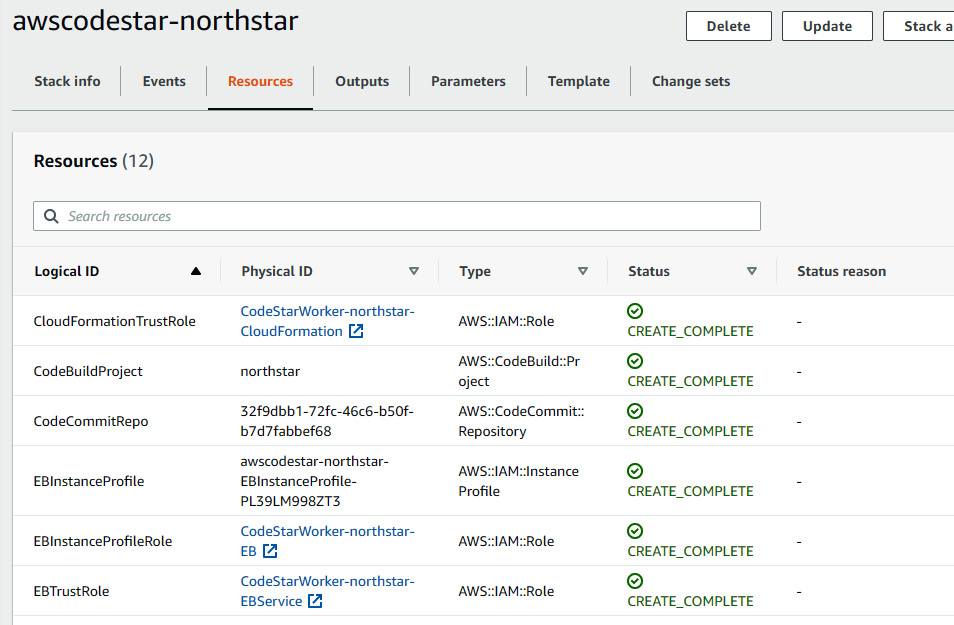
Figure 1.20 – CodeStar resources creation in CloudFormation page
- We can also have a look at the Elastic Beanstalk resource by going to the Environments view of the Elastic Beanstalk console, as illustrated in the following screenshot:
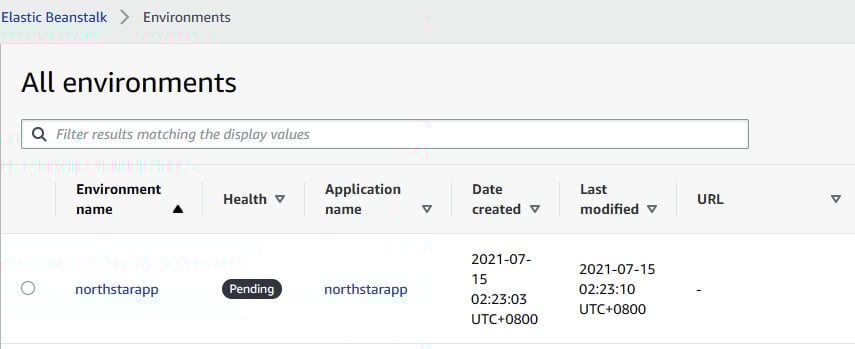
Figure 1.21 – Elastic Beanstalk page showing northstarapp
- After 10-15 minutes, we will keep monitoring the project main page. Once the View application button gets enabled, this means that the creation of a project, including a CI/CD toolchain and an environment infrastructure, and the deployment of an application have been completed. We can access the application by clicking on the View application button.
- This will redirect us to a Node.js sample web application, as illustrated in the following screenshot:
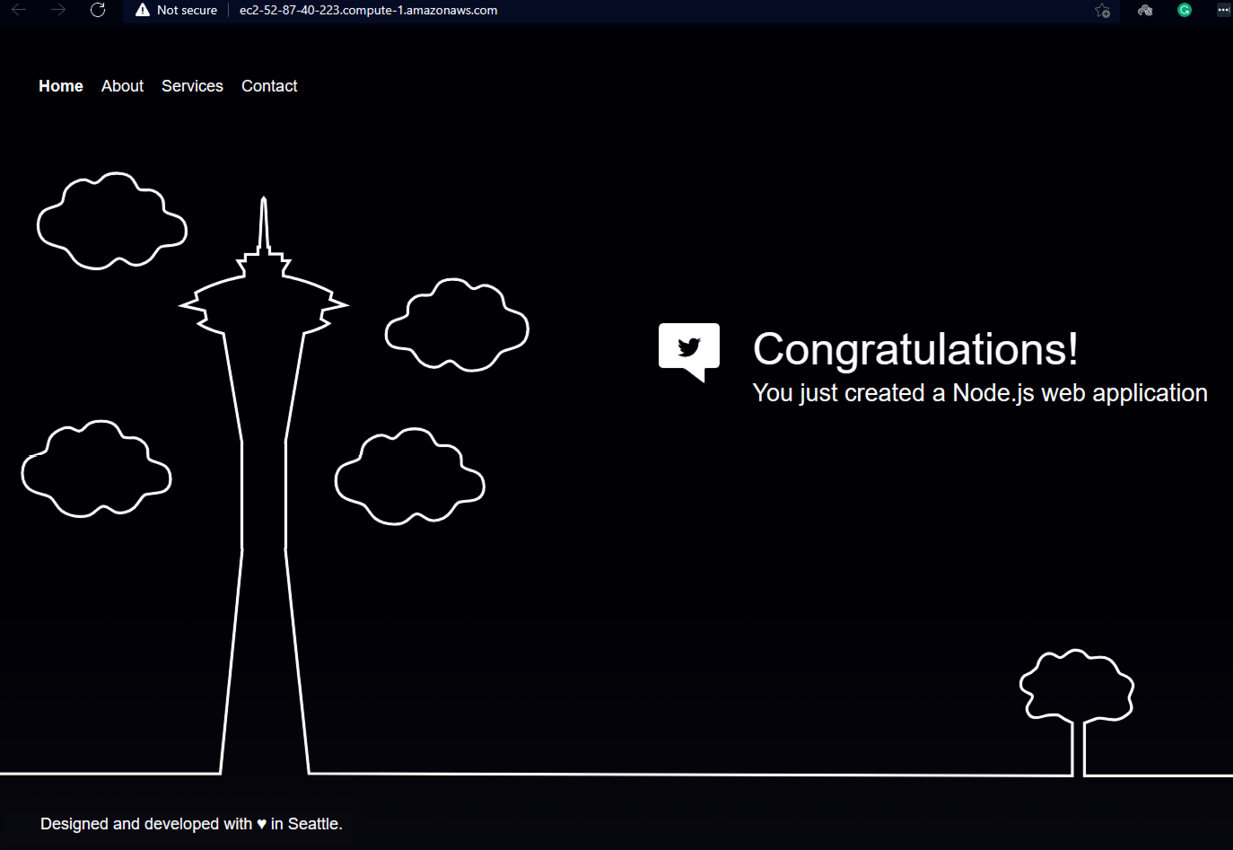
Figure 1.22 – Default Node.js web application page
Now, before replacing the sample application with our own application, let's get to know what exactly happened at the backend, as follows:
- CodeStar triggers an AWS CloudFormation stack to create an entire CI/CD toolchain and workload infrastructure.
- The toolchain includes the following:
- A CodeCommit repository with the master branch having a sample Node.js application
- A CodeBuild project with the preconfigured environment to run the build
- CodePipeline to trigger the build and deploy the application
- The workload infrastructure includes Elastic Beanstalk with one EC2 instance.
- IAM roles with certain permissions that allow CloudFormation to perform actions on other services.
To replace the sample application with our own sample application, perform the following steps:
- Our sample code provided by AWS CodeStar resides in AWS CodeCommit, but we are not going to edit the application code in CodeCommit directly; instead, we will use the AWS Cloud9 Integrated Development Environment (IDE) tool. Switch to the CodeStar console from Elastic Beanstalk. We need to create an IDE environment by going to the IDE tab, as illustrated in the following screenshot, and clicking on Create environment:
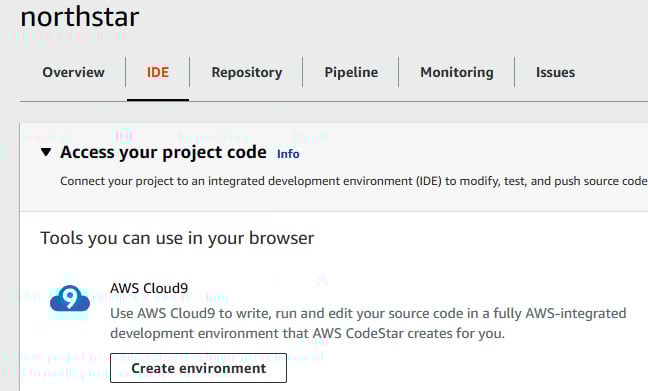
Figure 1.23 – CodeStar project page at IDE tab
- The second page will ask you for the environment configuration for the Cloud9 IDE. This IDE environment will stop automatically if it is in an ideal state for 30 minutes to save on cost. Once you fill in all the details, click on Create environment, as illustrated in the following screenshot:
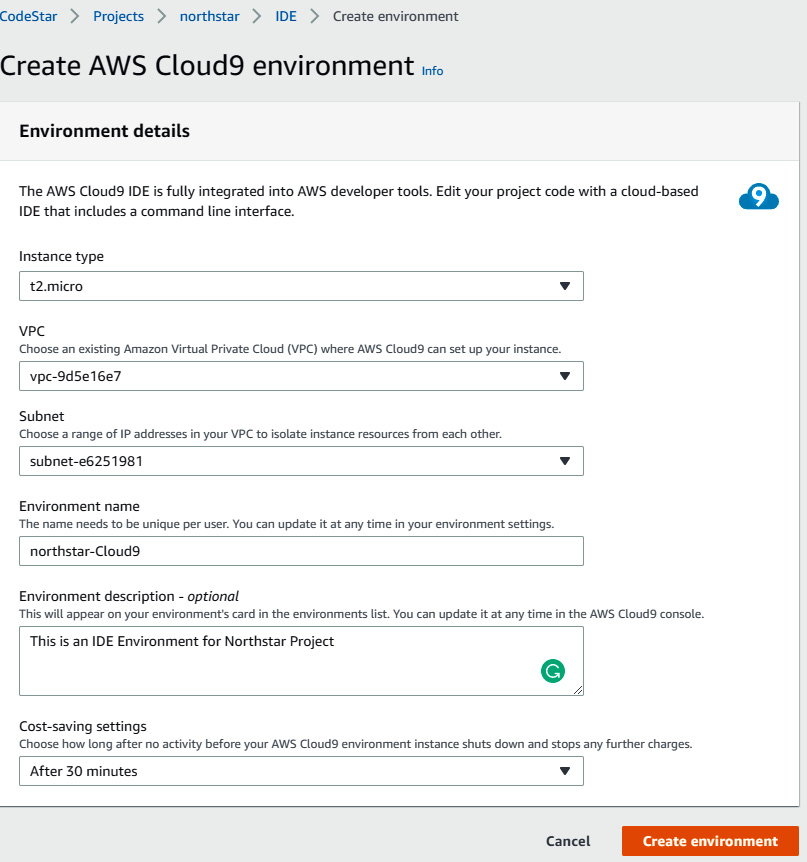
Figure 1.24 – Cloud9 environment configuration
- After 10-15 minutes, you will be able to see the Cloud9 IDE environment available for you to open it and start using it. Click on Open IDE to get to the Cloud9 IDE.
- The following screenshot shows you the Cloud9 IDE. This IDE will automatically clone the code from CodeCommit and show it in the cloud9 explorer. It also comes with its own shell:
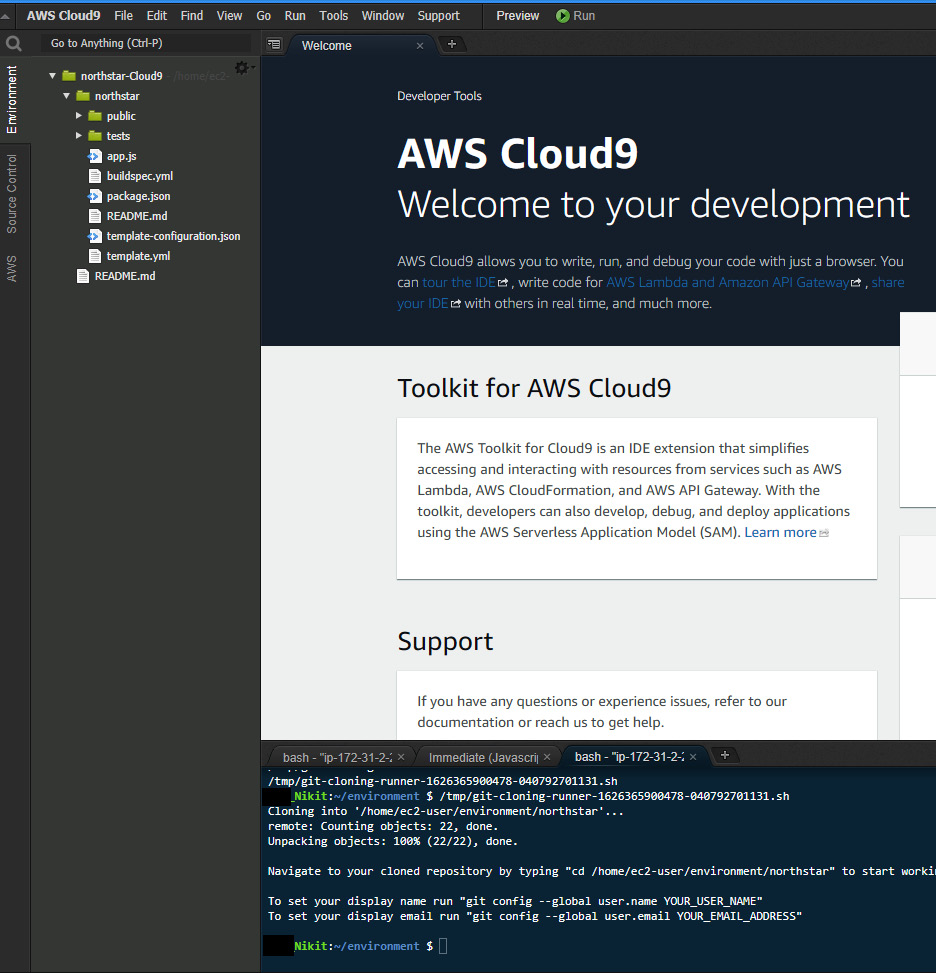
Figure 1.25 – Cloud9 IDE console
- Go to the shell of the editor and type the following commands. These commands will set the Git profile with your name and then clone our own application code:
$ git config –global user.name <your username>
$ git clone https://github.com/PacktPublishing/Modern-CI-CD-on-AWS.git
- Once you clone the application code, you will be able to see a folder with
Accelerating-DevSecOps-on-AWSon the left side, as illustrated in the following screenshot. AWS-CodeStar, in your case it will be Accelerating-DevSecOps-on-AWS folder. That folder contains all the application code and some lambda code that we will use in this chapter:
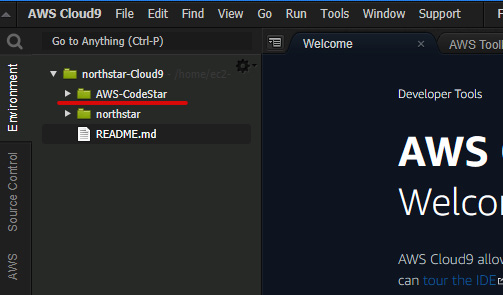
Figure 1.26 – Cloud9 IDE with the cloned Git folder
- Now, type the following command into the shell to replace the application code:
$ cd northstar
$ rm -rf package.json app.js public tests
$ cd ../Modern-CI-CD-on-AWS/chapter-01
$ cp -rpf server.js source static package.json ../../northstar
- After that, go to the editor and edit the
buildspec.ymlfile. Comment line 16 where it is using thenpm testcommand because our application does not include a test case for now. - After that, push the code into CodeCommit by typing the following commands:
$ cd ../../northstar
$ git add .
$ git commit -m "Replacing application code"
$ git push origin master
- The moment we push the code into CodeCommit, CodePipeline will trigger automatically. This will pull the latest code from CodeCommit and pass it to CodeBuild, where the build will take place using
buildspec.yml, and then it will deploy to Elastic Beanstalk using thetemplate.ymlCloudFormation template. The process is illustrated in the following screenshot:
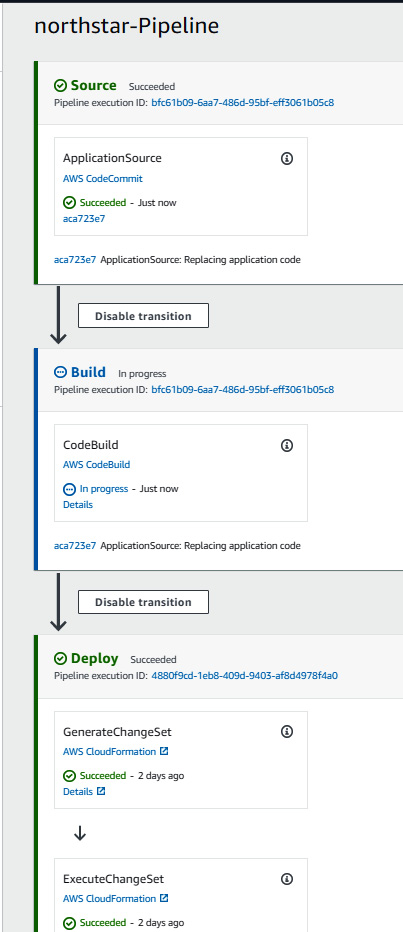
Figure 1.27 – northstar code pipeline
- Once the pipeline completes successfully, go to the CodeStar
Northstarproject page, as illustrated in the following screenshot, and click on View application button in the top right. Alternatively, you can also access the new application via the Elastic Beanstalk page:
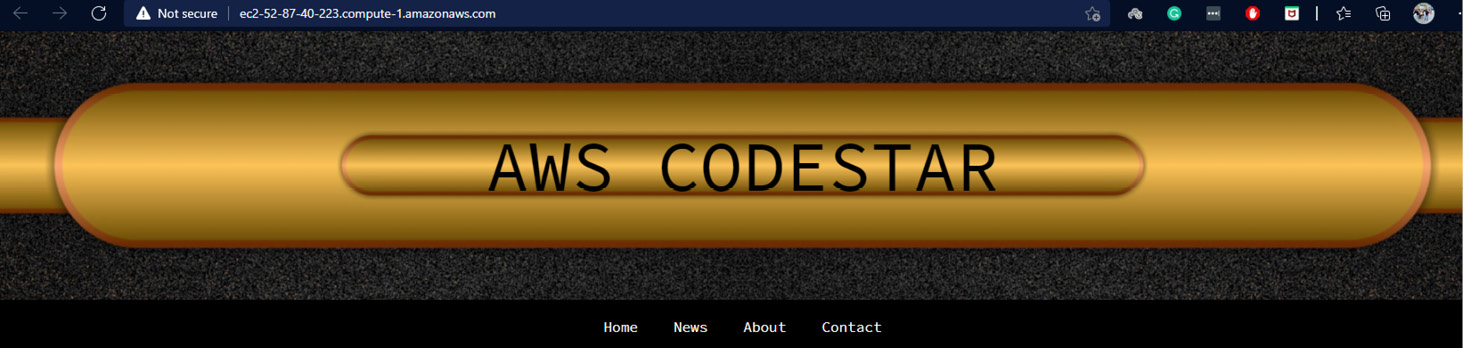
Figure 1.28 – New Node.js application deployed by CodePipeline
So, in this section, we created a CodeStar project, created an IDE environment, and replaced the sample application with our own application. Basically, the current flow looks like this:

Figure 1.29 – Current CodePipeline steps
We made changes in the master branch, which triggered the CodePipeline. Then, CodePipeline invoked CodeCommit to fetch the source code from the master branch, then invoked CodeBuild to build the application code, and then uploaded the artifact into an S3 bucket. Then, the CloudFormation stage did an infra check and then deployed into the current Elastic Beanstalk environment. At this stage, Elastic Beanstalk is based on a single EC2 instance. In the next three sections, we will be modifying the CI/CD pipeline and following the diagram shown here:
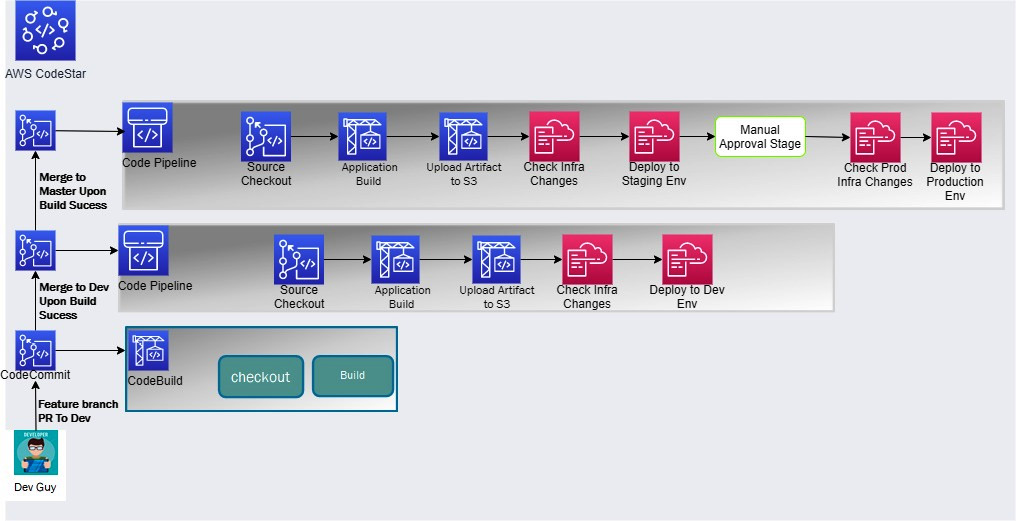
Figure 1.30 – CI/CD steps to be implemented in next three sections
Based on the preceding diagram, we will be performing the following tasks in the next three sections of the chapter:
- Creating two extra branches—a develop branch and a feature branch.
- Then, we will create a code pipeline with respect to the develop branch that gets triggered once code is pushed into the develop branch. This pipeline will check out the code from the develop branch, build the application, push the artifact into an S3 bucket and then spin up a separate development Elastic Beanstalk environment, and then deploy the application in the development environment.
- We will then create a CodeBuild project that will trigger on PR.
- Based on the PR build status, we will merge the code from the feature to the develop branch.
- We'll then modify the existing pipeline that listens to the master branch. We will modify the existing environment name to staging and add a production stage, in which we spin up a production Elastic Beanstalk environment (two EC2 instances via an Auto Scaling Group (ASG) and an Elastic Load Balancer (ELB)), and then deploy the application in the production environment.
In the next section, we will create feature and development branches in AWS CodeCommit.