

Before performing any partition editing, it is important to select the correct disk device. To do this we look at details, such as size, model, manufacturer, and device name. These details contain valuable information that will guide selection of the correct device.
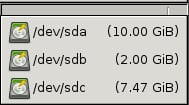
Size is the first indicator of which device to choose. To select a device, go to the GParted | Devices menu option and select a device of the correct size.

If there is more than one device of the same size, additional information is needed. To view more device information, select the View | Device Information menu option, which will toggle the display of the device information pane, as shown in the following screenshot:

Examine the device details, such as model, partition table, and sector size, to see if this is the device to modify.
If there are two or more identical disk drives from the same manufacturer, then look at the partition layout.
Examine the partitions in the graphical display area, and also in the text list of details to see if this is the correct device.
If there are two identical disks with the same partition layout, then this might be a RAID configuration. In this situation examine the device name as well. RAID arrays, which are configured using the motherboard BIOS, will have device names that start with
/dev/mapper/.... With RAID configurations choose the RAID device name. Please note that the/dev/mapperdirectory might also contain Logical Volume Management (LVM) or encrypted (dm-crypt) entries.If the correct device has not yet been chosen, then go back to step 1 and start over by selecting a different device.
Often, size alone can distinguish among different disk devices. Disk sizes can be a little tricky though because disk manufacturers use SI decimal prefixes (for example, 1 MB = 1,000,000 bytes), whereas GParted uses IEC binary prefixes (for example, 1 MiB = 1,048,576 bytes). The difference between these two methods becomes quite noticeable as the disk size becomes larger. For example, 160 GB is about 149 GiB. Hence the size of the disk device as shown in GParted will always be a lower number than the one reported by the disk manufacturer.
The device name is also useful to help distinguish among different disk devices. Device names vary by disk device as shown in the following table:
|
Disk device types |
Sample device names |
|---|---|
|
Hard disk drives (IDE, SATA, SCSI), USB flash drives, and dedicated hardware RAID drives |
|
|
Memory Cards (SD, SDHC, MMC) |
|
|
Motherboard BIOS (ATA) RAID drives |
|
|
Linux Software RAID drives |
|
There is another handy way to select a disk device. You can select a disk device from the drop-down menu in the upper-left hand corner of the window.
If you know the disk device contains data, but GParted shows the entire device as unallocated then there is no need to panic. It is possible there is a problem with the partition table.
Check for partition table problems by double-clicking on the unallocated disk device. This will bring up an information window, as shown in the following screenshot, which displays possible warnings about the device:
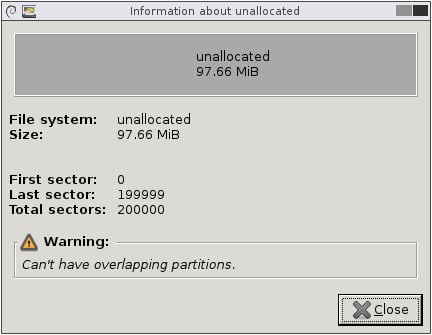
Two examples of warning messages that indicate partition table problems are as follows. A valid partition table:
Can't have overlapping partitions
Can't have a partition outside the disk
Resolution of these problems usually requires manually editing the partition table. The GParted website FAQ contains instructions on how to approach fixing these problems. See http://gparted.org/faq.php.
You can also seek help in the GParted forum. See http://gparted.org/forum.php.