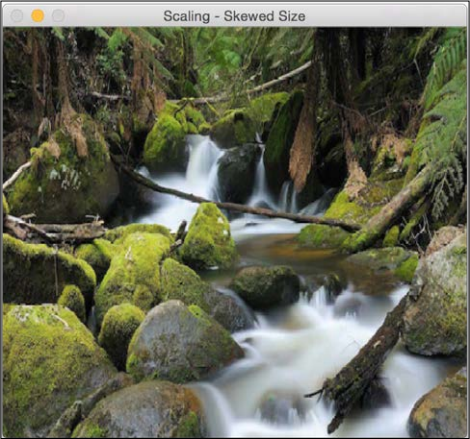

In this section, we will discuss resizing an image. This is one of the most common operations in computer vision. We can resize an image using a scaling factor, or we can resize it to a particular size. Let's see how to do that:
import cv2
img = cv2.imread('images/input.jpg')
img_scaled = cv2.resize(img,None,fx=1.2, fy=1.2, interpolation = cv2.INTER_LINEAR)
cv2.imshow('Scaling - Linear Interpolation', img_scaled)
img_scaled = cv2.resize(img,None,fx=1.2, fy=1.2, interpolation = cv2.INTER_CUBIC)
cv2.imshow('Scaling - Cubic Interpolation', img_scaled)
img_scaled = cv2.resize(img,(450, 400), interpolation = cv2.INTER_AREA)
cv2.imshow('Scaling - Skewed Size', img_scaled)
cv2.waitKey()Whenever we resize an image, there are multiple ways to fill in the pixel values. When we are enlarging an image, we need to fill up the pixel values in between pixel locations. When we are shrinking an image, we need to take the best representative value. When we are scaling by a non-integer value, we need to interpolate values appropriately, so that the quality of the image is maintained. There are multiple ways to do interpolation. If we are enlarging an image, it's preferable to use linear or cubic interpolation. If we are shrinking an image, it's preferable to use area-based interpolation. Cubic interpolation is computationally more complex, and hence slower than linear interpolation. However, the quality of the resulting image will be higher.
OpenCV provides a function called resize to achieve image scaling. If you don't specify a size (by using None), then it expects the x and y scaling factors. In our example, the image will be enlarged by a factor of 1.2. If we do the same enlargement using cubic interpolation, we can see that the quality improves, as seen in the following figure. The following screenshot shows what linear interpolation looks like:

Here is the corresponding cubic interpolation:

If we want to resize it to a particular size, we can use the format shown in the last resize instance. We can basically skew the image and resize it to whatever size we want. The output will look something like the following: