

The Informatica installation requires the installation of the server and the client separately. It is always recommended that you install the server first and then the client.
The installable file for the server can be located by navigating to the folder where you extracted the files. We are using the D:\1010_Server_Installer_winem-64t\Server folder . Navigate to D:\1010_Server_Installer_winem-64t\Server | Server | install as shown in the following screenshot:

Perform the following steps to complete the installation process:
- Double-click on
installto start the installation. In some cases, the file can be present asinstall.exe. This will initiate the installation process for Informatica PowerCenter.
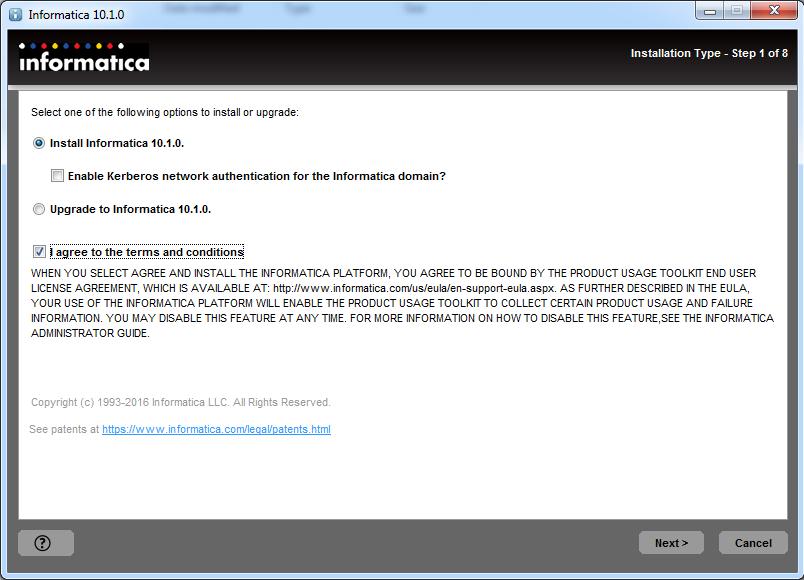
- Choose the installation type. If you are installing the Informatica software for the first time, select
Install Informatica 10.1.0. To upgrade to the latest version from previous versions, selectUpgrade to Informatica 10.1.0. Also accept the terms and conditions. After you have selected the appropriate option, click onNext, as indicated in the following screenshot:
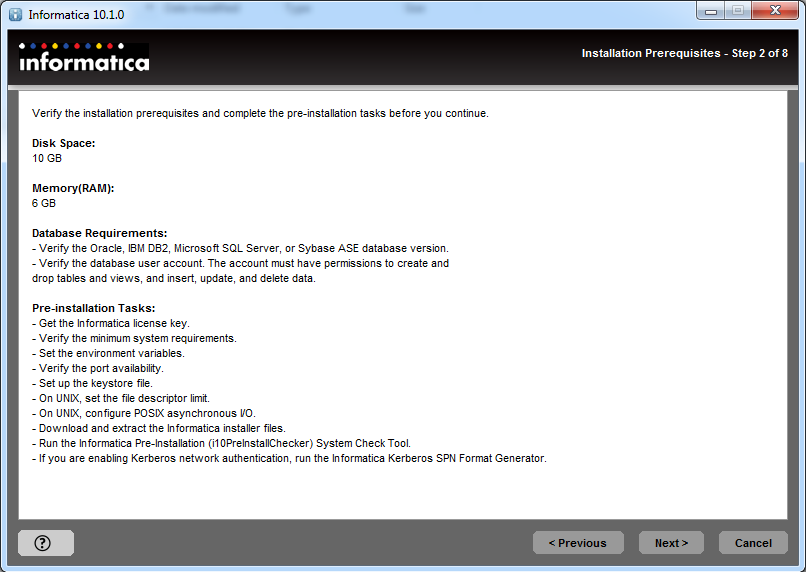
- On the next screen, verify the prerequisites for installation as shown in following screenshot. Please make sure your machine satisfies all the prerequisites for installation. Click on
Next:
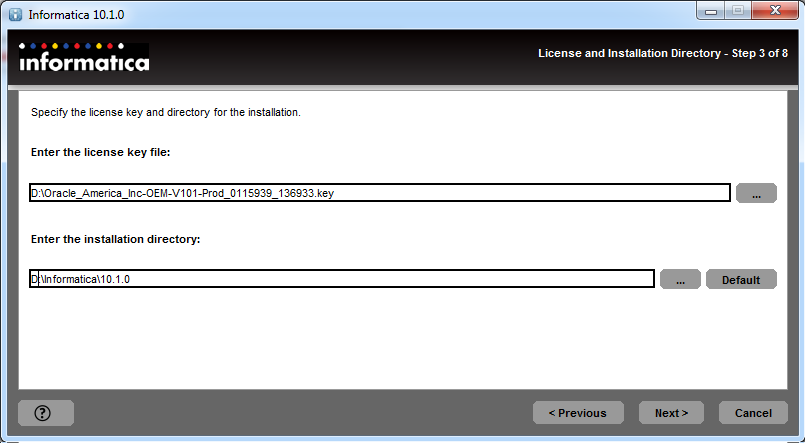
- The next step, as shown in the following screenshot, is to enter the license key. The license key can be located in the
D:\ Oracle_America_Inc-OEM-V101-Prod_0115939_136933.keyextraction folder. If you are not able to navigate to the path, directly paste the path. Select the installation directory. Click onNext:
- The next screen will show a pre-installation summary as shown in the following screenshot:
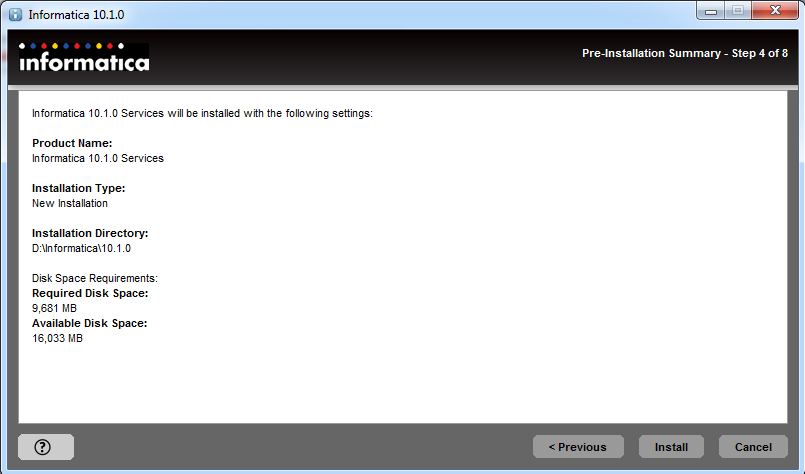
- Please check the details, and click on
Install.
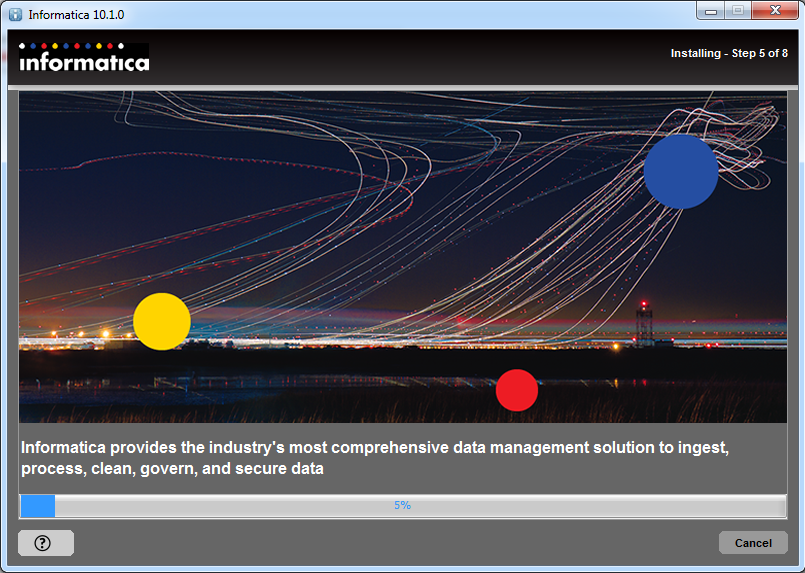
- The installation process will begin as shown in the following screenshot. It will take a few minutes before your installation finishes. The installation time depends on your system configuration:
- When the installation finishes, we will proceed to the next process: configuring the domain and node.
Once the server installation has been completed, the next screen will allow you to configure the domain and node. The domain and nodes are very important components of the Informatica PowerCenter architecture. We will be learning about the architecture and related components in the next chapter.
Perform the following steps to configure the domain and node:
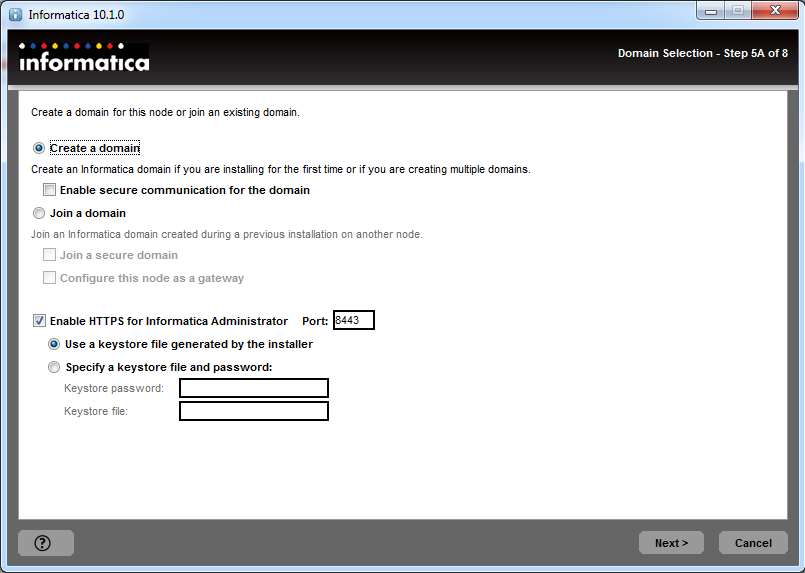
- If you are doing a fresh installation, select
Create a domainas shown in the following screenshot. This will initiate the process to create a new domain. If you are upgrading, you can select theJoin a domainoption. - Also check the
Enable HTTPS for Informatica Administratoroption. Make sure port 8443 is not utilized by any other process. In most cases, port 8443 will be used as the default, so you need not worry about the port number. Check the option Use a keystore file generated by the installer. Please refer to the following screenshot:
- Click on
Next.
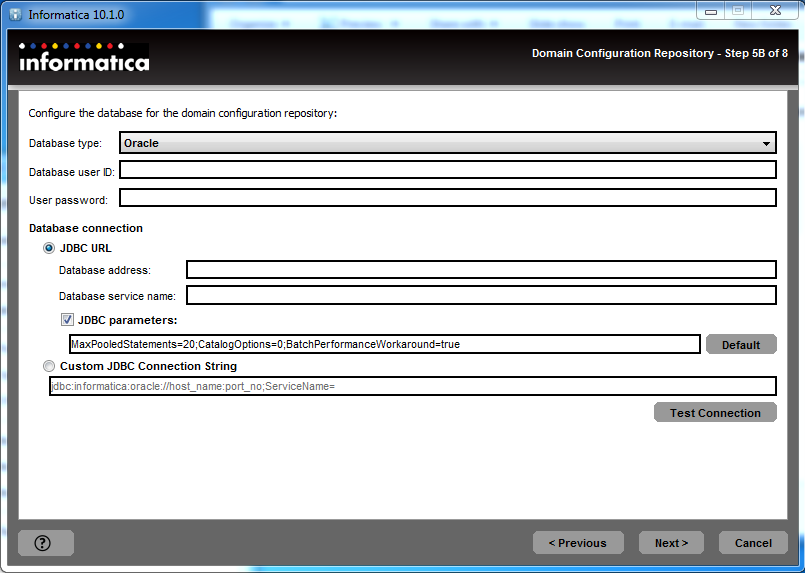
- In the next step, we will configure the domain with the database. Please select the appropriate option:
- Database type: Depending on what database (Oracle, SQL, or DB2) you are using, please select the appropriate option. In this book, we are using Oracle as our database.
- Database user ID: Mention the database user that you created for the domain configuration. In this book, we are using SYSTEM as the Oracle user.
- Password: Specify the password for the database. We are using oracle as our password in this book.
- Database address: Mention the address for your database. The address consists of the hostname and the port number, that is,
hostname:portnumber, where the hostname is your computer name, and the port number is the default port number for the database you are using. The hostname can also be used as a localhost. In this book, we are referring to the database address as localhost:1522. 1522 is the default port number for Oracle 11g. - Database service name: Specify the service name for your database connection; in this book, we are using it as orcl.
Leave the rest of the properties as they are not mandatory. Please refer to the following screenshot for reference:
- Click on
Test Connection. If all the properties that you mentioned are correct, the database connection will be successful, and we can proceed with the next step. If the connection fails, please recheck your database configuration details, and test them again. After the connection check is successful, click onNext.
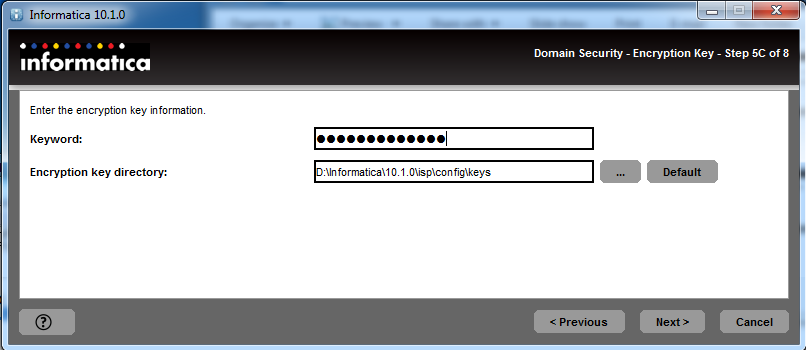
- The next screen will ask you to define a keyword, which will be used for the purpose of encryption. Specify the keyword and path you want to set. By default, you can use the default path mentioned by Informatica as shown in the following following screenshot:
- Click on
Next. It will launch an information pop-up; read the information, and click onOK. - In the next screen, you can assign a name to your domain and node. Informatica will assign the default name to your domain and node. You can leave those unchanged. If you wish to change the name, please do so. Also specify the password of your choice in the domain password and confirm password field.
Note
Informatica 10.1.0 has added a new feature called Model Repository Service in the architecture of Informatica. You can create the service while defining the domain name in this option; alternatively, it can be configured later from the Administration console of Informatica.
- As of now, uncheck Configure Model Repository Service and Data Integration Service as shown in the following screenshot:
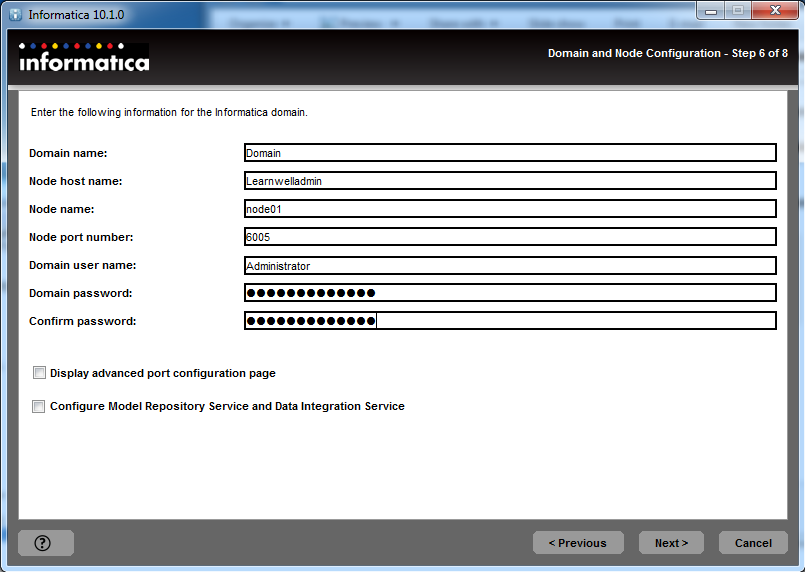
Note
Please note this domain user name and password will be used to log in into the Informatica Administration console.
- Click on the
Nextbutton.
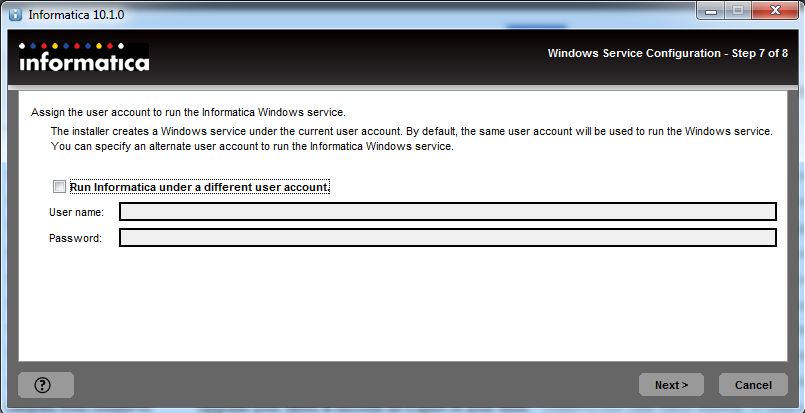
- On the next screen, uncheck the
Run Informatica under a different user accountoption, and click onNextas indicated in the following screenshot:
- The next screen indicates that the installation is complete. Please check the post-installation summary. You can keep those details for your future reference. Please check the following screenshot for reference:
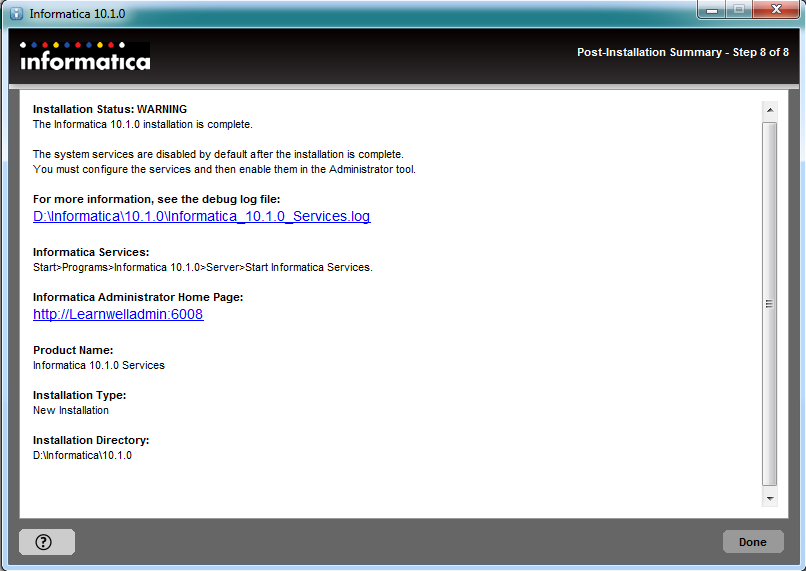
Note
Please note that, if you see the installation status as WARNING, there is nothing to worry about. The status is showing as WARNING because some services that are configured may not be running, and we have not configured one of the services, that is, model repository.
- Click on
Done.
With this, our server installation is complete. We will now proceed with the client installation, which is simple and straightforward and not as complicated as the server installation.