Book Image

Implementing Splunk 7, Third Edition - Third Edition

Book Image

Implementing Splunk 7, Third Edition - Third Edition

Overview of this book

Splunk is the leading platform that fosters an efficient methodology and delivers ways to search, monitor, and analyze growing amounts of big data. This book will allow you to implement new services and utilize them to quickly and efficiently process machine-generated big data. We introduce you to all the new features, improvements, and offerings of Splunk 7. We cover the new modules of Splunk: Splunk Cloud and the Machine Learning Toolkit to ease data usage. Furthermore, you will learn to use search terms effectively with Boolean and grouping operators. You will learn not only how to modify your search to make your searches fast but also how to use wildcards efficiently. Later you will learn how to use stats to aggregate values, a chart to turn data, and a time chart to show values over time; you'll also work with fields and chart enhancements and learn how to create a data model with faster data model acceleration. Once this is done, you will learn about XML Dashboards, working with apps, building advanced dashboards, configuring and extending Splunk, advanced deployments, and more. Finally, we teach you how to use the Machine Learning Toolkit and best practices and tips to help you implement Splunk services effectively and efficiently. By the end of this book, you will have learned about the Splunk software as a whole and implemented Splunk services in your tasks at projects
Table of Contents (19 chapters)
Title Page
Packt Upsell
Contributors
Preface
Index

Creating alerts from searches


Let's continue with our example. We want to take our original search query, schedule it, and then set a triggered response.

Any saved search can also be run on a schedule. One use for scheduled searches is firing alerts. Let's get started with our example. Go to the Reports page (shown in the previous screenshot) and click on Open in Search for our report (errors affecting mary). This opens our saved report not as a report but as a search query (it also runs the search). From there, we can click on Save As and choose Alert.

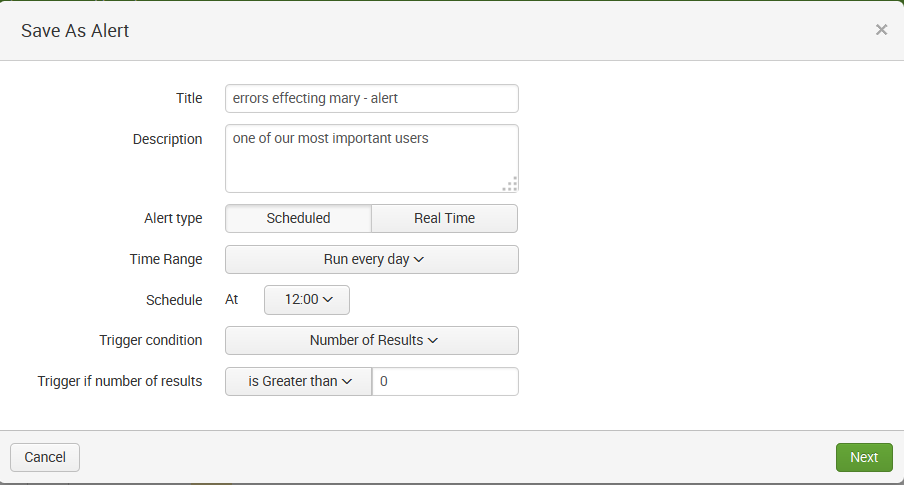
Using the Save As Alert window (shown in the next screenshot), we can fill in the appropriate details for our alert:

The fields can be filled as follows:

  • Title: I kept the original search title (errors affecting mary) but added the word alert
  • Description: I kept this the same, but in reality, we'd want to add more of a description
  • Alert Type: I selected Scheduled, since I want this alert search to be run every day
  • Time Range: I selected the preset...