
The CIELAB (abbreviated as Lab) color space consists of three color channels, expressing the color of a pixel as three tuples (L, a, b), where the L channel stands for luminosity/illumination/intensity (lightness). The a and b channels represent the green-red and blue-yellow color components, respectively. This color model separates the intensity from the colors completely. It's device-independent and has a large gamut. In this recipe, you will see how to convert from RGB into the Lab color space and vice versa and the usefulness of this color model.
Transforming color space (RGB → Lab)
Getting ready
In this recipe, we will use a flower RGB image as the input image. Let's start by importing the required libraries with the following code block:
import numpy as np
from skimage.io import imread
from skimage.color import rgb2lab, lab2rgb
import matplotlib.pylab as plt
How to do it...
In this recipe, you will see a few remarkable uses of the Lab color space and how it makes some image manipulation operations easy and elegant.
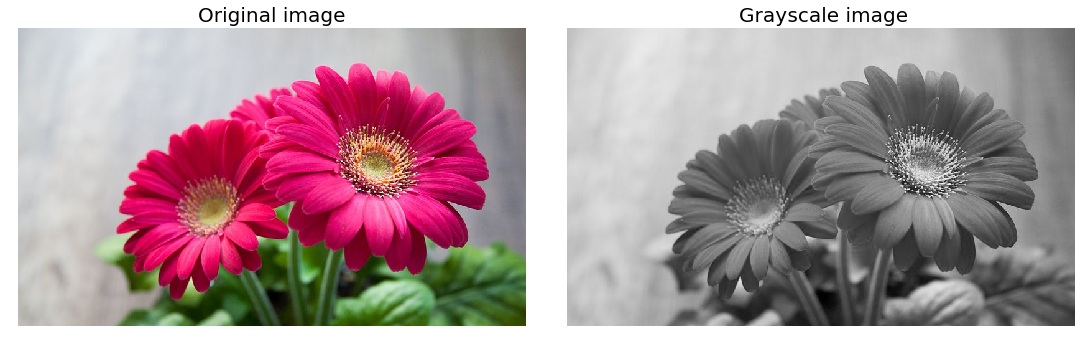
Converting RGB image into grayscale by setting the Lab space color channels to zero
Perform the following steps to convert an RGB color image into a grayscale image using the Lab color space and scikit-image library functions:
- Read the input image. Perform a color space transformation—from RGB to Lab color space:
im = imread('images/flowers.png')
im1 = rgb2lab(im)
- Set the color channel values (the second and third channels) to zeros:
im1[...,1] = im1[...,2] = 0
- Obtain the grayscale image by converting the image back into the RGB color space from the Lab color space:
im1 = lab2rgb(im1)
- Plot the input and output images, as shown in the following code:
plt.figure(figsize=(20,10))
plt.subplot(121), plt.imshow(im), plt.axis('off'), plt.title('Original image', size=20)
plt.subplot(122), plt.imshow(im1), plt.axis('off'), plt.title('Gray scale image', size=20)
plt.show()
The following screenshot shows the output of the preceding code block:
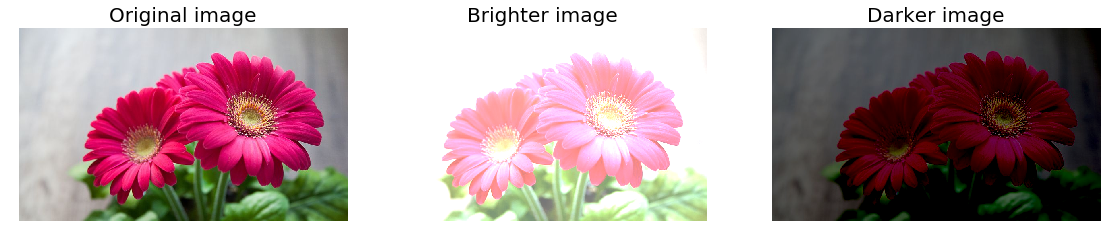
Changing the brightness of the image by varying the luminosity channel
Perform the following steps to change the brightness of a colored image using the Lab color space and scikit-image library functions:
- Convert the input image from RGB into the Lab color space and increase the first channel values (by 50):
im1 = rgb2lab(im)
im1[...,0] = im1[...,0] + 50
- Convert it back into the RGB color space and obtain a brighter image:
im1 = lab2rgb(im1)
- Convert the RGB image into the Lab color space and decrease only the first channel values (by 50, as seen in the following code) and then convert back into the RGB color space to get a darker image instead:
im1 = rgb2lab(im)
im1[...,0] = im1[...,0] - 50
im1 = lab2rgb(im1)
If you run the preceding code and plot the input and output images, you will get an output similar to the one shown in the following screenshot:
How it works...
The rgb2lab() function from the scikit-image color module was used to convert an image from RGB into the Lab color space.
The modified image in the Lab color space was converted back into RGB using the lab2rgb() function from the scikit-image color module.
Since the color channels are separated in the a and b channels and in terms of intensity in the L channel by setting the color channel values to zero, we can obtain the grayscale image from a colored image in the Lab space.
The brightness of the input color image was changed by changing only the L channel values in the Lab space (unlike in the RGB color space where all the channel values need to be changed); there is no need to touch the color channels.
There's more...
There are many other uses of the Lab color space. For example, you can obtain a more natural inverted image in the Lab space since only the luminosity channel needs to be inverted, as demonstrated in the following code block:
im1 = rgb2lab(im)
im1[...,0] = np.max(im1[...,0]) - im1[...,0]
im1 = lab2rgb(im1)
If you run the preceding code and display the input image and the inverted images obtained in the RGB and the Lab space, you will get the following screenshot:
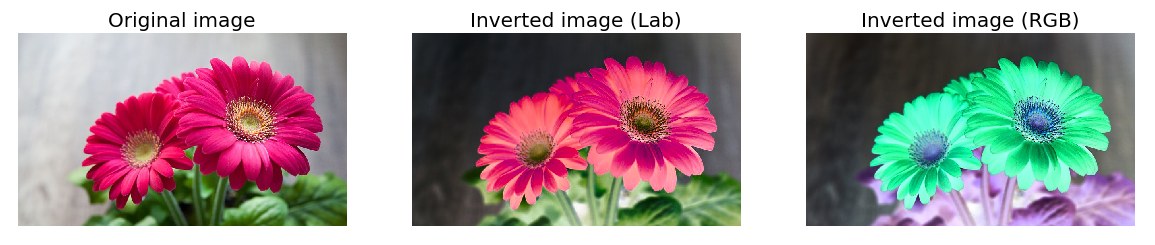
As you can see, the Inverted image in the Lab color space appears much more natural than the Inverted image in the RGB color space.