

Exploring Azure VMs
Virtual machines (VMs) are software abstractions of the physical hardware. They can emulate the computer hardware for the applications running on it. We can have multiple VMs running on a single machine. Each VM will have a portion of the host machine's CPU, memory, and storage allocated to it.
Azure VMs are the most common resources that are spun up in Azure. You can use VMs to set up virtually any application that you want. They are like plain vanilla servers that can be used to install any software that you need, except the OS upgrades and security patches, which are taken care of by Azure. Azure VMs provide the advantage of faster deployments, scalability, security isolation, and elasticity. Azure provides both Windows and Linux VMs. There is a huge collection of OS flavors and versions available in the Azure Marketplace that can be used to spin up the VMs. Here are some of the VM types available at the time of writing this book. You can look for more up-to-date information at https://docs.microsoft.com/en-us/azure/virtual-machines/sizes:
- General-purpose
- Compute-optimized
- Memory-optimized
- Storage-optimized
- GPU
- High performance
In the following subsections, we'll walk through the process of creating a VM.
Creating a VM using the Azure portal
First, let's learn how to create a virtual machine using the Azure portal and then using the CLI. The following is a screenshot of the Create a virtual machine page:
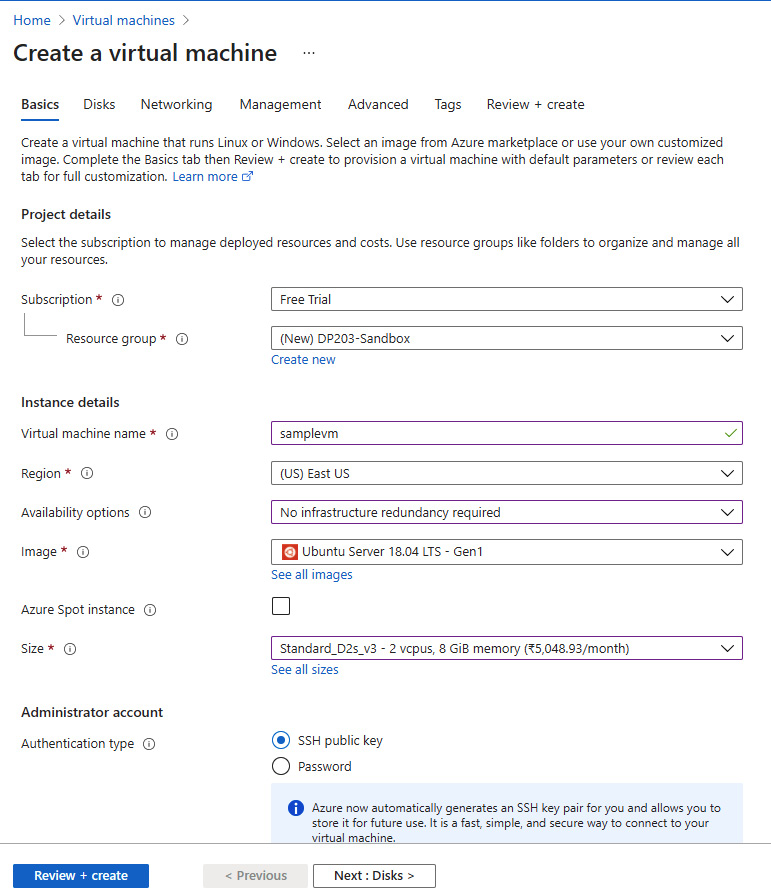
Figure 1.4 – Creating VMs using the Azure portal
Here are the steps to create the VM using the portal:
- From the portal, choose Virtual Machines (using the search bar or Explorer).
- Click on the + Create sign and select Virtual Machines.
- Enter a Virtual machine name, select a Resource group, select a VM image, select the Size of VM property, and an Authentication type.
- Click Review + Create and then Submit.
- You should see a pop-up with the option to Download private key and create resource. Click on the Download button and save the private key in a safe location. You will need this key to log in to your VM.
- You can also configure Advanced options such as Disks, Networking, Management, and Tags, as shown in the preceding screenshot.
Now, let's learn how to create a VM using the Azure CLI.
Creating a VM using the Azure CLI
Since this is the first time we are using the CLI, we'll learn how to get started.
Installing the CLI
There are two ways to use the CLI. First, you can use the Azure CLI option directly from the Azure portal, as shown here:
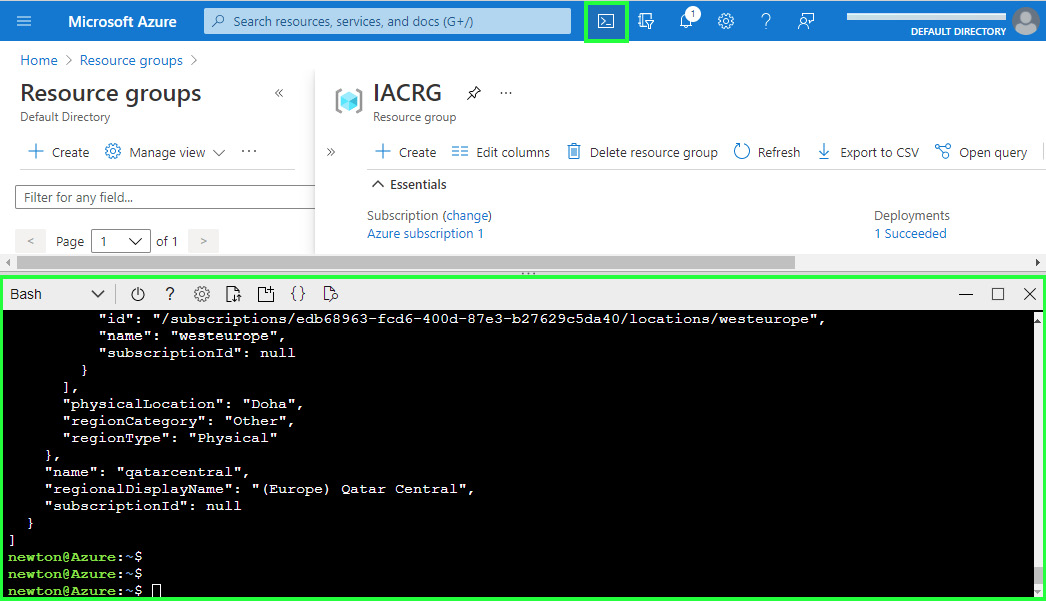
Figure 1.5 – Using the CLI directly from the Azure portal
Alternatively, you can choose to install the Azure CLI client on your local machine and run the commands from there. You can learn how to download and install the Azure CLI client here: https://docs.microsoft.com/en-us/cli/azure/install-azure-cli-windows.
Now, let's look at an example of creating a VM using the Azure CLI.
Note:
All these commands and scripts are available in the GitHub link that is provided along with this book, so that you can easily copy paste and try the commands.
To create a VM using the CLI, we will have to follow a sequence of steps. For this example, we'll create an Ubuntu VM:
- First, we have to find all the Ubuntu images that are available using the
vm image listoption:az vm image list --all --offer Ubuntu
- Next, we need to find the Azure regions where we want to deploy. We can use
account list-locationsfor this. You can choose a region that is closest to you:az account list-locations --output table
- Once we've done this, we can either create a new resource group or use an existing one to associate this VM with. Let us create a new resource group called
IACRGusing thegroup createoption, as shown here:az group create --name 'IACRG' --location 'eastus'
- Finally, let us create a VM using the information from the preceding commands. In this example, I've chosen the
eastuslocation to deploy this VM to. All the non-mandatory fields will default to the Azure default values:az vm create --resource-group 'IACRG' --name 'sampleVM' --image 'UbuntuLTS' --admin-username '<your username>' --admin-password '<your password>' --location 'eastus'
The previous command will create a VM named sampleVM under the resource group named IACRG.
That should have given you a good idea of how the CLI works in Azure. You can learn more about Azure VMs here: https://azure.microsoft.com/en-in/services/virtual-machines/.
Next, let's check out the storage options that are available in Azure.