

Accessing Blob storage accounts using managed identities
In this recipe, we will grant permissions to managed identities on a storage account and showcase how you can use managed identities to connect to Azure Data Lake.
Managed identities are password-less service accounts used by Azure services such as Data Factory and Azure VMs to access other Azure services, such as Blob storage. In this recipe, we will show you how Azure Data Factory's managed identity can be granted permission on an Azure Blob storage account.
Getting ready
Before you start, perform the following steps:
- Open a web browser and go to the Azure portal at https://portal.azure.com.
- Make sure you have an existing storage account. If not, create one using the Provisioning an Azure storage account using the Azure portal recipe in Chapter 1, Creating and Managing Data in Azure Data Lake.
How to do it…
We will be testing accessing a Data Lake account using managed identities. To achieve this, we will create a Data Factory account and use Data Factory's managed identity to access the Data Lake account. Perform the following steps to test this:
- Create an Azure Data Factory by using the following PowerShell command:
$resourceGroupName = " packtadestorage";
$location = 'east us'
$dataFactoryName = "ADFPacktADE2";
$DataFactory = Set-AzDataFactoryV2 -ResourceGroupName $resourceGroupName -Location $location -Name $dataFactoryName
- Go to the storage account in the Azure portal. Click on Access Control (IAM) and then Add, as shown in the following screenshot:
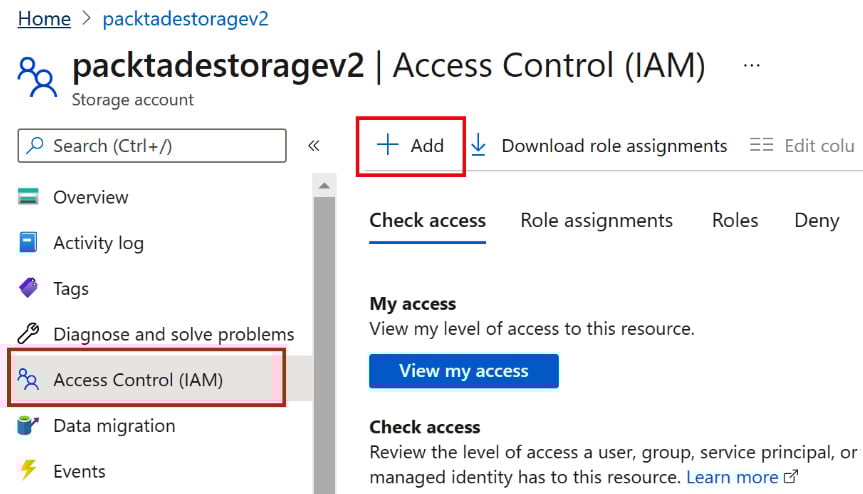
Figure 2.22 – Adding a role to a managed identity
- Select Add role assignment and search for the
Storage Blob Data Contributorrole. Select the role and click Next. Select Managed identity in Assign access to and click on + Select members, as shown in the following screenshot:
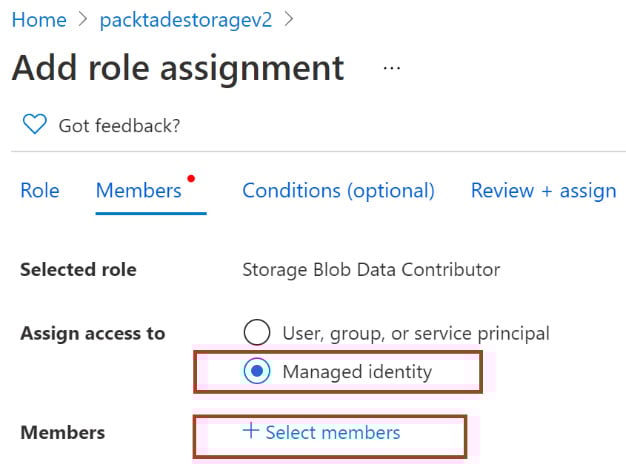
Figure 2.23 – Selecting the Data Factory managed identity
- Your subscription should be selected by default. From the Managed identity dropdown, select Data Factory (V2) (1). Select the recently created ADFPacktADE2 Data Factory and click on the Select button:
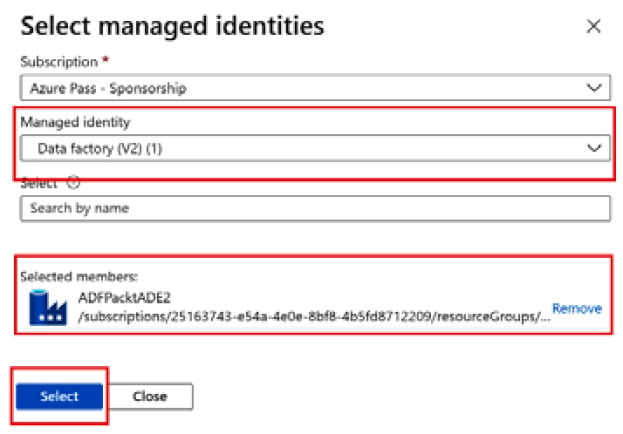
Figure 2.24 – Assigning a role to a managed identity
- Click on Review + Assign to complete the assignment. To test whether it's working, open the ADFPacktADE2 Data Factory that was created in step 1. Click on Open Azure Data Factory Studio, as shown in the next screenshot:
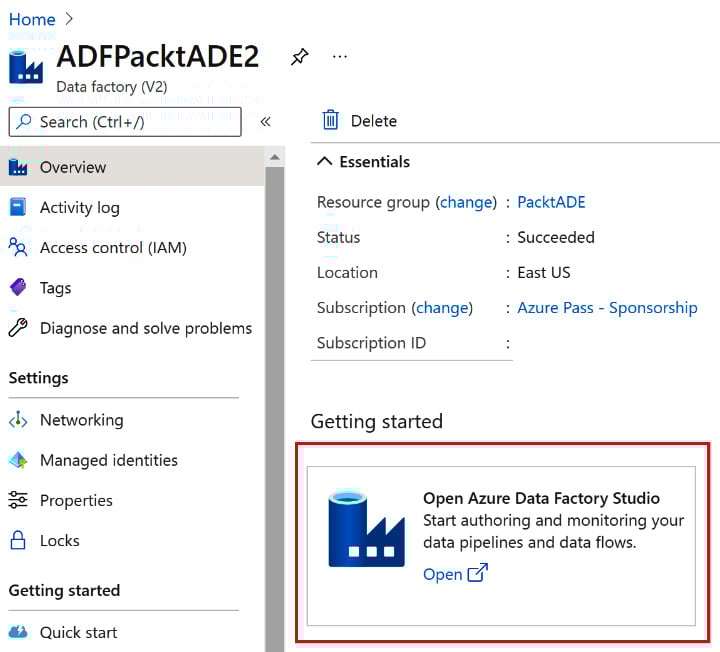
Figure 2.25 – Opening Azure Data Factory Studio
- Click on the Manage button on the left and then Linked services. Click on + New, as shown in the following screenshot:
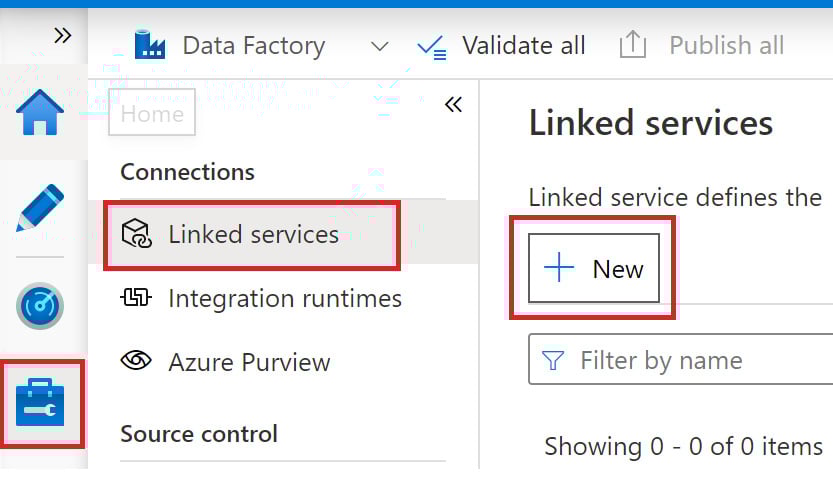
Figure 2.26 – Creating a linked service in Data Factory
- Search for
Data Lakeand select Azure Data Lake Storage Gen 2 as the data store. Select Managed Identity for Authentication method. Select the storage account (packadestoragev2) for Storage account name. Click on Test connection:
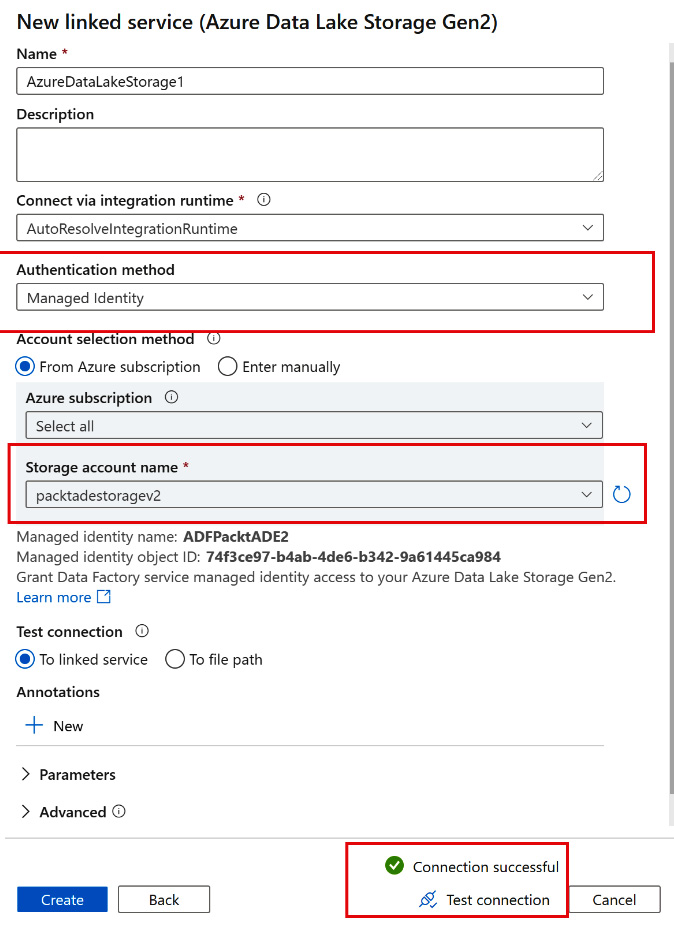
Figure 2.27 – Testing a managed identity connection in Data Factory
A successful test connection indicates that we can successfully connect to a storage account using a managed identity.
How it works…
A managed identity for the data factory was automatically created when the Data Factory account was created. We provided the Storage Blob Data Contributor permission on the Azure Data Lake storage account to the managed identity of Data Factory. Hence, Data Factory was successfully able to connect to the storage account in a secure way without using a key/password.