Book Image

Building a 3D Game with LibGDX

Book Image

Building a 3D Game with LibGDX

Overview of this book

LibGDX is a hugely popular open source, cross-platform, Java-based game development framework built for the demands of cross-platform game development. This book will teach readers how the LibGDX framework uses its 3D rendering API with the OpenGL wrapper, in combination with Bullet Physics, 3D Particles, and Shaders to develop and deploy a game application to different platforms You will start off with the basic Intellij environment, workflow and set up a LibGDX project with necessary APIs for 3D development. You will then go through LibGDX’s 3D rendering API main features and talk about the camera used for 3D. Our next step is to put everything together to build a basic 3D game with Shapes, including basic gameplay mechanics and basic UI. Next you will go through modeling, rigging, and animation in Blender. We will then talk about refining mechanics, new input implementations, implementing enemy 3D models, mechanics, and gameplay balancing. The later part of this title will help you to manage secondary resources like audio, music and add 3D particles in the game to make the game more realistic. You will finally test and deploy the app on a multitude of different platforms, ready to start developing your own titles how you want!
Table of Contents (12 chapters)

Basic use of IntelliJ IDEA with LibGDX


Running and debugging the app with IntelliJ IDEA is as simple as a click, but sometimes, we need to perform extra configurations on the IDE to avoid exceptions.

Running the Android app

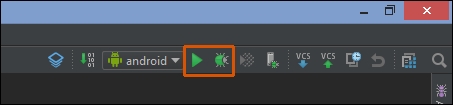
Once IntelliJ is done with all the processes, the default app to run will be Android. To run it, click on the Bug or Play buttons to the right of the navigation bar:

Gradle will build and the Choose Device dialog will pop up, from which you'll choose the Android device on which you'll run the app (either an emulator or a physical device), for which you just have to plug in your device.

Running the desktop app

To run the desktop app we have to change the default configuration and add the desktop launcher:

  1. Click on android and select Edit Configurations; the Run/Debug Configurations dialog should pop up.

  2. Click on the + icon at the top left of it and select Application.

  3. Name it desktop. In the Main class field, select DesktopLauncher. For Working directory, go to your Android project and double-click the assets folder.

  4. Click on the Use Classpath of module field, select desktop, and then click on the OK button at the bottom.

Now instead of android at the top, you'll see desktop. You can run or debug with the two buttons to the right of it.